


TL;DR:
Want to know how to record iPhone screen with audio? Use the built-in Screen Recording feature for quick captures, QuickTime Player to record on Mac, or Screen Recorder for flexible, high-quality recordings on PC/Mac.
Recording your iPhone screen is useful in many situations, such as creating tutorials, saving gameplay highlights, recording app demonstrations, or capturing important video calls. If you are searching for how to record iPhone screen, you've come to the right place. This article will introduce 3 ways to record your iPhone screen, allowing you to choose the method that best fits your needs.
Part 1. How to Record iPhone Screen with Audio Using iPhone's Built-in Feature
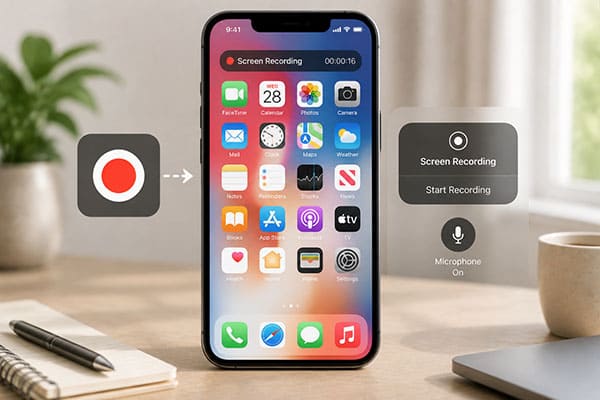
The easiest way to record iPhone screen with sound is by using Apple's built-in screen recording feature. This feature has been available since iOS 11, allowing users to start recording directly from the Control Center and choose whether to enable the microphone to capture external audio. However, please note that some copyrighted videos may not allow internal audio recording.
Here is how to record iPhone screen with sound:
Step 1. Open the "Settings" app on your iPhone and tap "Control Center".
Step 2. Scroll down to find "Screen Recording" and tap the "+" button to add it to Control Center.
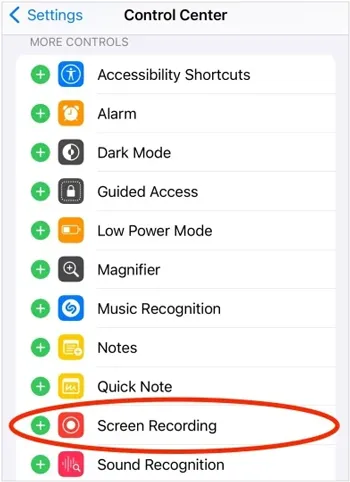
Step 3. Swipe down from the top-right corner of your screen to open Control Center.
Step 4. Tap the "Screen Recording" icon, and your iPhone will start recording after a 3-second countdown.
Step 5. To record your voice, press and hold the "Screen Recording" button, then tap the "Microphone" icon to turn it on.
Step 6. Tap "Start Recording" to begin capturing your iPhone screen with audio.
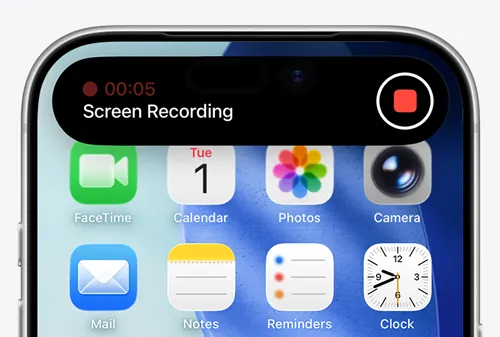
Step 7. When finished, tap the "red recording indicator" at the top of the screen or open Control Center and tap the "recording" button again.
Step 8. Open the Photos app to find, edit, and share your recorded video.
Part 2. How to Record iPhone Screen on Mac with QuickTime Player
How to screen record on iPhone without Control Center? If you are using a Mac, QuickTime Player provides another simple way to record your iPhone screen. As Apple's built-in media player, QuickTime Player can also function as a basic screen recorder when your iPhone is connected to a Mac via a USB cable. This method is ideal for capturing iPhone gameplay, app tutorials, demonstrations, and other on-screen activities on a larger display with better control over the recording process.
Here is how to record iPhone screen on a Mac:
Step 1. Connect your iPhone to your Mac using a USB cable. If you are connecting the device for the first time, tap "Trust" on your iPhone and enter your passcode when prompted.
Step 2. Open QuickTime Player on your Mac. Click "File" in the menu bar and select "New Movie Recording" from the drop-down menu.
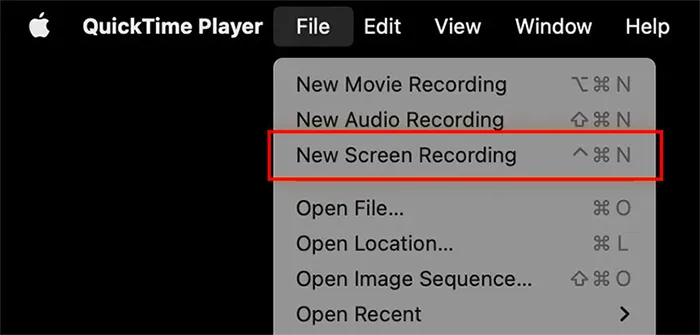
Step 3. Click the "arrow" icon next to the red "Record" button, then select your iPhone from the available camera options. Your iPhone screen will be displayed in the QuickTime Player window.
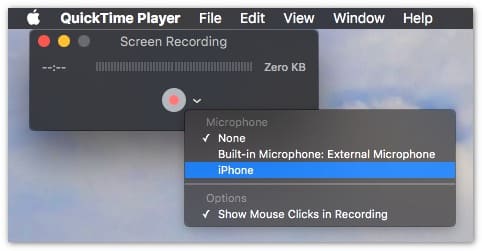
Step 4. Click the red "Record" button to begin recording your iPhone screen. Once you have captured the content you need, click the "Stop" button to end the recording.
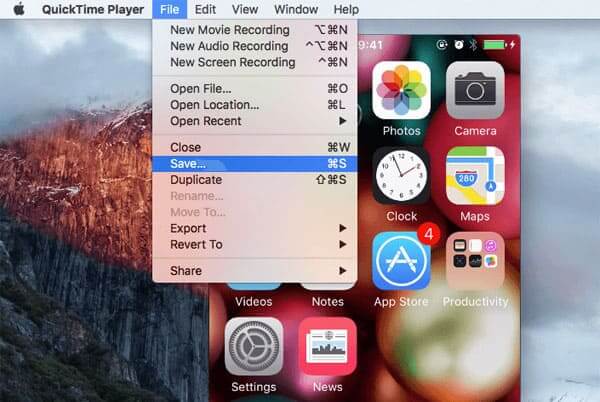
Step 5. Go to "File" > "Save", then select a destination folder to save your recorded video.
Part 3. How to Record iPhone Screen on PC/Mac via Screen Recorder
If you want to record your iPhone screen on a PC, Screen Recorder offers a more powerful and flexible solution. It allows you to mirror your iPhone display on a larger computer screen and customize various recording settings for a smoother experience. It supports high-quality screen capture while also allowing you to preview, organize, and edit your recordings after capturing. With advanced AI-powered features, it can enhance your recordings with functions such as audio noise reduction and intelligent processing for clearer sound quality.
Key features of Screen Recorder:
- Screen record your Android phone and iPhone on a computer with ease.
- Support multiple recording modes, including full-screen, custom area, specific window, and webcam capture.
- Easily record screens on both Windows and Mac computers.
- Add real-time annotations during recording, such as text, shapes, highlights, and drawings.
- Record system audio and microphone sound at the same time for complete audio capture.
- Schedule recordings with automatic start and stop settings for convenient hands-free recording.
Download for Win Download for Mac
Here is how to record an iPhone screen with voice using Screen Recorder:
-
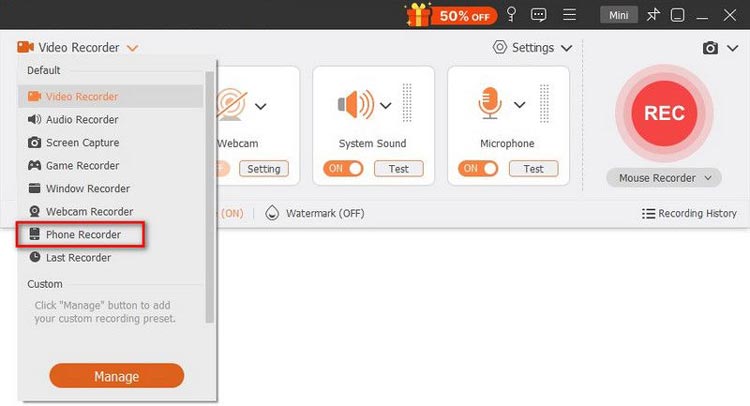
Download and install Screen Recorder on your computer. Launch the program and select "Phone Recorder" from the main interface.
-
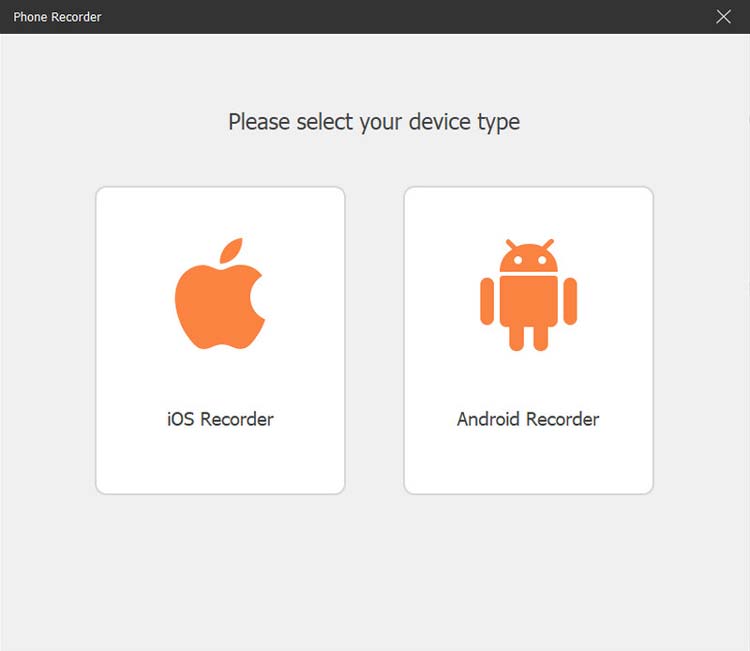
Choose "iOS Recorder" to start recording your iPhone screen. Before connecting, make sure your iPhone and computer are connected to the same Wi-Fi network.
-
Open Control Center on your iPhone by swiping down from the top-right corner. Tap "Screen Mirroring" and select "Screen Recorder" from the device list. Once connected successfully, your iPhone screen will be mirrored to your computer.
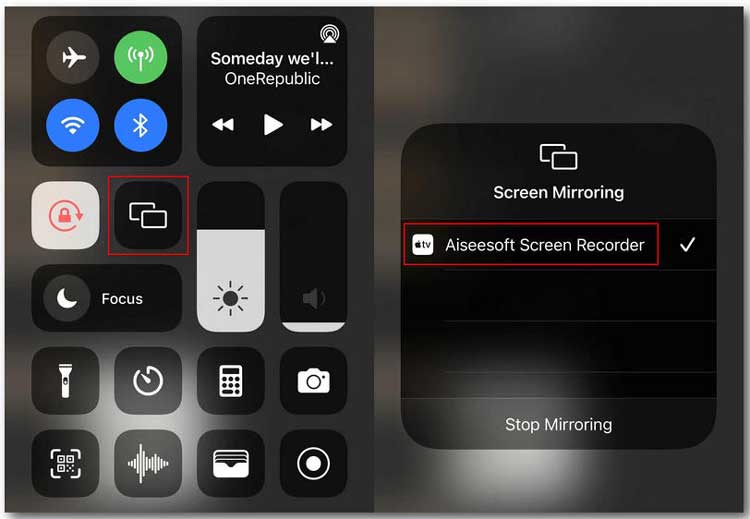
-
After your iPhone screen appears on the computer, customize the recording settings, including resolution, output quality, and recording area. Then click the "Record" button to start capturing your iPhone screen.
-
When the recording is complete, click the "Stop" button to finish. You can preview and edit the recorded video before saving it. If the result meets your expectations, click "Export" to save the recording to your computer.
Limitations of Screen Recorder
Although Screen Recorder provides more advanced features, it is not suitable for every situation:
- Screen mirroring requires both devices to be connected to the same Wi-Fi network. A poor Wi-Fi connection may cause lag or disconnection issues.
- Some DRM-protected apps may prevent recording.
- The free version may have certain limitations, such as watermarks or restricted features.
- Older iOS versions may experience audio sync issues during mirroring.
Understanding these limitations can help you decide whether this tool meets your recording needs.
What to Do If Screen Recorder Mirroring Fails?
If Screen Recorder cannot mirror your iPhone screen, try the following solutions:
- Make sure your iPhone and computer are connected to the same Wi-Fi network.
- Check that Screen Mirroring is enabled on your iPhone and select Screen Recorder from the device list.
- Restart Screen Recorder, your iPhone, and your computer, then try connecting again.
- Update Screen Recorder, iOS, and your computer system to the latest versions.
- Disable VPNs, proxies, or firewall settings that may block the connection.
- Close other screen mirroring apps that may interfere with the connection.
- Disconnect and reconnect your iPhone from the mirroring feature.
Is Screen Recorder Free vs Paid Version Different?
Screen Recorder offers both free and paid versions. The free version supports basic screen recording but may include limitations such as recording time restrictions, watermarks, and fewer advanced features. The paid version removes these limits and provides more powerful tools, including longer recordings, higher-quality output, editing features, scheduled recording, and more flexible controls. For occasional screen captures, the free version is sufficient, while frequent creators may prefer the paid version for a more complete experience.
Can I Record DRM-protected Streaming Videos Using Screen Recorder?
No, Screen Recorder cannot guarantee recording DRM-protected content. Some streaming platforms use DRM technology that may cause black screens, missing audio, or recording failures. Screen Recorder works best for capturing content you have permission to record, such as presentations, tutorials, gameplay, and personal videos. Always ensure you have the right to record protected content.
Part 4. FAQs on How to Record iPhone Screen
Q1. Why is my iPhone screen recording not working?
There are several possible reasons why iPhone screen recording is not working, including:
- Screen Recording has not been added to the Control Center.
- Your iPhone does not have enough available storage space.
- Certain apps restrict screen recording due to copyright or privacy protection.
- Your iPhone needs to be updated to the latest iOS version.
To fix common screen recording issues, check your Control Center settings, free up storage space, update iOS, or restart your iPhone and try recording again.
Q2. Where are iPhone screen recordings saved?
By default, your iPhone screen recordings are automatically saved to the Photos app. Open "Photos" > "Albums" > "Screen Recordings" to quickly locate your recorded videos. From there, you can view, edit, share, or transfer your screen recordings to another device.
Q3. How long can I screen record on my iPhone or iPad?
There is no specific time limit for iPhone screen recordings. You can continue recording as long as your iPhone has enough available storage space and battery. However, longer recordings will require more storage, so make sure your device has sufficient free space before starting.
Q4. Why does my iPhone screen recording have no sound?
If your iPhone screen recording has no sound, it may be caused by one of the following issues:
- The microphone was not enabled when starting the screen recording.
- The current app does not allow internal audio to be recorded.
- Your iPhone volume is set too low.
- Connected Bluetooth headphones are interfering with audio input.
- A temporary system glitch is affecting the recording.
Q5. Can I edit the screen recording afterward?
Yes. You can use the built-in editing tools in the Photos app to trim, crop, or make basic adjustments to your screen recording. If you need more advanced editing features, you can also use a third-party video editing app from the App Store.
Wrapping Up
After learning how to record your iPhone screen, you can choose the method that best suits your needs. If you only need to capture basic iPhone activities, the built-in Screen Recording feature is usually sufficient. If you want to record your iPhone screen through a Mac, QuickTime Player is a convenient option. For users who want high-quality recordings, more advanced features, and better audio performance, Screen Recorder offers a more professional recording experience, helping you easily create high-quality iPhone screen recordings.
Related Articles
AZ Screen Recorder Guide and 9 Practical Alternatives and Review
How to Screen Record Instagram Stories Without Trouble (New Guide)
Game Recording Software: Select the Best One to Record Gameplay
Camtasia Screen Recording Software: Latest Review and Top 12 Alternatives