"How do I screen record on Windows 11 with audio? Hi, everyone, I'm about to join an online meeting and I don't want to miss any important details, so I'd like to record it. I've rarely recorded my screen before, and I'm using a Windows 11 computer. I'm not sure what the best way to do this is, especially how to capture both the screen and the audio from the meeting."
- From Reddit
If you are in the same situation and want to record a screen on Windows with audio, you can get help from this guide, which includes 5 viable methods. Whether you want to record your screen with system audio, microphone sound, or both, you can do it with the following steps.

- Part 1: How to Record Screen on Windows with Audio via Xbox Game Bar
- Part 2: How to Record Screen on Windows 11 with Audio via iReaShare Screen Recorder
- Part 3: How to Screen Record on Windows 10 with Audio via OBS Studio
- Part 4: How to Screen Record on Windows 11 with Audio via Snipping Tool
- Part 5: How to Record Windows Screen with Audio via Clipchamp
- Part 6: Q&A About Recording Screen on Windows with Audio
Compare these 5 methods:
| Method | Pros (The Good) | Cons (The Bad) |
|---|---|---|
| Xbox Game Bar |
1. Built-in and ready to go. |
1. Cannot record the Windows Desktop or File Explorer. 2. No video editing tools. |
| iReaShare Screen Recorder | 1. Offers specialized settings like custom bitrates. 2. Record screens with system and microphone audio. 3. Allow you to take screenshots and edit images on your PC. 4. Easy-to-use interface. |
1. Requires a download. 2. The free version has a watermark. |
| OBS Studio | 1. Professional-level control. 2. Completely free. 3. Can record webcam and screen together. |
1. Very complex for beginners. 2. Requires more computer power (CPU/GPU). |
| Snipping Tool | 1. Perfect for recording just a small section of the screen. 2. Very fast and simple. |
1. Lacks advanced audio settings. 2. No way to trim or edit the video afterward. |
| Clipchamp | 1. Includes a full video editor. 2. Supports "Picture-in-Picture". 3. Saves directly to cloud. |
1. Requires a Microsoft login. 2. Can be slow as it is a web-based application. |
Part 1: How to Record Screen on Windows with Audio via Xbox Game Bar
Windows 10 and Windows 11 come with Xbox Game Bar, a built-in tool primarily designed for gamers but also excellent for screen recording. However, please note that it cannot record the desktop and file explorer interfaces.
Here how:
-
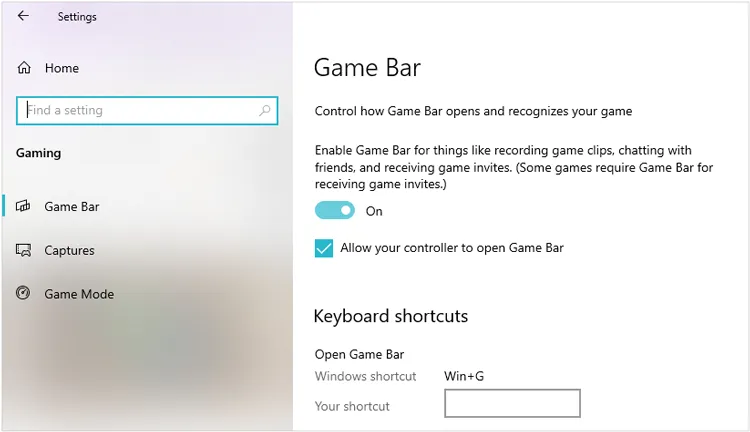
Press "Windows" + "G" to open the Xbox Game Bar. If it's your first time, you may be asked to enable the Game Bar in "Settings" > "Gaming" > "Xbox Game Bar".
-
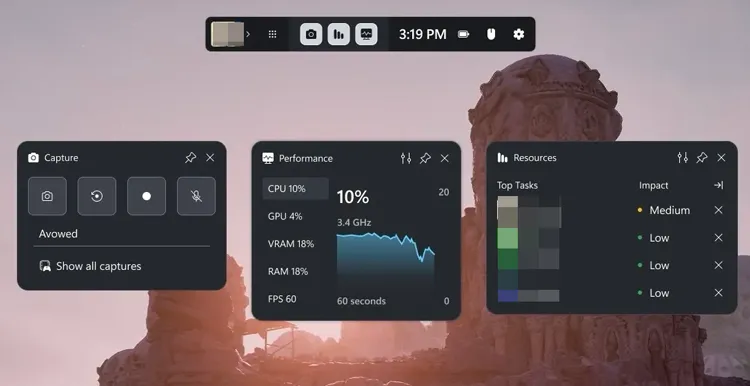
Click on the "Capture" widget (the camera icon) or press "Windows" + "Alt" + "R" to start recording. To record both system and microphone audio, make sure the "Microphone" icon in the Game Bar is toggled on.
-
Once you're finished, click the "Stop" button in the capture overlay or press "Windows" + "Alt" + "R" again. The recorded video will be saved in "This PC" > "Videos" > "Captures".
Part 2: How to Record Screen on Windows 11 with Audio via iReaShare Screen Recorder
If you want a recording tool with more practical features like recording with or without audio, capturing screen, edit screenshots, etc., you can use the iReaShare Screen Recorder. This software supports Windows 11/10/8/7, and it can record internal or microphone sounds. Furthermore, its free version doesn't has time limit.
Main features of this screen recorder:
* Record the screen on a Windows PC with quality.
* Support screen recording with system audio or microphone.
* Enable you to select the screen area you like freely.
* Save your videos in an accessible format, MP4.
* No network needed.
Download iReaShare Screen Recorder.
To record a screen on a Windows 10/11 PC with audio by using this screen recorder:
-
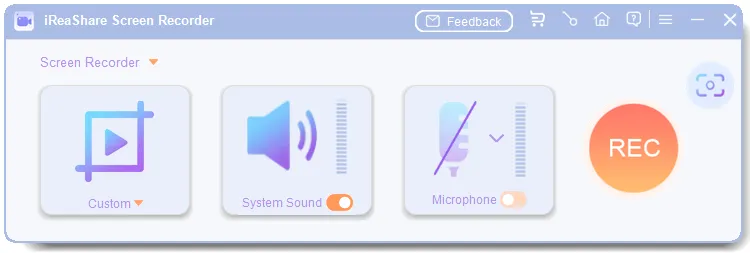
Install the software on your Windows PC. Once installed, launch it. Then choose "Custom", turn on "System Sound" or "Microphone", navigate to the window you want, and hit "REC".
-
Select the screen size you want to record, and click "Start Recording".

-
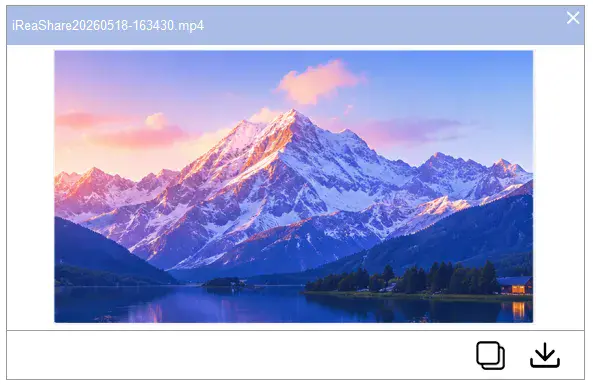
Once finished, click "Stop Recording". Then "Copy" or "Save" the video on your PC.
Tips: If you want to know more features about this software, you can read through the guide of this screen recorder software.
Part 3: How to Screen Record on Windows 10 with Audio via OBS Studio
OBS Studio is another useful third-party software for advanced screen recording and live streaming. It is compatible with Windows, macOS, and Linux, so you can easily download and use it on your Windows 10 or Windows computer.
To record a screen on a Windows 10 PC with audio by using OBS:
-
Click the "+" under "Sources" and select "Display Capture".
-
Go to "Settings" > "Output" to set your recording format (MP4 or MKV is recommended).
-
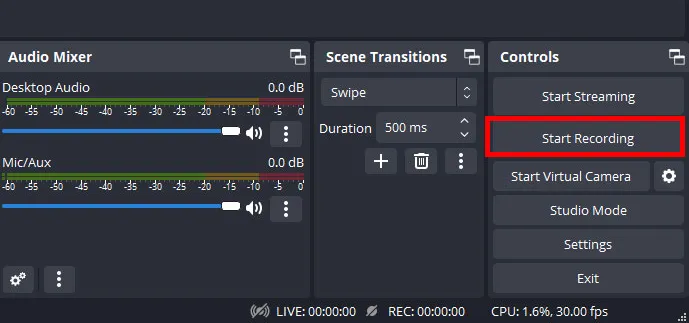
Hit "Start Recording". Once you're done, click Stop Recording. Your video will be saved in the default folder specified in "Settings" > "Output".
Part 4: How to Screen Record on Windows 11 with Audio via Snipping Tool
The updated Snipping Tool in Windows 11 is now the easiest way to record specific portions of your screen. It can record your screen with system audio and microphone input.
Here are the steps:
-
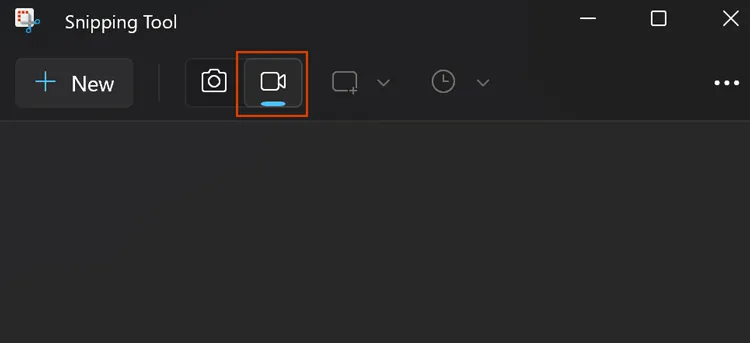
Press "Win" + "Shift" + "S" or search for "Snipping Tool"on your Windows 11 PC. Then choose the Record option in the toolbar.
-
Before recording, make sure both your microphone and system audio are turned on. Next, select the area of your screen you wish to record and hit "Record".
-
Once you're done, click the "Stop" button in the toolbar. The video will automatically save in the "Videos" folder.
Part 5: How to Record Windows Screen with Audio via Clipchamp
Clipchamp is a reliable video recorder and editor for Windows 11. It is excellent if you need to edit the footage immediately after recording. It supports video recording with system audio.
To record a Windows screen with audio via Clipchamp:
-
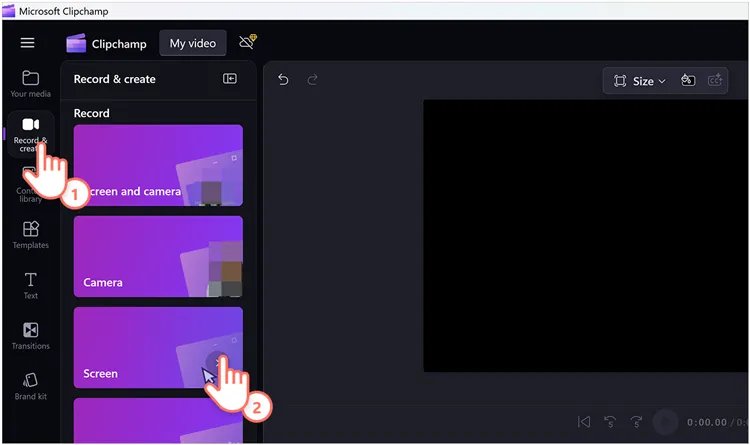
Download and install Clipchamp on your Windows PC from the Microsoft store. Then open it. Choose "Create a new video" > "Record & create" > "Screen".
-
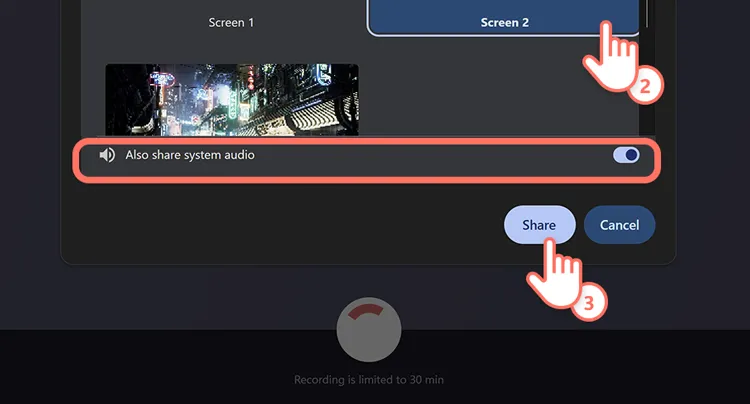
If you want to record computer audio, enable the "Also share system audio" toggle. Then click the red "Record" button.
-
Once finished, click "Stop sharing" at the top or bottom of your screen. Then click "Export" to save the video to your Windows computer.
Part 6: Q&A About Recording Screen on Windows with Audio
Q1: Why is my WIndows + Alt + R not working?
- App Focus: The Game Bar doesn't record the Windows Desktop or File Explorer. You must be inside an application or game.
- Disabled Settings: Go to Settings > Gaming > Game Bar and ensure "Record what happened" is turned On.
- Hardware: Some older graphics cards do not support the hardware encoding required for Game Bar.
Q2: Can I record my screen on my Windows PC with system and microphone sounds at the same time?
Yes. Most tools (Screen Recoder, OBS, Clipchamp, and the Windows 11 Snipping Tool) allow you to toggle both "System Audio" (what the computer plays) and "Microphone" (your voice) simultaneously. In Game Bar, check the "Capture" settings to ensure "All" audio is being recorded.
Q3: Where can I find the videos after recording the screen on Windows 11/10 PC?
- Screen Recorder: the videos are saved in C:\Users\[YourName]\Videos\Studio.
- Game Bar/Snipping Tool: Usually saved in C:\Users\[YourName]\Videos\Captures.
- Clipchamp: These are saved to your "Downloads" folder or synced to OneDrive.
- OBS Studio: The path is customizable, but the default is usually the Videos folder.
Conclusion
Recording your screen on Windows with audio has never been easier, thanks to a variety of built-in and third-party tools. If you're a casual user, a method like using Xbox Game Bar will be good. But if you want to record screens without restrictions, iReaShare Screen Recorder will be better. It can record screens with internal and external audio, and it is more user-friendly than OBS Studio.
Related Articles
Screen Record on Android: A Comprehensive Guide with 5 Solutions
Guide: Cast Android to Windows 10 PC (Contain USB and Wi-Fi Connections)
How to Factory Reset PC Windows 10 or 11 Easily (3 Ways)
How to Shred Files: Practical File Shredder Tips for Windows PC