TL;DR:
Backing up your Android to a USB drive frees up space safely without losing file quality. These transfer options break down into two core strategies:
- Direct Hardware Connections: Move files completely offline and without a computer. You can plug a dual-connector Type-C drive directly into your phone, or use a traditional USB stick paired with an OTG adapter.
- Software-Assisted Transfers: Manage data via external platforms. This includes using local Wi-Fi apps like LocalSend for wireless transfers, or desktop software like iReaShare Android Manager for stable, bulk backups through your computer.
We often capture high-resolution photos, download massive documents, and record 4K videos daily, so smartphone storage can fill up incredibly fast. One of the smartest solutions is to transfer files from Android to a USB flash drive - a quick and reliable way to free up space, back up important data, and keep your files secure.
Whether you have an OTG adapter on hand, prefer using a computer, or need a completely wireless solution, this guide covers the best methods to get the job done.
- Part 1: Transfer Files from Phone to Pendrive Without OTG or Computer
- Part 2: Transfer Files from Android to USB Flash Drive via iReaShare Android Manager
- Part 3: Transfer Data from Mobile to Pendrive via OTG Adapter
- Part 4: Transfer Files from Android to Flash Drive via LocalSend
- Part 5: Q&A About Transferring Files from Android to USB Flash Drive
Compare these 4 methods:
| Method | Pros | Cons |
|---|---|---|
| Type-C Connector Drive | 1. Incredibly fast and plug-and-play. 2. No extra cables, computers, or internet required. 3. Highly portable. |
1. Requires buying a specific type of USB drive. 2. Cannot use regular USB-A sticks you already own. |
| iReaShare Android Manager | 1. Best for large bulk transfers or full backups. 2. Visual desktop interface lets you preview files easily. 3. Supports direct, stable wired transfer and Wi-Fi transfer. 4. One-click bakcup and restore is available. |
1. Requires installing software on your PC/Mac. 2. A paid license is needed for full features. |
| OTG Adapter | 1. Lets you reuse standard USB drives you already own. 2. Affordable and widely compatible. 3. No internet or computer required. |
1. Requires carrying an extra adapter hardware piece. 2. Some phone brands require manually turning on OTG settings. |
| LocalSend App | 1. Completely wireless and free. 2. Open-source, secure, and ad-free. 3. No physical adapters or cables needed. |
1. Both devices must be on the exact same Wi-Fi network. 2. Requires intermediate storage (PC) before saving to the flash drive. |
Part 1: Transfer Files from Phone to Pendrive Without OTG or Computer
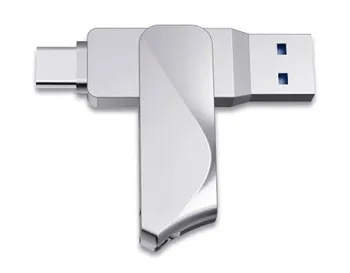
The absolute easiest way to transfer files without needing a computer or a separate OTG cable is by using a Dual-Connector Flash Drive (often called a Type-C Flash Drive or Dual USB Drive). These devices feature a standard USB-A plug on one end (for computers) and a USB Type-C (or Micro-USB) plug on the other, allowing them to plug directly into your phone.
Here's how to transfer files from a phone to a pendrive directly:
-
Plug the Type-C end of the pendrive directly into your Android phone's charging port. Then launch your phone's native file app, e.g., Files by Google, My Files, or File Manager.
-
Navigate to the folder (like DCIM or Downloads), long-press the files you want to transfer, and tap "Copy" or "Move". You'd better copy rather than move your files to prevent accidental data loss during the process.
-
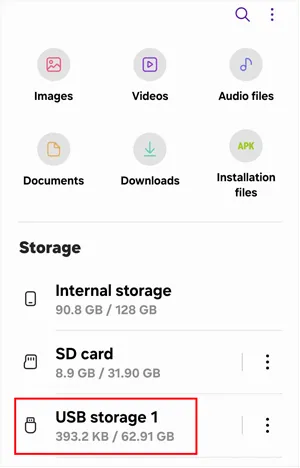
Go back to the main menu of your File Manager, select your connected USB drive under "Storage", choose your destination folder, and tap "Paste" or "Move" here.
-
Swipe down from the top of your screen, expand the USB notification, and tap "Eject" before unplugging the drive.
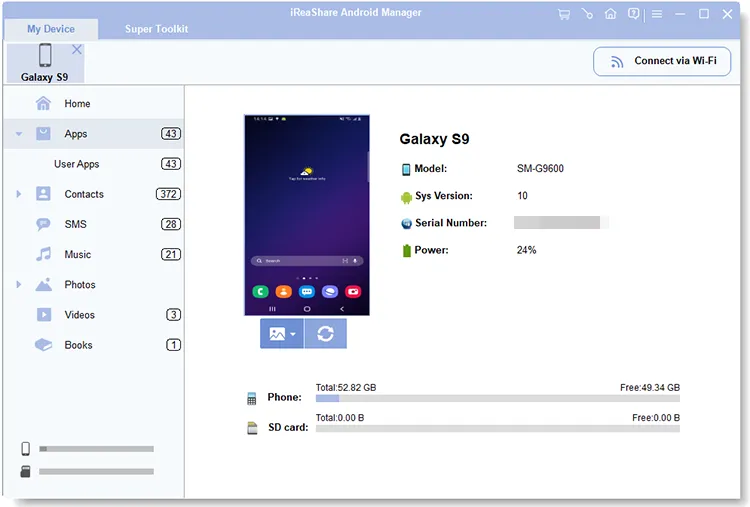
Part 2: Transfer Files from Android to USB Flash Drive via iReaShare Android Manager
If you prefer a structured, visual approach on a larger screen, using a professional desktop tool like iReaShare Android Manager is a fantastic option. It allows you to manage, preview, and selectively transfer files from your Android phone to a computer, and straight onto your connected flash drive. Furthermore, in addition to regular media files, it allows you to transfer your contacts, messages, call logs, and apps to the USB stick.
Main features of iReaShare Android Manager:
* Easily move documents, videos, music, and photos from your Android device to your USB flash.
* Transfer virtually any file type including images, audio, video, contacts, messages, and apps without compatibility issues.
* Move large batches of files without long waiting times.
* Not only transfer files from Android to your PC, but also push files back from your computer to your Android device with ease.
* Browse, sort, and manage all your Android files directly from your computer screen in a clean and intuitive interface.
* Back up and restore your Android data on a Windows or Mac computer at one go.
* Support USB and Wi-Fi connection methods.
* Compatible with Android 6.0 or later, including the latest version.
Download iReaShare Android Manager.
Download for Win Download for Mac
To move videos and other files from an Android phone to a USB stick via this program:
-
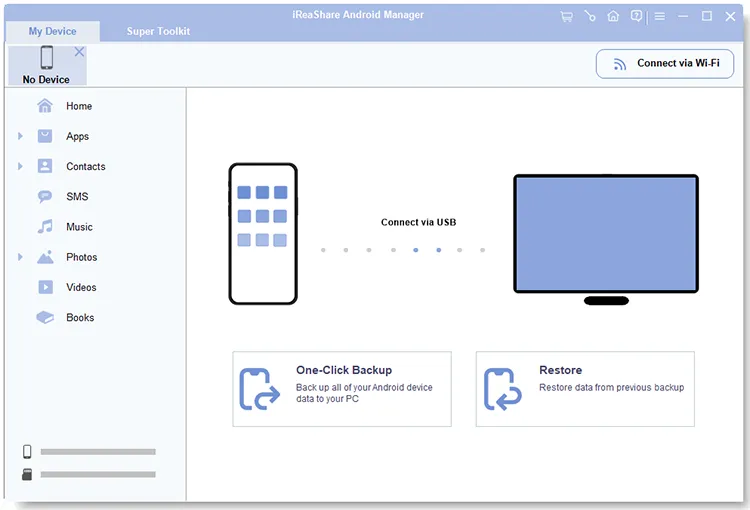
Download, install, and launch iReaShare Android Manager on your computer. Then plug your Android phone into the PC via a USB cable (ensure USB Debugging is enabled), and insert your USB flash drive into another open USB port on the PC.
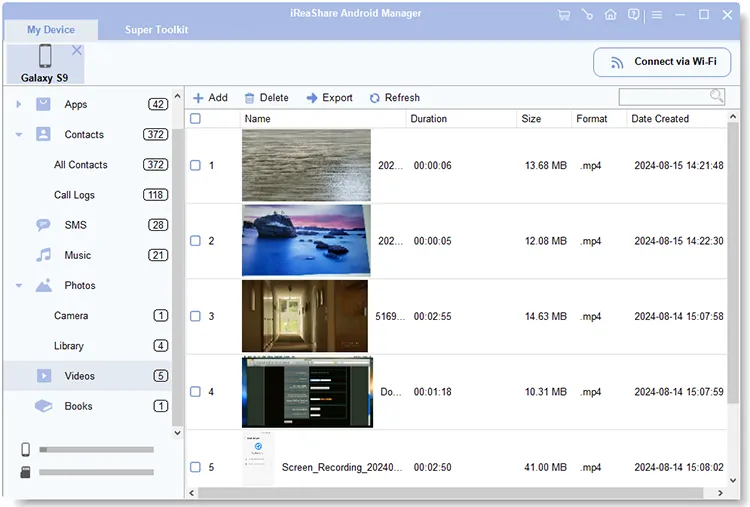
-
Once the software recognizes your phone, click on the file categories from the left panel, such as "Videos".
-
Check the boxes next to the files you want to transfer, click the "Export" button at the top, and set your output destination path directly to your connected USB flash drive.
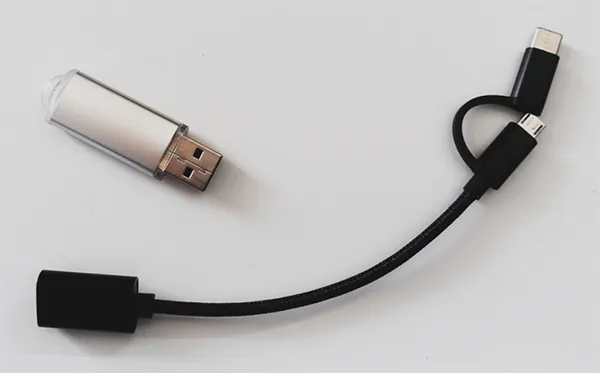
Part 3: Transfer Data from Mobile to Pendrive via OTG Adapter
If you have a traditional, standard USB flash drive (USB-A) that you use for computers, you can still connect it to your phone using a cheap and widely available OTG (On-The-Go) adapter. This adapter acts as a bridge between your phone's Type-C port and the flash drive's Type-A plug. Then you can complete the Android file transfer to the USB stick.
Here are the steps:
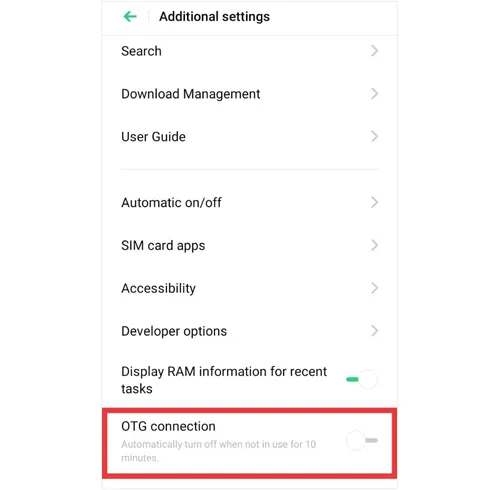
-
On some phones (like OnePlus, OPPO, or Vivo), you must go to Settings > "Additional settings" and turn on the "OTG connection" toggle. (Samsung and Google Pixel do this automatically).
-
Plug your standard flash drive into the OTG adapter, and then plug the adapter into your phone. Next, open your phone's File Manager. You will see a notification stating a "USB storage device is connected".
-
Browse your internal storage, select the files/folders you want to back up, tap "Copy", navigate to the OTG/USB drive storage section, and select "Paste".
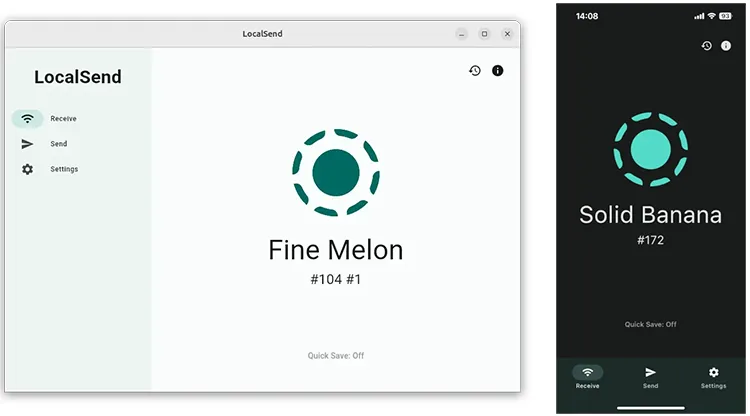
Part 4: Transfer Files from Android to Flash Drive via LocalSend
If you want to move files to a flash drive plugged into your PC or another device, but you don't have any cables handy, you can use LocalSend. LocalSend is a free, open-source, cross-platform app that allows you to send files securely over your local Wi-Fi network without using the internet.
How to do it:
-
Download LocalSend on your Android phone and on your computer (where your USB flash drive is plugged in). Make sure both devices are on the same Wi-Fi network.
-
Open LocalSend on the PC and go to "Receive" to make it discoverable. Open LocalSend on your phone, tap "Send", choose the files, photos, or videos you want to transfer, and select your computer's name from the discovered device list.
-
Accept the transfer on your computer. Once downloaded, simply drag and drop those files from your PC's download folder into your connected USB flash drive.
Part 5: Q&A About Transferring Files from Android to USB Flash Drive
Q1: Why can't I transfer files from an Android phone to a USB stick?
There are three common reasons for this:
- File System Incompatibility: Android typically does not support the NTFS file system natively. If your USB drive is formatted to NTFS, your phone won't recognize it. Reformatting the drive to FAT32 or exFAT on a computer will fix this.
- OTG Disabled: As mentioned in Part 3, some Android skins turn off OTG connections automatically after 10 minutes of inactivity. Check your Settings.
- Power Limitations: Some high-capacity external hard drives or older USB sticks draw more power than an Android phone port can supply.
Q2: How long will photos last on a USB stick?
Under normal storage conditions (away from extreme heat, moisture, and magnetic fields), data on a high-quality USB flash drive can last anywhere from 10 to 20 years. However, flash memory degrades based on write/erase cycles and is not meant for archival, permanent storage. It is always wise to keep a secondary backup elsewhere.
Q3: Will my videos and photos lose quality after moving to a flash drive?
Under normal storage conditions (away from extreme heat, moisture, and magnetic fields), data on a high-quality USB flash drive can last anywhere from 10 to 20 years. However, flash memory degrades based on write/erase cycles and is not meant for archival, permanent storage. It is always wise to keep a secondary backup elsewhere.
Conclusion
There are multiple reliable ways to transfer files from an Android phone to a USB flash drive, ranging from direct OTG connections to wireless apps and cloud-based methods. The best option depends on your available tools and how frequently you need to move data.
If you need to transfer more file types, iReaShare Android Manager is suitable for you, as it supports not only media files but also basic information data like call logs, SMS, contacts, etc. Moreover, it provides transfer, management, backup and restore, and more features. After regular file transfer, you will never worry about running out of phone storage space again.
Download for Win Download for Mac
Related Articles
How to Transfer Files from iPhone to Flash Drive (6 Functional Methods)
How to Format USB Drive Easily in 5 Ways (Step by Step)
How to Transfer Files from Android to Mac: 5 Proven Solutions
Transfer Files from iPad to Android with 6 Effective Methods (New)