


"I bought a Transcend 16GB USB drive and burnt an Arch ISO to it but now I cant format it, when I try to format it on windows it says The system cannot find the file specified, but the flash drive is still RAW."
- From Reddit
It is common to format a USB drive, whether you're trying to fix a corrupted drive, create a bootable installer, or simply wipe old data. To solve this problem, this guide has shared 5 solutions for USB drive formatting on both Windows and Mac operating systems.
Take a quick look at the methods' pros and cons:
| Method | Pros | Cons |
|---|---|---|
| Format Feature on Windows | 1. Easiest and fastest method for most users. 2. Simple, graphical user interface. 3. Good for quick wipes and basic formatting. |
1. Not suitable for securely wiping data. 2. Data can often be recovered with specialized tools. 3. Limited options compared to other tools. |
| iReaShare Data Wipe | 1. Designed for secure, permanent data destruction. 2. Ensures files and data are unrecoverable. 3. Overwrites deleted data and free space for total privacy. 4. Provides both "Quick Erase" and "Deep Erase" modes. |
1. May take longer than a simple format due to secure overwriting. 2. Not a standard OS feature, so you need to acquire it separately. |
| Diskpart on Windows | 1. Extremely powerful and versatile for advanced users. 2. Can fix complex disk errors and issues. 3. Allows for very specific partitioning and formatting. |
1. Requires knowledge of command-line interface. 2. High risk of data loss if the wrong disk is selected. 3. Not beginner-friendly. |
| Disk Utility on Mac | 1. Intuitive and user-friendly graphical interface. 2. The standard and most reliable method for Mac users. 3. Provides options for different file systems and schemes. |
1. Can be slower than command-line methods for some tasks. 2. Less control over low-level disk operations than Terminal. |
| Terminal on Mac | 1. Fast and efficient for experienced users. 2. Ideal for scripting and automating disk tasks. 3. Provides granular control over the formatting process. |
1. Requires knowledge of specific commands. 2. High risk of accidentally formatting the wrong drive. 3. Less intuitive for those unfamiliar with command lines. |
Part 1: How to Format USB Drive on Windows 11/10/8/7
Windows offers built-in tools to format a USB drive, from a simple right-click option to a more powerful command-line interface. Besides, you can install an expert data erasure tool to format and wipe your USB drive.
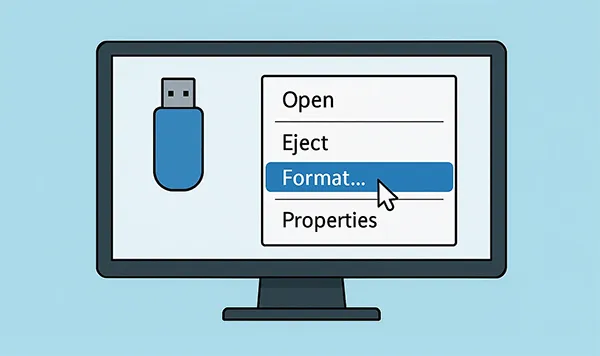
1.1 Using the Format Feature
This is the easiest and most common way to format a USB drive in Windows. As long as your PC recognize your USB drive, you can use the "Format" feature for the external flash drive.
Here's how to how to format usb drive to exFAT:
-
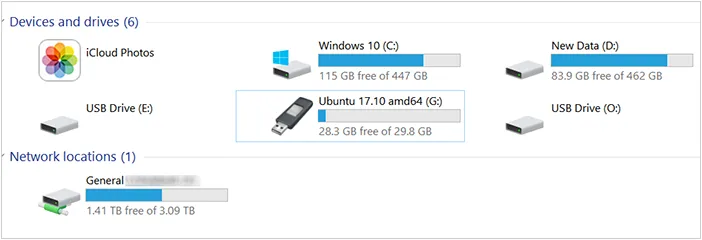
Plug your USB drive into a USB port on your Windows computer, and tap the "Windows" and "E" keys to open File Explorer.
-
In the left-hand pane, click on "This PC". Find your USB drive under "Devices and drives", right-click it, and select "Format...".
-
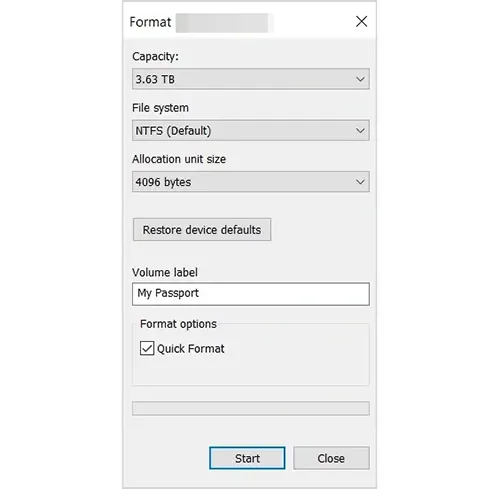
A new window will appear. Here, you can select the "File system" (e.g., NTFS, FAT32, exFAT), change the Volume label (the name of the drive), and choose to perform a "Quick Format" or a full format.
-
Click "Start" to begin the process. A warning will appear reminding you that all data will be erased. Click "OK" to continue.
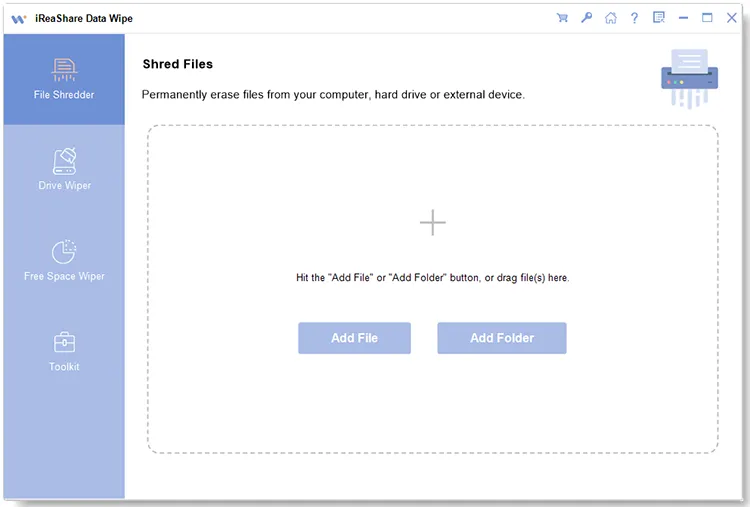
1.2 Using iReaShare Data Wipe
Simple formatting is not enough to make all your data unrecoverable on your USB drive, especially when you plan to resell or donate it. iReaShare Data Wipe can wipe all your data, and overwrite deleted files completely, ensuring no one can recover your data from the USB drive.
Main features of iReaShare Data Wipe:
* Format USB drives thoroughly on a PC.
* Quickly recognize connected external storage devices, including USB drives.
* Shred specific files and folders from your hard drive and flash drive.
* Wipe the free storage space only without erasing your existing files.
* Erase your files on hard drives of your computer.
* Support Windows 11/10/8/7.
Download iReaShare Data Wipe.
Here's how to format a USB drive on Windows 11 completely:
-
Install the Data Wipe tool on your PC, and then open it.
-
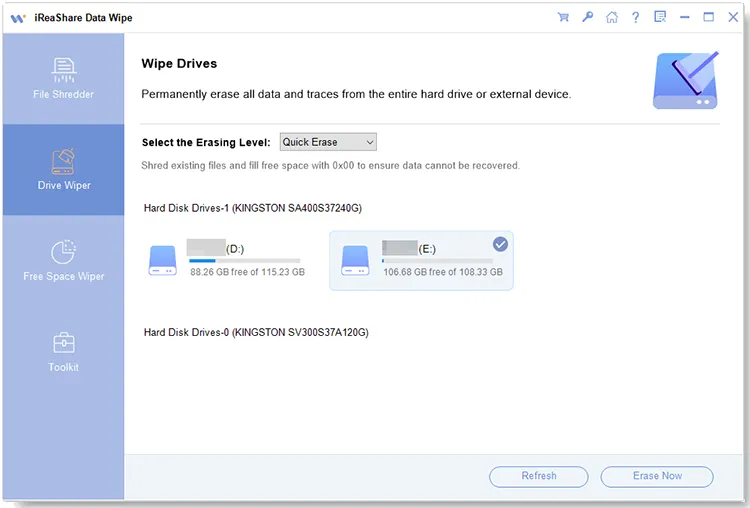
Plug your USB drive into your PC, and then click "Drive Wiper" on the interface. Then choose your USB drive.
-
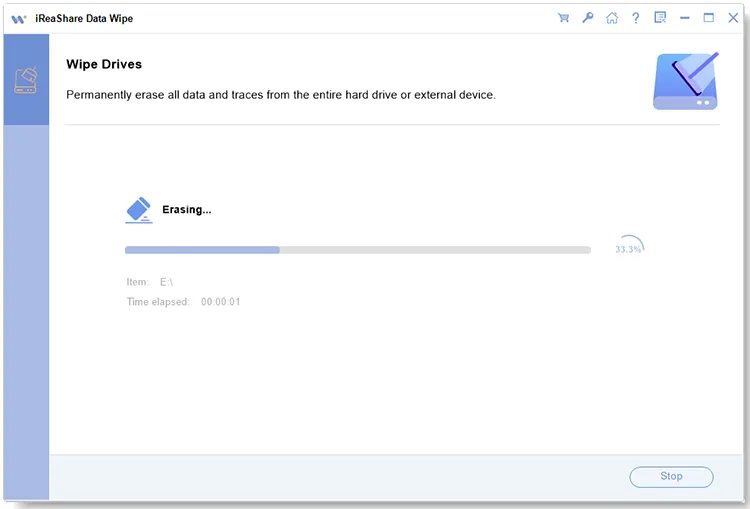
Opt for a level for data erasure, and tap "Erase Now" > "OK" to wipe your USB drive. All the data will be removed permanently.
Watch the video guide to erase a USB drive:
1.3 Using Diskpart
For advanced users, Diskpart is a powerful command-line utility for managing disks. This method is useful for resolving complex disk issues and creating specific partitions.
To format a USB drive to FAT32 via Diskpart:
-
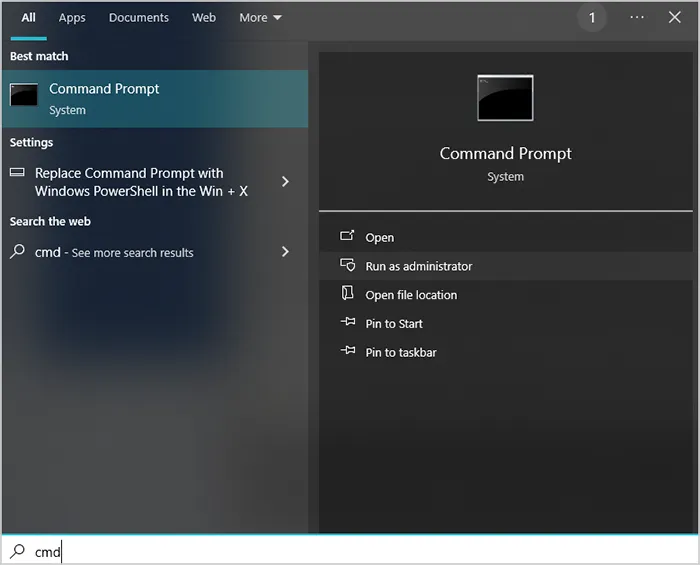
Plug in your USB drive. Then open the Command Prompt as an administrator. You can do this by typing "cmd" in the "Start" menu, right-clicking on "Command Prompt", and selecting "Run as administrator".
-
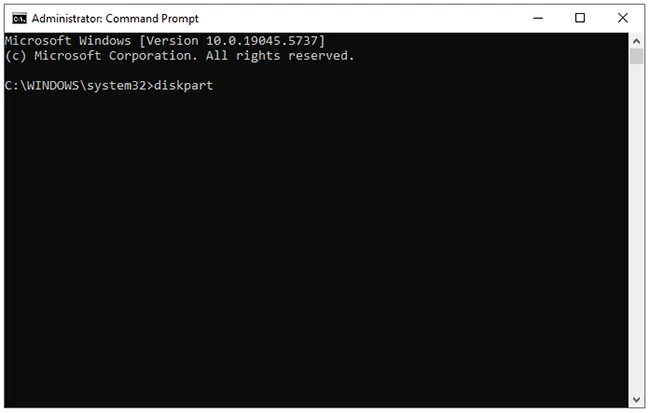
Type "diskpart" and press "Enter". Next, Type "list disk" and press "Enter". This will display all disks on your computer. Identify your USB drive by its size. Be careful to select the correct disk.
-
Input "select disk #" (replace # with the number of your USB drive) and hit "Enter".
-
Input "clean" and press "Enter". This command will wipe all partitions and data from the drive. Now, type "create partition primary" and press "Enter".
-
Type "format fs=fat32 quick" and hit "Enter". This will format the new partition. After that, type "assign" and press "Enter" to assign a drive letter. Finally, type "exit" to close Diskpart.
Part 2: How to Format USB Drive on Mac
Formatting a USB drive on a Mac is straightforward using its built-in tools.
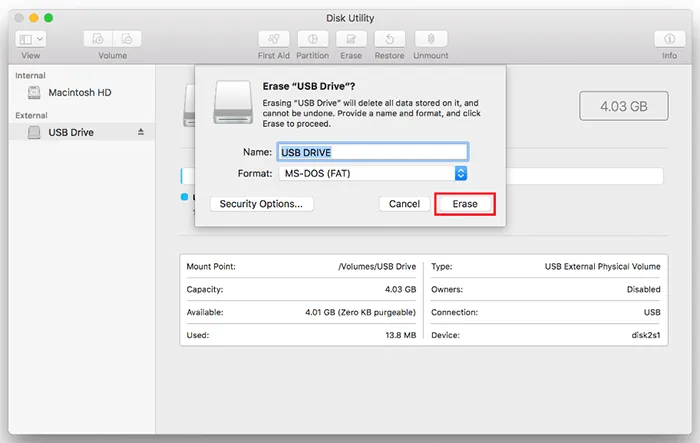
2.1 Using Disk Utility
Disk Utility is the primary graphical tool for managing disks on a Mac. You can use it to format your USB drive.
Here's how:
-
Connect your USB drive to your Mac, open Finder, go to "Applications" > "Utilities", and launch "Disk Utility". Alternatively, you can use "Spotlight" (press Command + Spacebar) and search for "Disk Utility".
-
In the left-hand sidebar, select your USB drive. Make sure to select the parent drive, not a specific partition indented beneath it.
-
Click the "Erase" button in the top menu. Then the program will start to erase your USB drive. All the data will be removed.
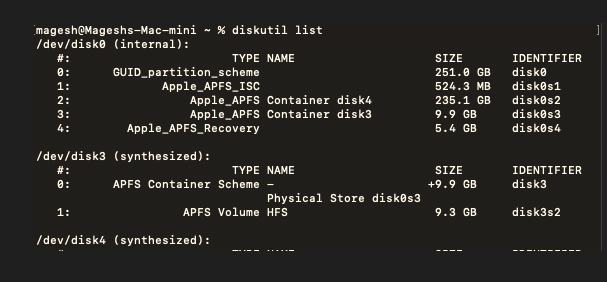
2.2 Using Terminal
For a more command-line-driven approach, you can use the Terminal to format your USB drive to ExFAT.
Here are the steps:
-
Plug in your USB drive, and open "Terminal" (located in Applications > Utilities).
-
Type "diskutil list" and press "Enter" to see a list of all disks. Identify your USB drive by its name and size. It will likely be something like "/dev/disk2" or "/dev/disk3".
-
Type "diskutil eraseDisk ExFAT NEWDRIVENAME /dev/disk#" (replace NEWDRIVENAME with the name you want, and # with the disk number of your USB drive). For example: diskutil eraseDisk ExFAT USBDRIVE /dev/disk2.
-
Press "Enter" to run the command. The system will prompt you for your password. The formatting will begin, and once complete, your drive will be ready to use.
Part 3: FAQs About Formatting USB Drive
Q1: Should my USB drive be FAT32 or NTFS?
The choice between FAT32 and NTFS for your USB drive depends entirely on how you plan to use it. Neither is universally "better", as each has distinct advantages and disadvantages.
For most modern uses, neither FAT32 nor NTFS is the best choice. A third option, exFAT, is now the recommended file system for USB drives. ExFAT is a modern file system that was designed specifically for flash memory, like USB drives and SD cards. It combines the best features of both FAT32 and NTFS. Unlike FAT32, it has no file size restrictions, so you can transfer files larger than 4GB.
Q2: Why is there no FAT32 option when formatting USB?
If you don't see the FAT32 option when formatting your USB drive, it's almost always because your drive's capacity is larger than 32 GB. This is not a technical limitation of the FAT32 file system itself, but an arbitrary restriction imposed by both Windows and macOS in their standard formatting tools.
When Microsoft developed the tools for formatting drives for its operating systems, it set a rule that drives larger than 32 GB should not be formatted to FAT32. This was to encourage the use of newer, more advanced file systems like NTFS and, later, exFAT, which don't have the 4 GB single-file size limit and offer better performance and security.
Q3: How to fix a USB drive that won't format?
When a USB drive refuses to format, it's often due to an underlying issue such as write-protection, a corrupted file system, or a bad sector.
- Check the Physical and Basic Issues: Before trying more advanced methods, check for these simple problems. Some older or specialized USB drives have a small physical switch on the side. If it's in the "lock" or "on" position, the drive is write-protected, and you cannot format it. Slide the switch to the "off" or "unlocked" position. Or you can try a different USB port, and restart your computer.
- Use the Command Line to Remove Write Protection: If the drive is "read-only", it will fail to format. Press Windows + R, type "cmd", and press Ctrl + Shift + Enter to open Command Prompt as an administrator. Type "diskpart" and press "Enter". Then input "list disk" and press "Enter". Carefully identify your USB drive by its size and note its disk number (e.g., Disk 2). Type "select disk #" (replace # with your USB drive's number) and press Enter. Type "attributes disk clear readonly" and press "Enter". This command should remove any software-level write protection.
- You can also use Diskpart to for a deep clean.
Conclusion
Regardless of whether you're using Windows or Mac, you have multiple options for formatting a USB drive. For most users, the standard graphical tools—File Explorer on Windows and Disk Utility on Mac—are the easiest and most reliable methods.
If you want to erase and overwrite your data on the USB drive, you will need an expert tool, such as iReaShare Data Wipe. This software provides more features. In addition to formatting a USB drive, it can wipe the free storage only, erase specific files or folders, etc.
Related Articles
How to Factory Reset PC Windows 10 or 11 Easily (3 Ways)
Best SSD Wipe Software: 10 Options to Help You Wipe SSD with Ease
How to Erase Locked Hard Drive Effectively? Exhaustive Explanation
Solved: How to Clean Disk Using CMD Without Effort
