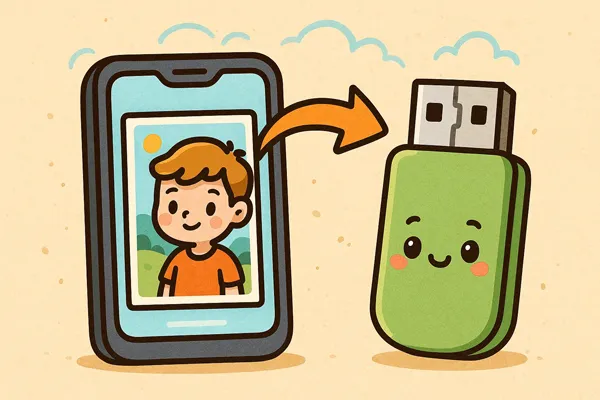
Flash drives are convenient for us to store data, especially when our Android phone's internal storage is almost full. However, if you want to transfer photos from Android to a flash drive for backup, particularly if there are many pictures, the process may be tiresome. It may crash at times. So, how can we transfer pictures easily? Here are 3 tips for you.
- Part 1: How to Transfer Photos from Android to Flash Drive via OTG Adaptor
- Part 2: How to Transfer Photos from Phone to USB Stick via iReaShare Android Manager
- Part 3: How to Transfer Photos from Photo Gallery to Flash Drive Manually with Computer
- Part 4: Q&A About Transferring Photos from Android to Flash Drive
You can take a quick look at these 3 ways first:
| Method | ✅ Pros | ❌ Cons |
|---|---|---|
| Via OTG Adaptor | 1. No PC required (truly portable). 2. Simple, direct hardware connection. 3. Fast transfer speeds with compatible devices. |
1. Requires buying a separate OTG adapter. 2. Can drain phone battery quickly. 3. File management interface is limited to the phone's native app. |
| Via iReaShare Android Manager | 1. Feature-rich, user-friendly PC interface. 2. Excellent for large, complex batch transfers and sorting. 3. Includes one-click backup and restoration features. 4. Allows you to manage your Android data on your computer. |
1. Requires a computer and stable USB cable connection. 2. A paid software app, and has functional limitations in the free version. |
| Via Manual Transfer | 1. Most universal and reliable method. 2. Uses standard Windows File Explorer. 3. Familiar drag-and-drop or copy/paste commands. |
1. Requires a computer and stable USB cable connection. 2. Basic interface is less powerful for filtering photos than dedicated software. |
Part 1: How to Transfer Photos from Android to Flash Drive via OTG Adaptor
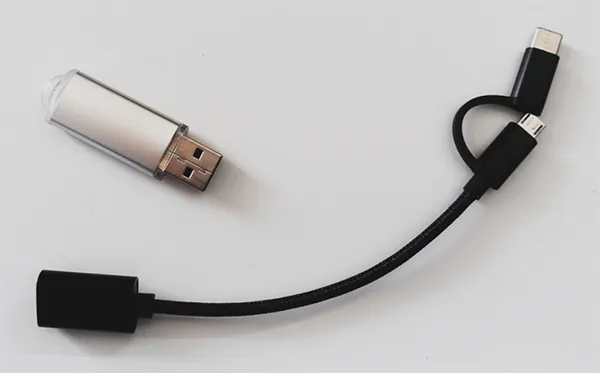
The On-The-Go (OTG) adapter method is the most direct and convenient way, as it doesn't require a computer. An OTG adapter allows your Android phone to act as a "host," enabling it to power and read data from a peripheral device, like a flash drive.
Here's how to move photos from an Android phone to a flash drive via OTG:
-
You will need a compatible OTG adapter (often USB-C or Micro-USB on one end and USB-A on the other). Then plug the flash drive into the USB-A port of the OTG adapter, and then plug the adapter into your Android phone's charging port.
-
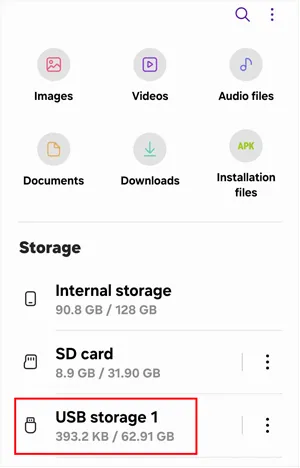
Your phone should automatically detect the flash drive. You may see a notification, or you can open your phone's File Manager app.
-
The flash drive will appear as a separate storage volume (e.g., "USB Drive", "OTG Storage", or the manufacturer's name). In the File Manager app, navigate to your phone's internal storage, and find the "DCIM" folder, where most of your camera photos are saved.
-
Select the photos and folders you wish to transfer, and tap the "Copy" or "Move" option. Next, navigate back to the flash drive's storage location and tap "Paste" or "Move here".
Part 2: How to Transfer Photos from Phone to USB Stick via iReaShare Android Manager
If you prefer a more organized and user-friendly method for managing your photos, iReaShare Android Manager is a great tool. It helps you transfer files, including photos, from your Android device to a computer or an external USB stick with ease. You can also transfer your contacts, text messages, apps, call logs, music, videos, etc. There is no quality loss during the transfer.
Main features of iReaShare Android Manager:
* Copy photos and other media files from Android to a USB flash drive.
* Back up all your pictures from Android to your computer at once.
* Allow you to preview your files on the interface.
* Restore backup data from your computer or external storage to your Android device.
* Allow you to manage your Android photos on your computer, such as creating new albums, moving pictures, etc.
* Support most Android devices, including OnePlus 15/13/12/11/10/9/8/7, Google Pixel 10 Pro Fold/10 Pro XL/10 Pro/10/9/8/7/6, Motorola, Vivo, TCL, Tecno, Infinix, Honor, OPPO, realme, etc.
* Compatible with Android 6.0 and later, including the latest.
Download iReaShare Android Manager.
Download for Win Download for Mac
Here's how to save pictures from a phone to a flash drive with this software:
-
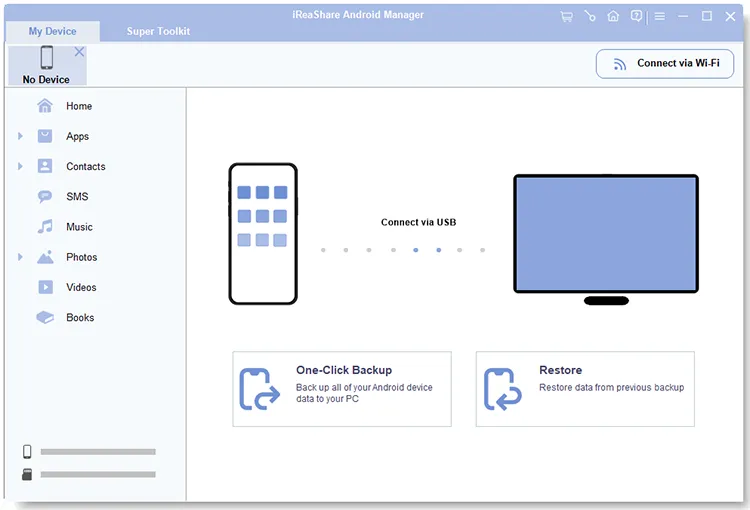
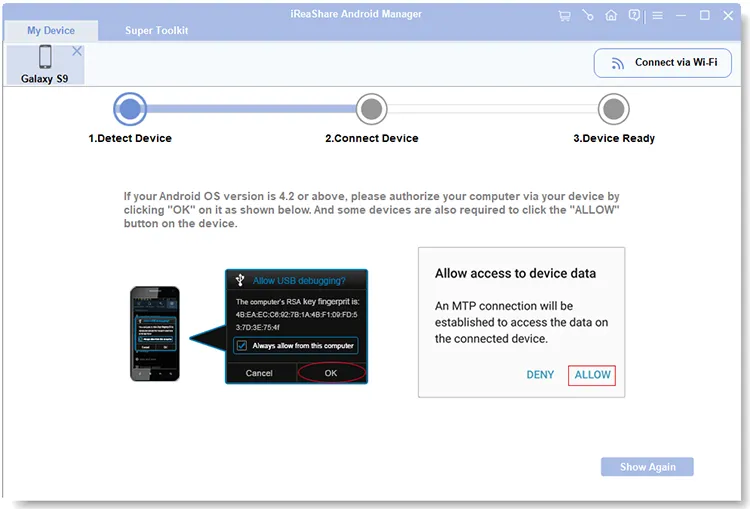
Download and install the iReaShare Android Manager on your computer. Then connect your Android phone to your computer with USB, and plug your USB stick into the computer.
-
Open the iReaShare software, and it should automatically detect your Android device. Enable USB debugging on Android, and the program will recognize your device immediately.
-
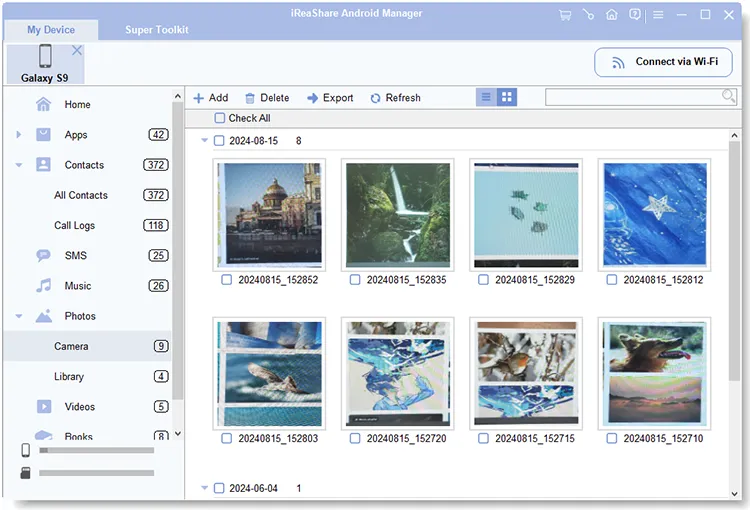
Once connected, click "Photos". Select the photos you want, and click "Export". Then select your flash drive, and start the process. Your pictures will be stored on your USB stick.
Watch the video guide to transfer photos from Android to a flash drive:
Part 3: How to Transfer Photos from Photo Gallery to Flash Drive Manually with Computer
For those who prefer using a computer, transferring photos from your Android phone to a flash drive manually is a simple process. In general, the transfer speed depends on the USB standard supported by the phone, the computer port, and the cable.
Here's how:
-
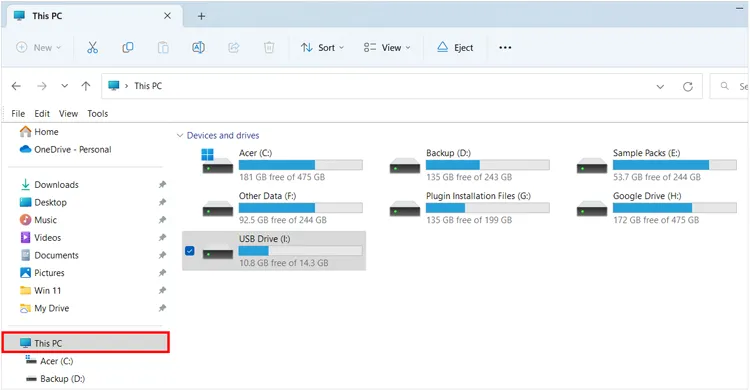
Use a USB cable to connect your Android phone to the computer. Also, insert your flash drive into an available USB port on the computer.
-
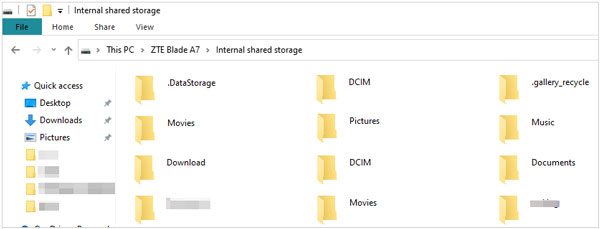
Open File Explorer by clicking "This PC", and navigate to your phone's storage. Usually, it appears as a new drive labeled with your phone's name or model.
-
Inside the phone's storage, locate the folder containing your photos. This is typically found in "DCIM" or "Pictures". Next, open the folder where you want to store your photos on the flash drive.
-
Now, simply drag and drop your selected images from your phone's storage to the flash drive folder. After the transfer is complete, don't forget to safely eject both your phone and the flash drive.
Note: If you meet a crash when directly transferring photos from Android to a flash drive on their PC. In this case, you can copy your photos to your computer first, and then copy them to your flash drive, which can effectively avoid the error.
Part 4: Q&A About Transferring Photos from Android to Flash Drive
Q1: What's the difference between a photo stick and a flash drive?
A photo stick is a specialized flash drive designed specifically for storing photos. It often comes with software that automatically organizes and backs up your photos. A regular flash drive, on the other hand, is a general-purpose storage device, which can be used for any type of data, including photos, documents, and more.
Q2: Will I lose quality when I transfer photos to a flash drive manually?
No, you will not lose quality. When you manually copy or move files (photos and videos) from your Android phone to a flash drive, you are creating a bit-for-bit copy of the original digital file. This process does not involve any recompression, resizing, or degradation of the image data.
The file stored on the flash drive will be identical to the original file on your phone. Quality loss only occurs when you intentionally compress or edit the image and save it with a lower quality setting.
Q3: Can I copy the entire photo library to an external drive?
Yes, you can copy your entire photo library to a flash drive or any external drive. Simply navigate to the folder that contains all of your photos (usually in the DCIM or Pictures folder), and copy everything. Be sure that the external drive has enough storage space to hold all the files.
Conclusion
Now you have learn 3 effective methods to transfer your photos from an Android phone to a flash drive. You can even manage your photos on your computer with iReaShare Android Manager. With this software, whether you want to transfer, back up, restore, and organize your files, you can complete it with ease.
Download for Win Download for Mac
Related Articles
How to Transfer Files from iPhone to Flash Drive (6 Functional Methods)
How to Transfer Photos from Mac to Android: Full Guide with 6 Solutions
How to Permanently Delete Photos from Android Device (Proven)
Solved: How to Transfer Photos from iPad to Computer in 5 Ways