


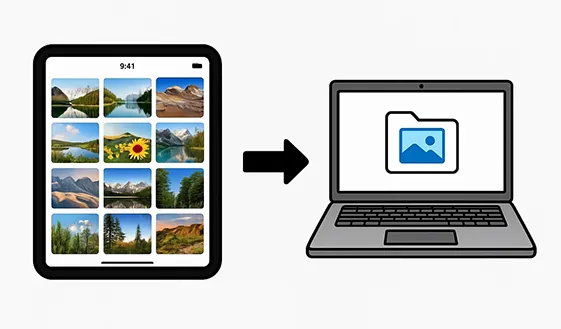
Not enough internal storage space on your iPad or iPhone to store your photos? Or want to keep a backup of your photos? You can transfer photos from the iPad or iPhone to a computer. There are 5 ways to do this depending on your preferences and tools available to you. Whether you prefer cloud-based solutions, dedicated software, or even simple drag-and-drop, you'll find a way that suits your needs.
- Part 1: How to Transfer Photos from iPad/iPhone to Computer via iCloud Photos?
- Part 2: How to Transfer Photos from iPad/iPhone to PC via iReaShare iPhone Manager?
- Part 3: How Do I Transfer Photos from iPad or iPhone to Computer via Photos App?
- Part 4: How to Export Pictures from iPad or iPhone to PC via Google Photos?
- Part 5: How to Transfer Images from iPad/iPhone to Computer via File Explorer?
- Part 6: FAQs About Transferring Photos from iPad/iPhone to Computer?
Take a quick look at these ways' pros and cons:
| Method | Pros | Cons |
|---|---|---|
| iCloud Photos |
1. Automatic syncing across |
1. Requires iCloud storage (free tier limited) 2. Internet connection needed for sync |
| iReaShare iPhone Manager | 1. Granular control over file selection 2. Offers more features than native tools 3. Support the preview of photo and other data |
1. Requires third-party software installation 2. Has a cost of a license for full features 3. Reliability can vary |
| Photos App (Mac or Windows) | 1. Native Apple/Windows solution, seamless integration with Mac/Windows ecosystem 2. Easy to import and organize |
1. Import photos to PC only on Windows but not exporting to iPad 2. Manual transfer |
| Google Photos | 1. Cross-platform (works on any OS with web browser) 2. Cloud backup & access from anywhere 3. Free unlimited storage (for compressed photos) |
1. Requires internet connection for upload/download 2. Might compress photos (if not using Original quality setting which counts against storage limits) |
| File Explorer (Windows PC) |
1. No extra software needed on PC |
1. Windows PC only, not for Mac |
Part 1: How to Transfer Photos from iPad/iPhone to Computer via iCloud Photos?
iCloud Photos is Apple's cloud-based photo syncing service, making it easy to access your pictures across all your devices, including your computer. Please make sure there is adequate cloud storage on your iCloud account first.
To move pictures from iPad to PC via iCloud Photos:
-
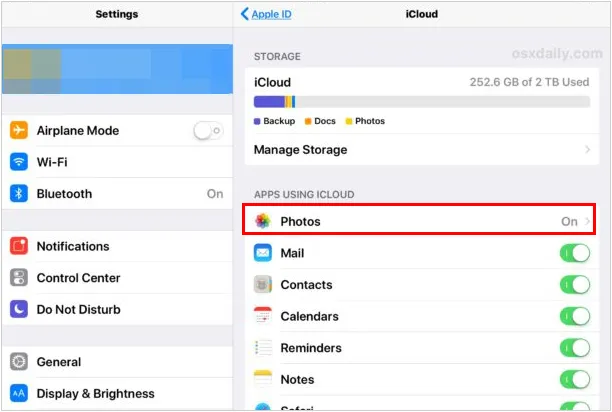
On your iPad, please go to Settings > "[Your Name]" > "iCloud" > "Photos". Toggle on "Sync this iPad" (if it's not already enabled). This will upload your iPad photos to iCloud. Ensure your iPad is connected to Wi-Fi.
-
On your Windows PC, download and install iCloud for Windows from Apple's website or the Microsoft Store. Or visit the iCloud Photos website and sign in to your Apple account.
-
Click the "Photos" option, and download the photos you want to your PC.
Note: On a Mac computer, iCloud Photos is built into macOS. Make sure you're signed in with the same Apple ID on your Mac as on your iPad. Just open the Photos app on your Mac. Go to "Photos" > "Settings" (or Preferences) > "iCloud". Ensure iCloud Photos is checked. Your iPad photos will sync to your Mac's Photos library. You can then drag and drop them to other folders if desired.
Part 2: How to Transfer Photos from iPad/iPhone to PC via iReaShare iPhone Manager?
As an all-in-one iOS management tool, iReaShare iPhone Manager offers practical functionalities to transfer data, including photos, videos, music, contacts, SMS, etc. If you want to seamlessly export your photos from your iPad or iPhone to your Windows or Mac computer, it will meet your requirements.
Main features of iReaShare iPhone Manager:
* Transfer pictures from an iPad to a computer with lossless quality.
* Will not change your image formats.
* Transfer various files from an iOS device to a computer.
* Back up your iOS data to your computer at once.
* Restore backup data from your computer to your iPad or iPhone.
* Support iOS 5.0 and later, including iOS 26.
Download iReaShare iPhone Manager.
Download for Win Download for Mac
Here's how to export pictures from an iPad to a PC via this software:
-
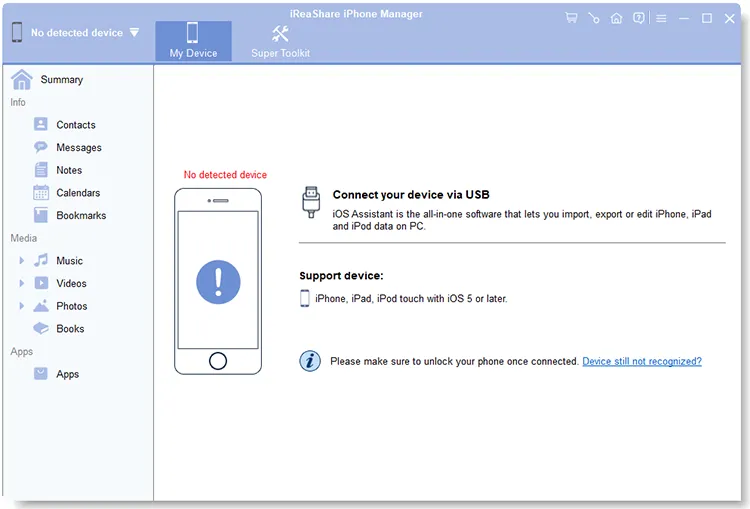
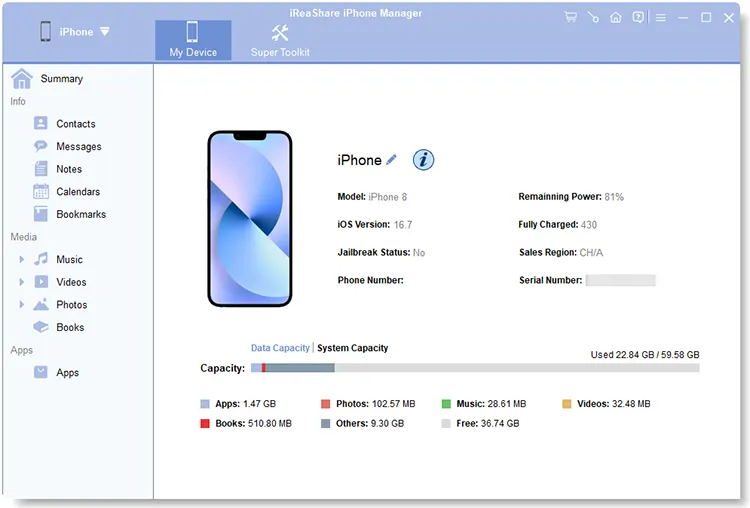
Download and install iReaShare iPhone Manager on your computer, and connect your iPad to your computer using a USB cable. Launch the software. It should detect your iPad.
-
Grant access on your iPad if prompted by tapping "Trust This Computer". Then the connection will be established.
-
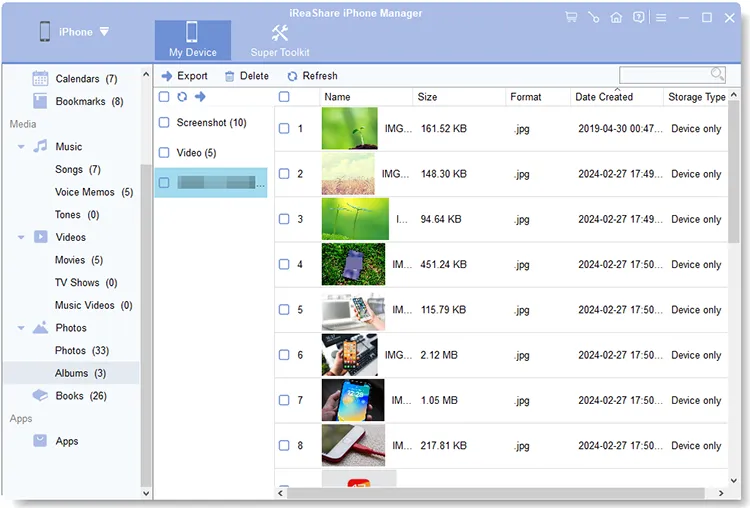
Click the "Photos" section on the interface. Next, select the photos you wish to transfer, and click the "Export" icon. Then choose a destination folder on your computer to save the photos. The software will then begin the transfer process.
Here's the video guide:
Part 3: How Do I Transfer Photos from iPad or iPhone to Computer via Photos App?
The Photos app on macOS and Windows OS is the primary tool for managing photos on your devices, including direct transfers from an iPad. For Windows users, as long as your PC is running Windows 10 or later, you can use the Photos app to import your pictures from your iOS device.
Import iPad photos to PC:
-
Please link your iPad to your PC with USB. Then click "Search" and type "Photos" to launch the Photos app.
-
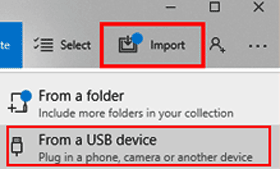
Click "Import" in the upper right corner, and click "From a USB device".
-
Choose your iPad, and then select the pictures you want to transfer. After selecting, click "Add X items", choose a folder on your PC, and tap "Import".
Import iPad photos to Mac:
-
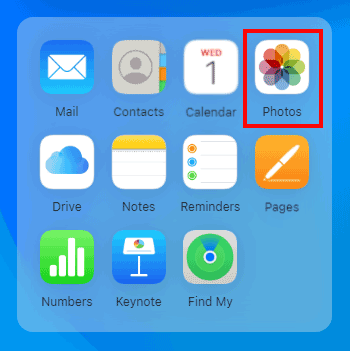
Connect your iPad to your Mac using a USB cable. Open the Photos app on your Mac. If it doesn't open automatically, find it in your Applications folder or Dock.p.
-
Your iPad should appear under the "Devices" section in the Photos app sidebar. Click on it. If it's your first time connecting, your iPad might ask if you trust the computer. Tap "Trust" and enter your passcode.
-
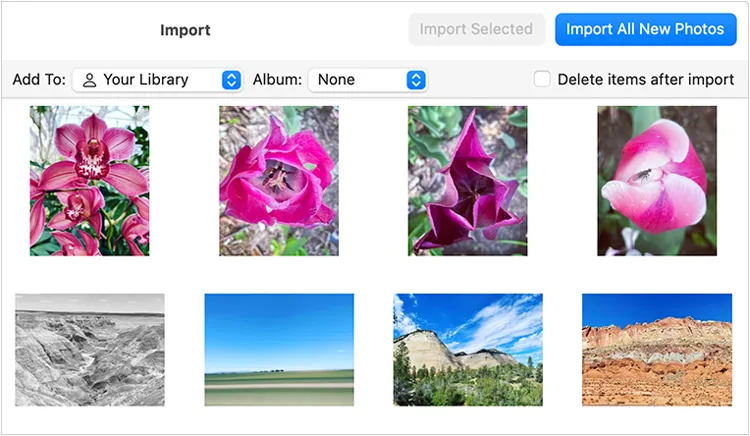
The Photos app will display all the photos and videos on your iPad. You can choose to "Import All New Photos" or select specific photos and then click "Import Selected". Once imported, the photos will be available in your Photos library on your Mac.
Tips: You can easily sync your contacts from an iPhone or iPad to a Mac computer. Check it out if you need a useful solution.
Part 4: How to Export Pictures from iPad or iPhone to PC via Google Photos?
Google Photos is a popular cross-platform cloud service that provides an excellent way to back up and transfer your photos from your iPad or iPhone to your computer, regardless of the operating system.
Download photos from an ipad to a computer:
-
Download the Google Photos app from the App Store and install it on your iPad. Open the Google Photos app and sign in with your Google Account.
-
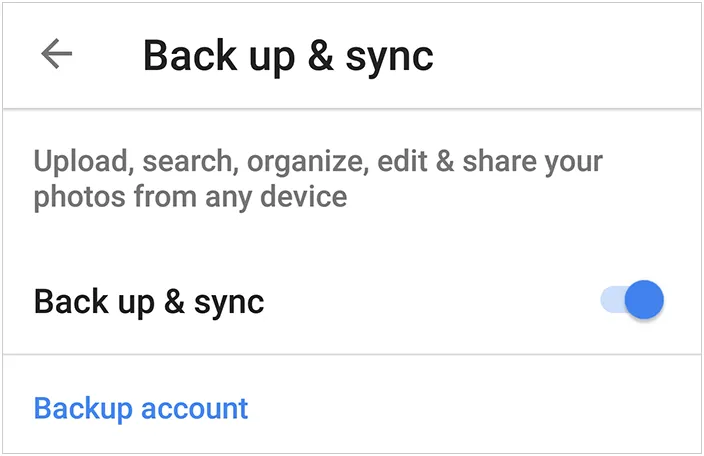
Tap on your profile icon in the top right corner. Go to "Photos settings" > "Back up & sync". Toggle "Back up & sync" on. Your iOS photos will start uploading to Google Photos (ensure you have a good Wi-Fi connection).
-
On Your Computer (Windows PC or Mac), open a web browser and go to photos.google.com. Then sign in with the same Google Account you used on your iPad.
-
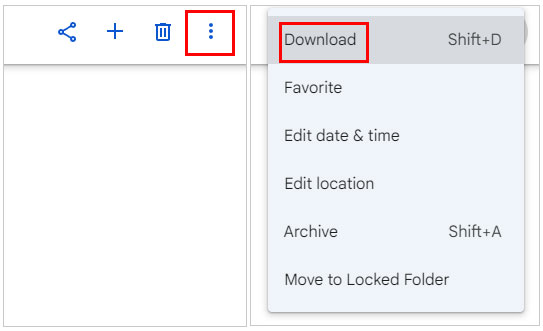
All your backed-up photos from your iPad will be visible here. Select your desired photos, click the three-dot menu icon in the top right corner and choose "Download". The photos will be downloaded to your computer's downloads folder.
Part 5: How to Transfer Images from iPad/iPhone to Computer via File Explorer?
For Windows PC users, your iOS device can be recognized as a digital camera, allowing for simple drag-and-drop transfers using File Explorer. If your PC is running Windows 7/8 that there is no a Photos app, you can use this way to copy your photos from an iPad to your PC.
Here's how to do it:
-
Connect your iPad to your Windows PC using a USB cable, and click "Trust" on your iPad.
-
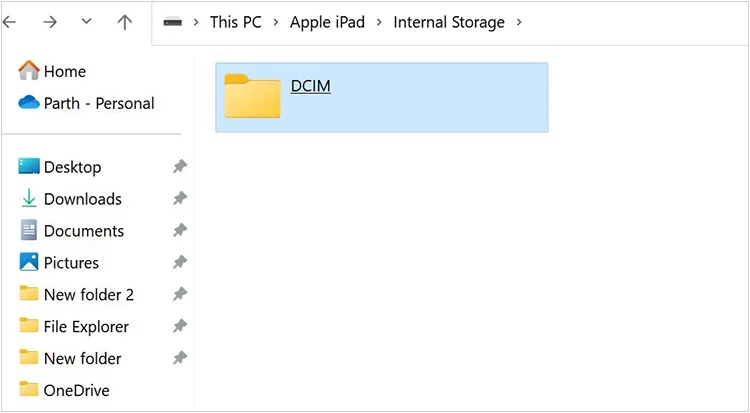
On your PC, open File Explorer (you can press Windows + E). In the left-hand sidebar, you should see your iPad listed under "Portable Devices" or "Devices and drives". It might appear as "Apple iPad" or similar.
-
Double-click on your iPad/iPhone to open it, and navigate to "Internal Storage" > "DCIM". Inside the DCIM folder, you'll find one or more folders (e.g., 100APPLE, 101APPLE) containing your photos and videos.
-
Open these folders to view your images. Now, you can select the photos you want to transfer. Drag and drop the selected photos to any folder on your computer, or copy and paste them to your desired location.
Part 6: FAQs About Transferring Photos from iPad/iPhone to Computer
Q1: What is the easiest way to transfer photos to a computer from an iPad or iPhone?
The methods in this guide are all easy to use. Which is the easiest way depends on your requirements. If you want to transfer your photos wirelessly, using iCloud Photos and Google Photos. If you want like the stable and bulk transfer, using iReaShare iPhone Manager will be the best.
Q2: Can I transfer photos from an iPad/iPhone to a PC with iTunes?
No, you generally cannot transfer photos from an iPad to a PC using iTunes. iTunes is primarily designed for syncing media from your PC to your iPad (music, videos, etc.) and for backing up your iPad. It doesn't really have a direct "Transfer photos from an iOS device to a PC" feature.
Q3: Can I use AirDrop to transfer photos between my iPad and computer?
Yes, you absolutely can use AirDrop to transfer photos (and other files) between your iPad and a Mac computer. But if your computer is Windows, you cannot use AirDrop to transfer your pictures.
Conclusion
No matter which method you choose, it's easy to transfer photos from your iPad or iPhone to your computer. Using iReaShare iPhone Manager can transfer pictures efficiently with quality, and manage your iPad data effortlessly. Anyway, consider your personal preferences for cloud storage versus direct connection, and pick the method that best fits your workflow.
Download for Win Download for Mac
Related Articles
How to Transfer Music from iPhone to Mac with Ease
Swiftly Transfer Photos from Samsung to PC | 7 Reliable Options
Back Up Photos from iPhone: 5 Ways to Save Your iPhone Pictures
How to Transfer Photos from iPhone to Android Without Hassle (6 Methods)
