


As smartphones become more integral to our lives, our photos have become one of the most valuable forms of data on our devices. However, the iPhone internal storage is still limited, so we need to back up photos from an iPhone to another place to release the space and ensure the precious image memories being safe. Read this guide, and learn about 5 methods. Then you can effortlessly back up your iPhone photos.
- Part 1: How to Back Up iPhone Photos to Computer via iReaShare iPhone Manager
- Part 2: How to Back Up Photos from iPhone to PC with iTunes
- Part 3: How to Back Up Pictures on iPhone to iCloud
- Part 4: How to Back Up iPhone Pictures to PC with Photos App
- Part 5: How to Store Pictures from iPhone to Google Photos
- Part 6: FAQs About Backing Up iPhone Photos
Part 1: How to Back Up iPhone Photos to Computer via iReaShare iPhone Manager
Safeguarding the photos stored on your iPhone is paramount, and one of the best ways to back up your iPhone photos is to use iReaShare iPhone Manager. This desktop application allows you to selectively transfer your iPhone photos after previewing them. It also supports one-click backup for your iPhone on your computer.
Main features of iReaShare iPhone Manager:
* Back up iPhone photos to PC or Mac without effort.
* Allow you to preview the thumbnail of your iPhone pictures on the interface.
* Enable you to transfer specific photos to your computer.
* All your iPhone photos will be saved with original quality and formats.
* Seamlessly back up iPhone contacts, videos, text messages, music, and more.
* Support iOS 5.0 and higher, including iOS 18.
Download iReaShare iPhone Manager.
Download for Win Download for Mac
Here's how to save pictures from an iPhone to a computer:
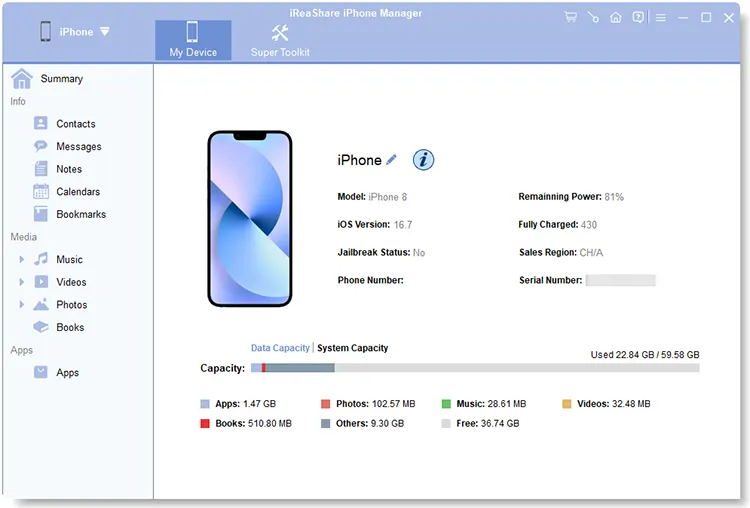
Step 1: Install iReaShare iPhone Manager on your computer, and launch it. Then connect your iPhone to the computer with a USB cable.
Step 2: Click "Trust" on the iPhone to make it trust your computer. Once done, you will see the connected interface.
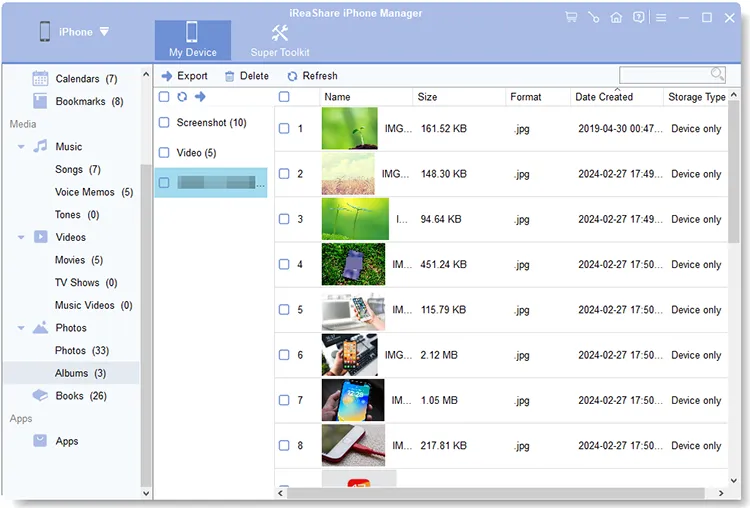
Step 3: Choose the "Photos" category, and select the pictures you want to back up. Then click "Export" to transfer them to your computer.
Part 2: How to Back Up Photos from iPhone to PC with iTunes
While primarily known for managing music and devices, iTunes (or Finder on newer macOS versions) can also be used to create a full backup of your iPhone, which includes your photos. However, please note that iTunes can sync photos from your computer to your iPhone only, so you can back up your photos only to the PC with iTunes.
Here are the steps:
Step 1: Connect your iPhone to your computer using a USB cable, and then launch iTunes on Windows.
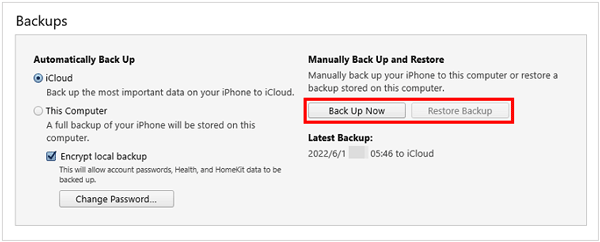
Step 2: In iTunes, click the iPhone icon near the top left, and navigate to "Summary".
Step 3: Under the "Backups" section, select "This computer". Then click the "Back Up Now" button. This will create a full backup of your iPhone data, including your photos, to your computer. Note that this backup is not easily browsable, and restoring photos requires restoring the entire backup.
Part 3: How to Back Up Pictures on iPhone to iCloud
iCloud is Apple's cloud storage service, offering a convenient and automatic way to back up your iPhone photos wirelessly. You can store your photos to your iCloud account, and then access them on different devices by logging in to your account. Also, you can back up your messages, notes, calendar, and more to iCloud.
Here's the guide:
Step 1: Ensure your iPhone is connected to a stable Wi-Fi network, and go to the Settings app on your iPhone.
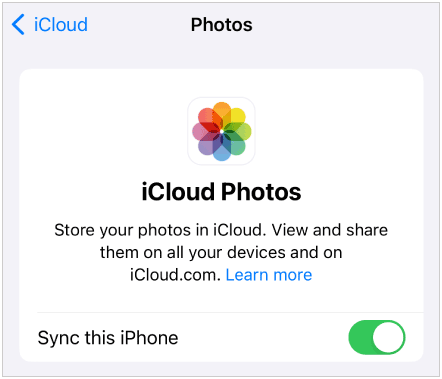
Step 2: Tap on your Apple ID name at the top of the screen, and choose "iCloud".
Step 3: Choose "Photos", and turn on "Sync this iPhone". Then your photos will be saved to your iCloud account via the network.
Part 4: How to Back Up iPhone Pictures to PC with Photos App
Windows offers a built-in application, the Photos app, which provides a straightforward method for importing and thus backing up your iPhone pictures to your PC. This eliminates the need for additional software and integrates seamlessly with the Windows environment.
Here's how:
Step 1: Employ a USB cable to establish a connection between your iPhone and your Windows PC. Ensure your iPhone is unlocked, and if prompted, tap "Trust This Computer".
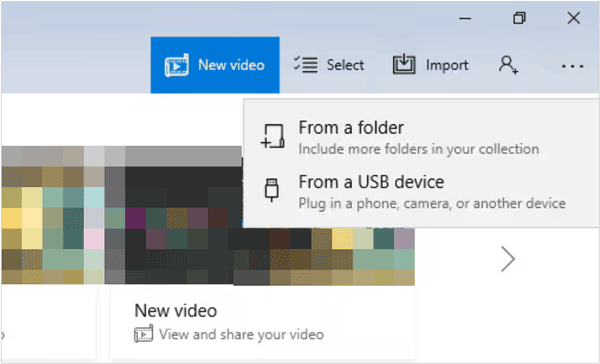
Step 2: On your Windows PC, locate the "Photos" app in the Start Menu and launch it. Within the Photos app, look for an "Import" option. This is often located in the top right corner of the window or accessible via a menu. Click on it.
Step 3: A dropdown menu or a new window may appear, presenting options for import sources. Choose your connected iPhone from the list of devices.
Step 4: The Photos app will now scan your iPhone for photos and videos. You will be presented with thumbnails of your media. You can choose to import all new items or select specific photos and videos you wish to transfer.
Step 5: Click the "Import" or "Continue" button. The Photos app will then begin transferring the chosen photos and videos to your computer. You can monitor the progress of the import.
Part 5: How to Store Pictures from iPhone to Google Photos
Google Photos is a popular cloud-based photo storage service that offers a convenient way to back up and access your iPhone photos across various devices.
Here's how to back up photos on an iPhone with Google Photos:
Step 1: Download the Google Photos app from the App Store on your iPhone and install it.
Step 2: The app will likely prompt you to enable the "Turn on Backup" icon. If not, go to your profile icon in the top right corner, tap "Photos settings", and then tap "Backup" to turn it on.
Step 3: You can typically choose between "Original quality" or "Storage saver". Then customize backup settings, such as whether to back up over cellular data and which albums to back up.
Step 4: Once enabled, Google Photos will automatically back up your new photos and videos to the cloud.

Part 6: FAQs About Backing Up iPhone Photos
Q1: Can I use both iCloud and Google Photos at the same time?
Yes, you can use both iCloud Photos and Google Photos for backups. Many people use iCloud for seamless integration with Apple devices and Google Photos for additional storage and features.
Q2: Is it possible to back up photos selectively (not the entire library)?
iCloud Photos does not allow selective photo backup; it syncs your entire library. However, you can manually back up specific photos using iReaShare iPhone Manager, which enables you to preview and select your photos before the backup.
Q3: Can I view my photos from any device once they're backed up?
Yes, as long as you're using iCloud Photos, you can view and access your photos from any Apple device signed into your iCloud account. If you're using third-party apps like Google Photos, you can access your photos from any device with the app or website.
Conclusion
If you want to preserve your precious memories, it's essential to back up your iPhone photos. You can use iReaShare iPhone Manager to back up your pictures from your iPhone to a PC or Mac without hassle. Besides, you can back up your photos to iCloud, Google Photos or other cloud storage space you want. The key is to find the method that best fits your lifestyle and storage preferences, ensuring that your photos are always backed up and protected.
Download for Win Download for Mac
Related Articles
Practical Guide: Transfer Files from iPhone to PC with Ease
Swiftly Print Text Messages from iPhone via 4 Methods
Resolved: How to Transfer Music from Computer to iPhone Without iTunes
How to Permanently Delete Photos from iPhone via Hassle-free Methods
