


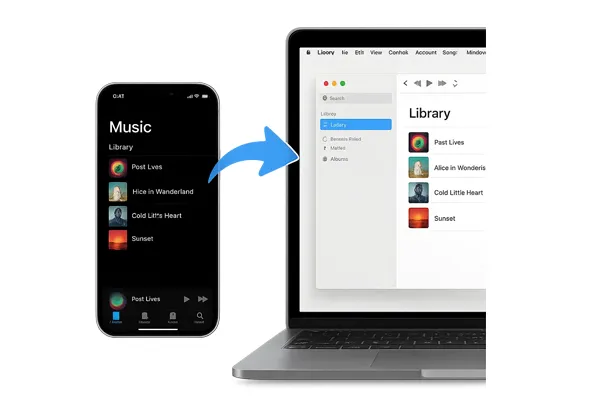
Do you want to transfer music from iPhone to Mac? This is a common need, whether you're switching devices, backing up your collection, or just want to enjoy your favorite songs on a bigger screen. Fortunately, there are 6 effective methods to get the job done, depending on the tools you prefer to use. Let's get started.
- Part 1: Transfer Music from iPhone to Mac via iReaShare iPhone Manager
- Part 2: Export Music from iPhone to Mac via Finder
- Part 3: Upload Music from iPhone to MacBook Pro via iCloud Music Library
- Part 4: Transfer Music from iPhone to Mac Air via AirDrop
- Part 5: Import Music from iPhone to MacBook Air via Apple Music
- Part 6: Get Music from iPhone to Mac via Google Drive
- Part 7: FAQs About iPhone to Mac Music Transfer
Part 1: Transfer Music from iPhone to Mac via iReaShare iPhone Manager
If you want to transfer your downloaded music files from your iPhone to your Mac, including your ringtones, songs, and other audio files, iReaShare iPhone Manager can do it well. It can copy all your music files from your iPhone to your Mac computer without losing any quality. Thus, you can enjoy the same quality songs on your Mac device.
Main features of iReaShare iPhone Manager:
* Seamlessly transfer music from iPhone to Mac.
* Allow you to create new playlists to organize your music files.
* Enable you to search for your songs by entering keywords so that you can fast locate the files.
* Help you transfer iPhone photos, contacts, e-books, and more media files.
* Move iPhone text messages, contacts, calendars, and more information to Mac for backup.
* Back up an iPhone to your computer without trouble.
* Restore data from backup to your iOS device.
* Support iOS 5.0 or higher, and Mac OS X 10.9 or later.
Download iReaShare iPhone Manager.
Download for Mac Download for Win
Here's how to export music from an iPhone to Mac with iPhone Manager:
Step 1: Download and install the Mac version of iReaShare iPhone Manager on your Mac. Then connect your iPhone to your Mac using a USB cable.
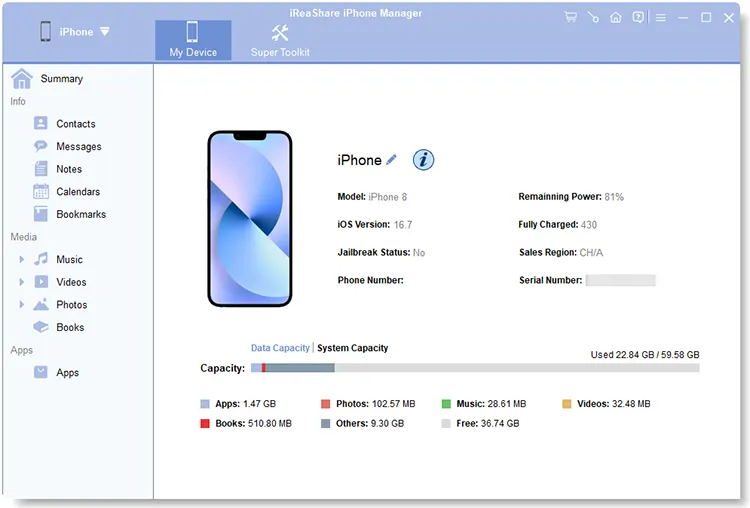
Step 2: Open iReaShare iPhone Manager. It will detect your iPhone, and require you to click "Trust" and enter your passcode on your iPhone.
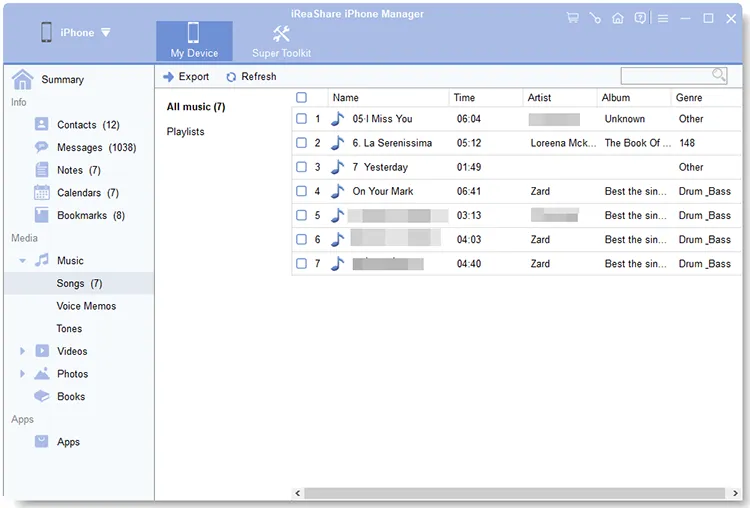
Step 3: Click the "Music" option. Then select the songs you want to transfer and choose "Export", and specify a destination folder on your Mac. Your music will be transferred from your iPhone to your MacBook.
Watch this video guide to transfer your music easily:
Part 2: Export Music from iPhone to Mac via Finder
For iPhones running iOS 13 or later, Finder on macOS Catalina and newer has replaced iTunes for managing your device. This method is ideal for syncing your entire music library or selected playlists. By the way, if your Mac is running macOS Mojave (10.14) or earlier, you'll use iTunes to transfer music. Their steps are similar.
Here's how to copy music from iPhone to Mac via Finder:
Step 1: Connect your iPhone to your Mac with a USB cable. Open a Finder window on your Mac. You should see your iPhone listed in the sidebar under "Locations".
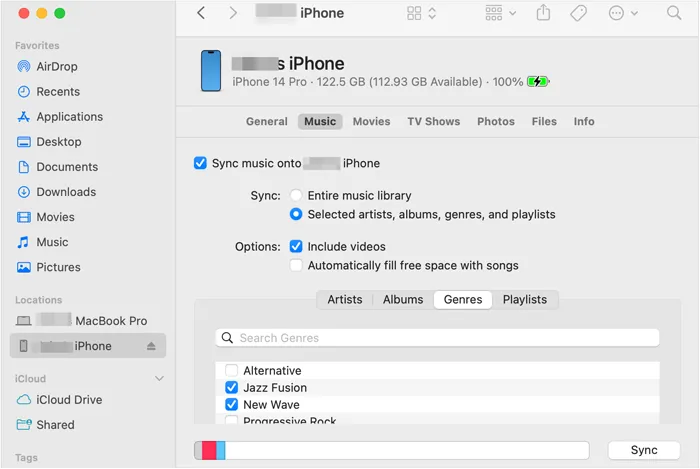
Step 2: Click on your iPhone in the Finder sidebar. In the main Finder window, click on the "Music" tab at the top.
Step 3: Here, you can choose to sync your entire music library or select specific artists, albums, genres, or playlists. Click the "Apply" or "Sync" button in the bottom right corner to start the transfer.
Part 3: Upload Music from iPhone to MacBook Pro via iCloud Music Library
iCloud Music Library (now part of Apple Music and iTunes Match) is a cloud-based service that lets you access your music collection across all your Apple devices. If your music isn't purchased from iTunes, it will be matched or uploaded to iCloud.
Here's how to upload music from your iPhone to your MacBook via iCloud Music Library:
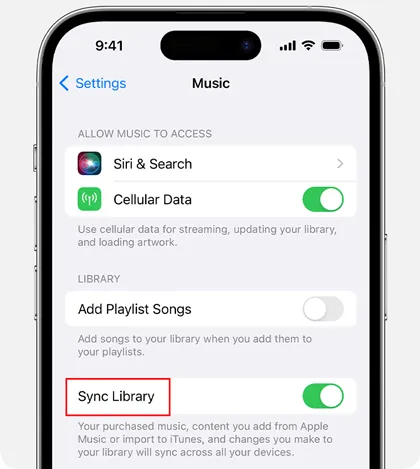
Step 1: On your iPhone, go to Settings > "Music" and turn on "Sync Library" (or "iCloud Music Library" on older iOS versions).
Step 2: On your MacBook Pro, open the Music app. Go to "Music" > "Settings" (or "Preferences" on older macOS). Under the "General" tab, make sure Sync Library is checked.
Step 3: Once enabled on both devices, your music library will begin syncing. This process can take some time depending on the size of your library. Your music will then be accessible within the Music app on your MacBook Pro.
Tips: If you have queries about backing up messages to iCloud, please open this guide.
Part 4: Transfer Music from iPhone to Mac Air via AirDrop
AirDrop is a convenient way to wirelessly share files between Apple devices that are in close proximity. While it's great for individual songs or small selections, it's not practical for large music libraries.
Here's how to send music files from iPhone to Mac Air via AirDrop:
Step 1: On both your iPhone and MacBook Air, ensure AirDrop is enabled (from Control Center on iPhone, or Finder > Go > AirDrop on Mac) and set to "Contacts Only" or "Everyone".
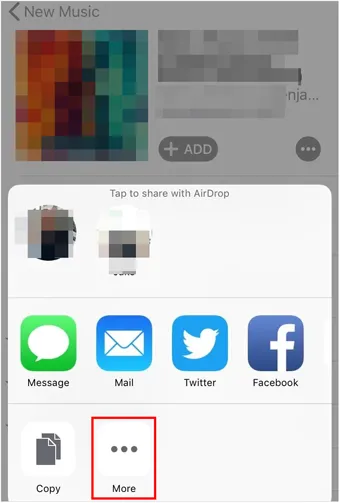
Step 2: On your iPhone, open the Music app. Find the song you want to transfer. Tap the "..." (More) icon next to the song, then tap "Share Song". Or you can go to the Files app to select the downloaded music files.
Step 3: Select your MacBook Air from the AirDrop options. On your MacBook Air, you'll receive an AirDrop notification. Accept the transfer, and the song will be downloaded to your Downloads folder or opened in the Music app.
Part 5: Import Music from iPhone to MacBook Air via Apple Music
If you have an Apple Music subscription, most of your music will be accessible automatically on your MacBook Air once Sync Library is enabled (as described in Part 3).
For music that is physically on your iPhone and not part of your Apple Music subscription, the Finder sync method (Part 2) is the primary way to get it onto your MacBook Air.
Part 6: Get Music from iPhone to Mac via Google Drive
Using cloud storage services like Google Drive is a versatile way to transfer music, especially if you want to access your files on non-Apple devices as well. This method requires you to have the music files themselves on your iPhone, not just streamable content.
Here's how to import music from iPhone to MacBook with Google Drive:
Step 1: Download and install the Google Drive app on your iPhone. Then log in to your Google Account.
Step 2: Tap the "+" icon to create new content. Then select "Upload". You'll need to navigate to the location of your music files.
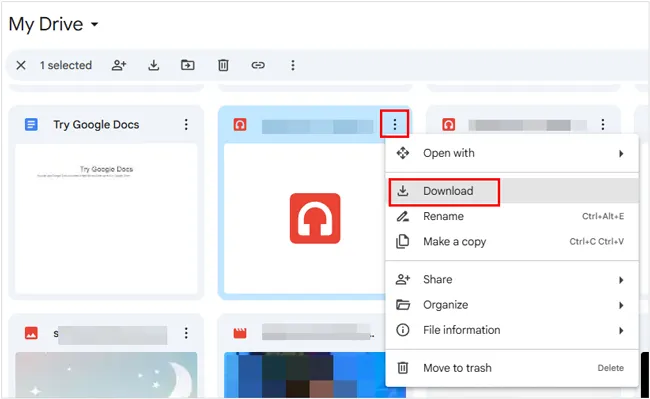
Step 3: After uploading your iPhone music to Google Drive, open a web browser and go to drive.google.com on your MacBook. Next, log in with your Google account. You can then download the uploaded music files to your Mac.
Part 7: FAQs About iPhone to Mac Music Transfer
Q1: What's the difference between purchased and non-purchased music?
The distinction between "purchased" and "non-purchased" music primarily revolves around ownership, licensing, and how you acquired the music. You can freely save and transfer the songs bought from the iTunes Store and Apple Music. For the non-purchased music, you usually need to subscribe to the service like Apple Music, YouTube Music, etc. Then you can sync your songs and library with a network across devices by logging in to your account.
Q2: Will I lose my music if I sync my iPhone to a new Mac?
Possibly. If you have music on your iPhone that you ripped from CDs or obtained from other sources and it's not part of your Apple Music Sync Library, then connecting to a new Mac and performing a standard sync will likely erase this music from your iPhone and replace it with whatever is in the new Mac's (likely empty) Music library. To avoid loss, please back up your music to cloud or an external storage device before syncing your iPhone to your new Mac.
Conclusion
It is easier to transfer music from your iPhone to your Mac than ever, isn't it? If you want to transfer and manage your local iPhone music files on your Mac, iReaShare iPhone Manager will be your good helper. But if you want to upload or synchronize your streamable music content between your devices, you need to use an Apple Music subscription. Anyway, choose the one that fits your workflow best and enjoy your music collection across all your devices.
Download for Mac Download for Win
Related Articles
How to Transfer Files from PC to iPhone Easily (8 Useful Solutions)
iTunes Could Not Back Up iPhone Because an Error Occurred: Fix It in 10 Ways
How to Transfer Android to iPhone Effortlessly: 5 Approaches
How to Transfer Data from iPhone to Android: 5 Powerful Solutions
