


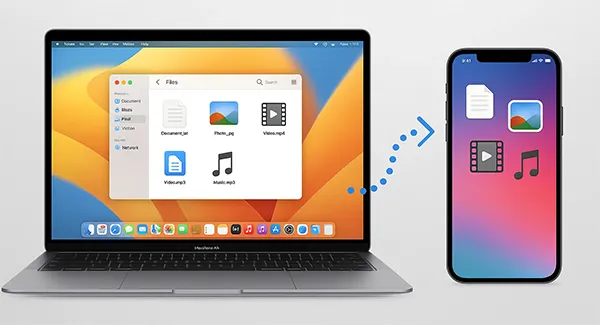
Many people often transfer files from Mac to iPhone and vice versa for kinds of purposes, including sending documents, pictures, audio files, bookmarks, videos, contacts, etc. If you want to copy your files from your Mac to your iPhone without effort, fortunately, this guide will help you, since there are 5 ways to achieve this. You can follow the correct steps provided below to transfer your files.
- Part 1: How to Transfer Files from Mac to iPhone via iReaShare iPhone Manager
- Part 2: How to Copy Files from Mac to iPhone Using Finder
- Part 3: How to Move Files from Mac to iPhone via AirDrop
- Part 4: How to Transfer Fata from Mac to iPhone via iCloud Drive
- Part 5: How to Send a File from Mac to iPhone Using External Storage
- Part 6: Q&A About File Transfer from Mac to iPhone
Take a quick look at these 5 methods' pros and cons:
| Method | Pros (Advantages) | Cons (Disadvantages) |
|---|---|---|
| iReaShare iPhone Manager | 1. Often simpler interface than Finder. 2. Excellent for bulk transfers and specific media types (e.g., data preview and selection before transferring them). 3. Bypasses some Apple restrictions for file placement. 4. The stable USB transfer is suitable for large file transfer. |
1. Requires downloading and installing a program on your Mac. 2. Requires a paid license for full features. 3. Supports USB connection only. |
| Finder | 1. Official, reliable, and free Apple method. 2. Ideal for full device backups and major content syncs (Music, Photos, Movies). 3. Good for transferring files to specific "File Sharing" apps. |
1. Primarily used for syncing media, not simple drag-and-drop file management (except for File Sharing apps). 2. Requires a USB cable connection. 3. Less intuitive for general document transfer than AirDrop/iCloud. |
| AirDrop | 1. Extremely fast for small files and quick, one-off transfers. 2. No cable or internet connection needed (uses local Wi-Fi/Bluetooth). 3. Simple drag-and-drop interface. |
1. Only works over short distances (proximity required). 2. Can be slow or unreliable for very large files or folders. 3. Requires both devices to have AirDrop enabled and discoverable. |
| iCloud Drive | 1. Allows access to files anytime, anywhere, on any device (Mac, iPhone, Web). 2. Files sync automatically and instantly across devices. 3. Excellent for documents that need regular editing/access. |
1. Requires a stable internet connection for upload and download. 2. Transfer speeds depend entirely on internet bandwidth. 3. Limited by the user's iCloud storage plan (free tier is only 5GB). |
| External Storage | 1. Ideal for transferring massive files or large volumes of data. 2. No internet connection required. 3. Fastest method if you use a fast drive/cable connection. |
1. Requires purchasing a USB drive and often a separate adapter for the iPhone. 2. Requires physical handling and connection of hardware. 3. Drive must be formatted to be compatible with both Mac and iOS. |
Part 1: How to Transfer Files from Mac to iPhone via iReaShare iPhone Manager
While Finder is the standard method, iReaShare iPhone Manager offers greater flexibility, speed, and ease of use, especially for managing media and direct preview. You can use this tool to transfer contacts, calendar events, bookmarks, books, and even iTunes backup files from your Mac to your iPhone.
Main features of iReaShare iPhone Manager:
* Transfer files from a Mac computer to an iPhone with ease.
* Allow you to preview your iPhone data on your computer.
* Keep your files with lossless quality during the process.
* Back up and restore iOS data on a computer without cloud storage.
* Restore backup data from your computer to your iPhone or iPad with ease.
* Compatible with iPhone 17 Pro Max/17 Pro/17/Air, iPhone 16/15/14/13/12/11/X, etc., running iOS 5.0 or later, including iOS 26.
Download iReaShare iPhone Manager.
Download for Win Download for Mac
Here's how to transfer data from a MacBook to an iPhone with this iPhone Manager software:
-
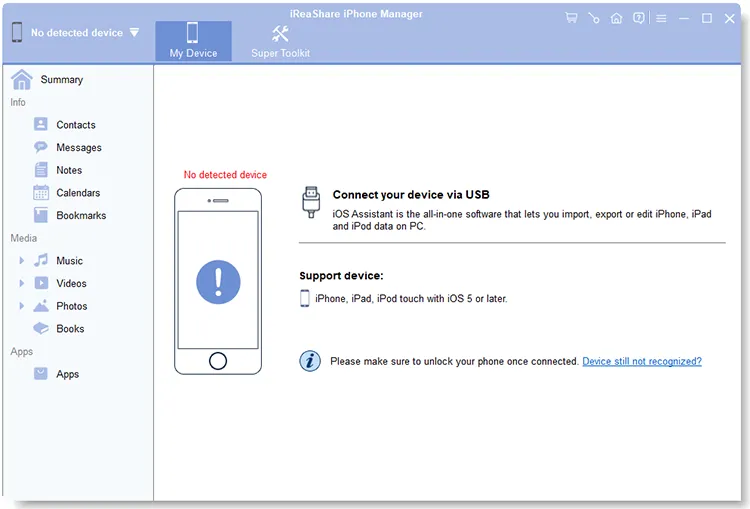
Please install the iReaShare iPhone Manager software on your Mac, and connect your iPhone to the Mac computer with a USB cable.
-
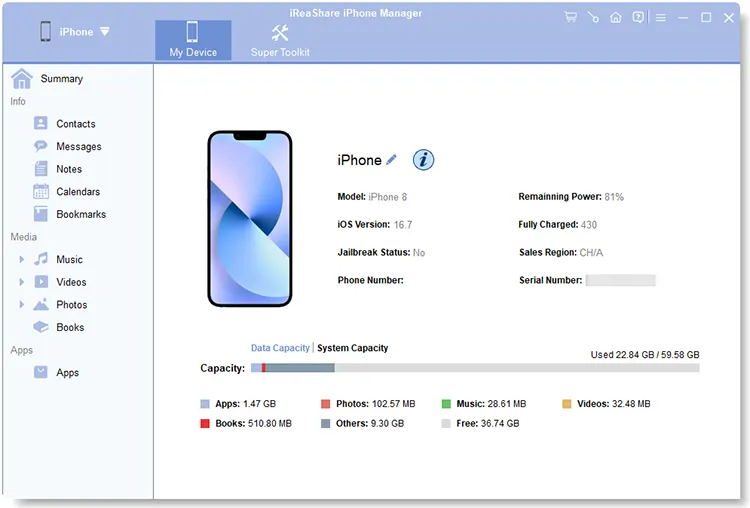
The software should automatically detect your device. Please click "Trust" on your iPhone if prompted. Then the connection will be built successfully.
-
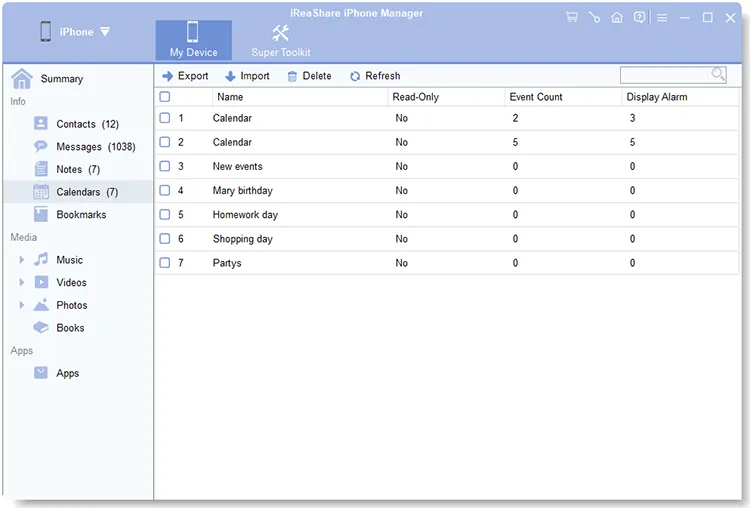
Within the software interface, click on the category of files you wish to transfer. Click the "Import", and then browse and select the files on your Mac. Finally, click "Open" or "OK" to transfer the files to your iPhone.
Part 2: How to Copy Files from Mac to iPhone Using Finder
Finder is the native way to manage and sync data between your Mac and your iPhone. It replaced iTunes for this function starting with macOS Catalina (and later). This method is primarily used for syncing media, backups, and for transferring files to apps that support "File Sharing".
How do I transfer files from Mac to iPhone via Finder? Here's the guide:
-
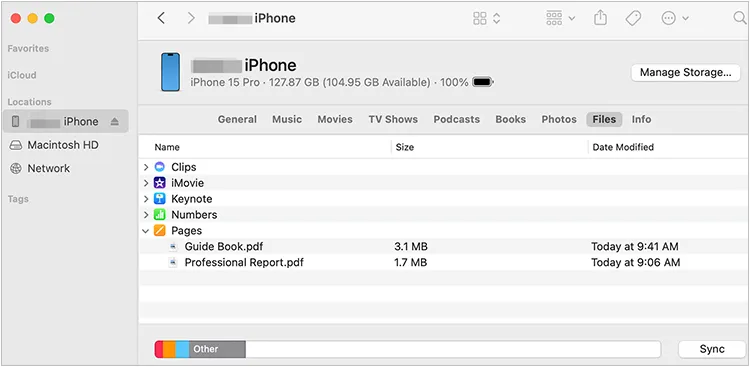
Connect your iPhone to your Mac using a USB cable. Open a new Finder window on your Mac. Your iPhone should appear in the sidebar under "Locations". Click on your device name.
-
If you are transferring documents to a specific app, click the "Files" tab at the top of the Finder window.
-
You will see a list of apps that can store files. Select the target app. Then, drag the desired files from your Mac desktop or folders directly onto the app's folder within the Finder window.
-
Once the transfer is complete, click the eject icon next to your iPhone's name in the Finder sidebar before disconnecting the cable.
Tips: You can also sync your messages from your iPhone to your Mac with 3 different methods.
Part 3: How to Move Files from Mac to iPhone via AirDrop
AirDrop is the fastest and most convenient wireless method for transferring a small number of files between nearby Apple devices. It uses a combination of Bluetooth and Wi-Fi to establish a peer-to-peer connection. However, it's not efficient when you transfer very large files.
Here are the steps:
-
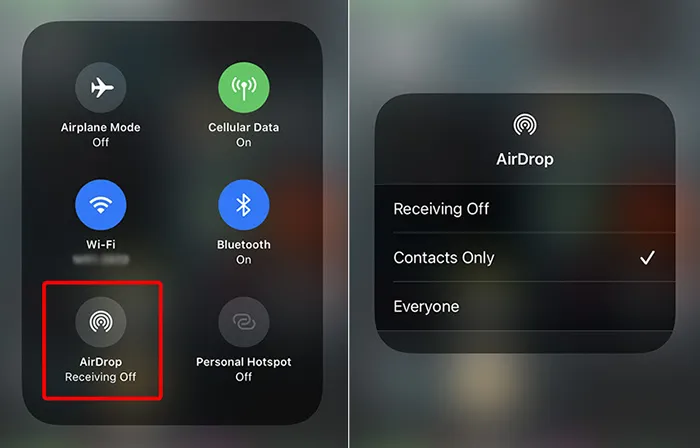
Swipe down (or up on older models) to open "Control Center", press and hold the network settings card, tap "AirDrop", and select "Contacts Only" or "Everyone" (recommended for quick use).
-
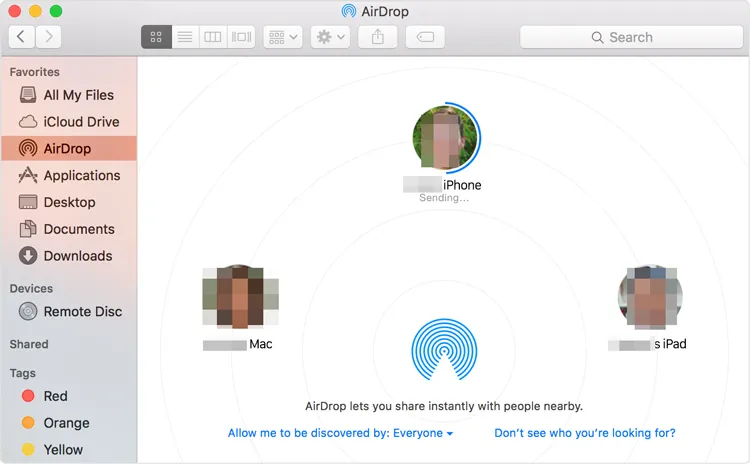
Open Finder, click "AirDrop" in the sidebar, and ensure the "Allow me to be discovered by" setting matches your iPhone setting. Bluetooth and Wi-Fi must be enabled on both devices.
-
Find the file(s) you want to send on your Mac. Right-click on the selected file(s), choose "Share", and then select "AirDrop".
-
Click on your iPhone's name/icon in the AirDrop window that appears. A notification will pop up on your iPhone asking to accept the file(s). Tap "Accept". Then you will receive the file on your iPhone.
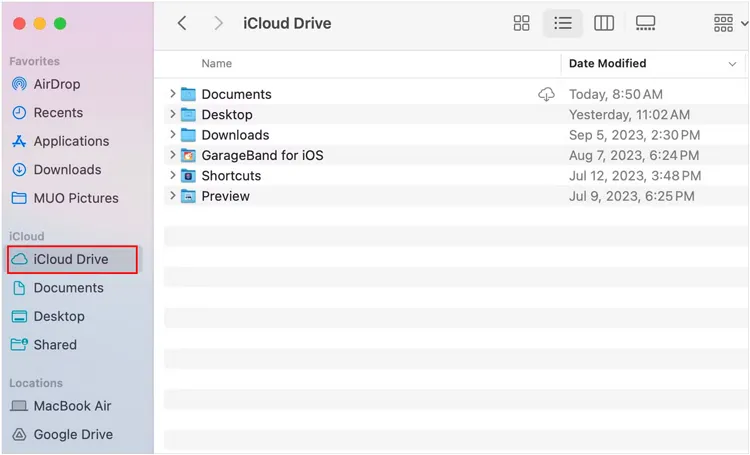
Part 4: How to Transfer Fata from Mac to iPhone via iCloud Drive
iCloud Drive is Apple's cloud-based storage service that seamlessly syncs files across all your Apple devices and the web. This is the ideal method for transferring documents that you need to access and edit regularly on both platforms without a cable.
Complete iMac to iPhone transfer with iCloud Drive:
-
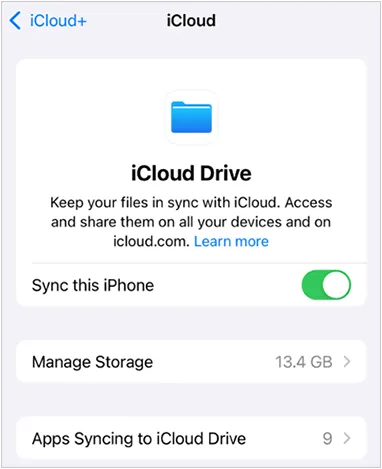
Ensure that iCloud Drive is enabled on both your Mac: in "System Settings" or "Preferences" > "Apple ID" > "iCloud", and your iPhone: open the Settings app > tap "[Your Name]" > "iCloud" > "iCloud Drive" > enable "Sync this iPhone".
-
On your Mac, simply drag the files you wish to transfer into the "iCloud Drive" folder (accessible via Finder's sidebar). The files will be uploaded to Apple's servers. The time required depends on the file size and your internet connection speed.
-
Open the "Files" app on your iPhone. Navigate to "iCloud Drive". The transferred files will appear there and can be opened, edited, or moved to another local folder on your iPhone.
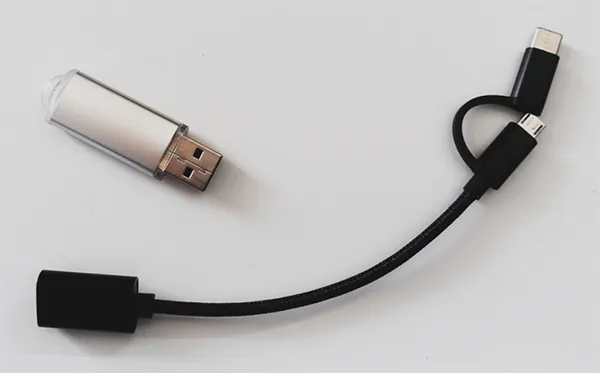
Part 5: How to Send a File from Mac to iPhone Using External Storage
For large transfers, or when you lack a stable internet connection (for cloud services) or a reliable cable (for Finder), an external storage device is a physical, reliable solution. This requires a USB flash drive or external SSD/HDD and, usually, a connection adapter for the iPhone.
Here's how:
-
Connect the external storage device to your Mac. Drag the desired files from your Mac onto the drive. Ensure the drive is formatted correctly for compatibility with both Mac and iPhone.
-
Eject the drive from your Mac. Use a compatible adapter (like a Lightning-to-USB or USB-C hub/adapter) to connect the external drive to your iPhone.
-
Open the "Files" app on your iPhone. The external drive should appear under "Locations" in the sidebar. Tap on it to view the files.
-
Navigate to the files on the external drive. Tap and hold a file, then select "Move" or "Copy". Choose a local folder on your iPhone, e.g., "On My iPhone" as the destination to complete the transfer.
Part 6: Q&A About File Transfer from Mac to iPhone
Q1: AirDrop isn't working for file transfer from Mac to iPhone, what should I do?
- Make sure both devices have Bluetooth + Wi-Fi on.
- They must be within about 30 feet (9 meters).
- Set AirDrop to "Everyone" temporarily.
- Restart both devices if it still fails.
Q2: What's the best way to transfer very large files (like movies or game files) from Mac to iPhone?
Finder and iReaShare iPhone Manager are the best ways to transfer very large files from Mac to iPhone and vice versa. They allows you to connect your devices with USB, and can import/export files without effort. If you have an external storgae device like USB flash drive, you can it to transfer your large files as well.
Q3: Can I transfer my podcasts from Mac to iPhone?
If you are using the Apple Podcasts app on your Mac, the easiest method is to use iCloud's Sync Library feature. This will sync your subscriptions, play position, and stations across all your Apple devices. Besides, you can use Finder to sync your podcasts.
Conclusion
There are several ways to transfer files from your Mac to your iPhone, and the best method depends on your preferences and the type of files you're moving. If you want to move your files at once with USB, you can use Finder, iReaShare iPhone Manager, or an external storage device.
Besides, iReaShare iPhone Manager provides more features for you to manage your iOS data on your computer, such as editing contacts, adding new bookmarks, removing backup files, etc. It's a practical option if you need a comprehensive tool.
Download for Win Download for Mac
Related Articles
How to Transfer Files from iPhone to Android (New Guide)
Easily Transfer Files from PC to iPhone Using USB Cable: 3 Tested Methods
How to Transfer Data from iPhone to iPhone 17 Without Trouble
Transfer Large Video Files from iPhone to PC (No Quality Loss)
