

TL;DR:
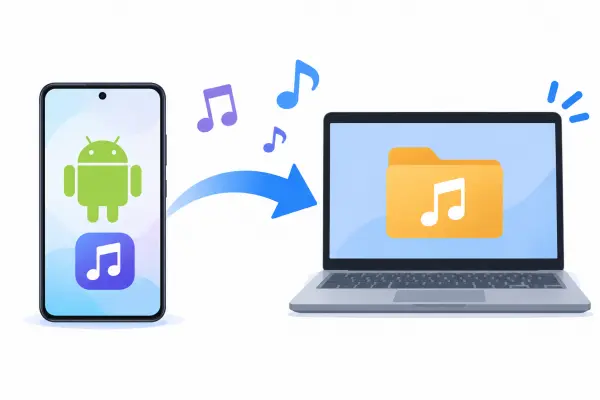
You can transfer music from Android to computer using a USB cable, cloud storage, Bluetooth, Quick Share, an SD card, or a dedicated Android transfer tool. A USB connection is usually the simplest choice for moving large music collections, while cloud storage and wireless sharing are convenient when you don't have a cable. If you want to preview and selectively export multiple songs, iReaShare Android Manager provides a more organized way to manage your music files on a computer.
Transferring music from an Android phone to a computer is useful when you want to back up your favorite songs, free up phone storage, or enjoy your music on another device. Whether your songs are stored in the Music folder, Download folder, or another location on your phone, you can move them to a computer in several ways.
Some methods require a USB cable, while others let you transfer music wirelessly or through cloud storage. In this article, we'll introduce six practical ways to transfer music from Android to a Windows PC or Mac, so you can choose the one that best suits your needs.
- Method 1. Transfer Music from Android to Computer Through USB Cable
- Method 2. Move Music from Android to Computer Wirelessly with Cloud Storage
- Method 3. Transfer Music from Android to Computer Using Bluetooth
- Method 4. Sync Music from Android to Computer via Quick Share
- Method 5. Transfer Music from Android to Computer Through SD Card
- Method 6. Transfer Songs from Android to Computer by iReaShare Android Manager
Comparison of 6 Methods to Transfer Music from Android to Computer
Before getting started, take a look at the following comparison to understand the requirements of each method.
| Method | Connection | Internet Required | Windows Compatibility | Mac Compatibility |
|---|---|---|---|---|
| USB Cable | Wired | No | Yes | Requires an MTP tool |
| Cloud Storage | Wireless | Yes | Yes | Yes |
| Bluetooth | Wireless | No | Yes | Depends on device support |
| Quick Share | Wireless | No | Yes | No |
| SD Card | Physical Storage | No | Yes | Yes |
| iReaShare Android Manager | USB / Wi-Fi | No | Yes | Yes |
Method 1. Transfer Music from Android to Computer Through USB Cable
Using a USB cable is one of the easiest ways to transfer music from an Android phone to a Windows computer. You don't need to install additional transfer software or connect to the internet. Once your phone is recognized, you can browse its folders and copy your music files directly.
Here's how:
Step 1. Connect your Android phone to your Windows computer using a compatible USB cable.
Step 2. Unlock your phone and swipe down from the top of the screen to open the notification panel.
Step 3. Tap the "Charging this device via USB" notification.
Step 4. Under Use USB for, select "File Transfer".
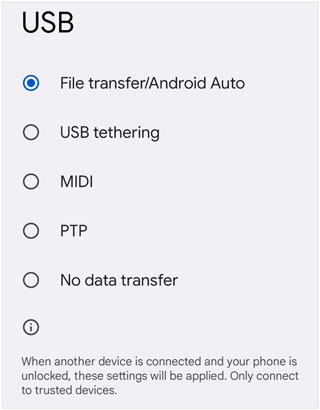
Step 5. On your computer, open File Explorer and double-click your Android device under This PC.
Step 6. Open "Internal Storage" and navigate to the Music folder or another folder containing your songs.
Step 7. Select the music files you want to transfer, right-click and choose "Copy".
Step 8. Open a destination folder on your computer, right-click and select "Paste". Your selected music files will be copied to the computer.
- No internet connection or third-party software is required.
- Supports copying multiple music files at once.
- Provides a direct way to access music stored in your phone's internal storage.
- Requires a compatible USB data cable.
- You may need to troubleshoot the connection if your computer doesn't recognize your phone.
- The built-in MTP file browsing experience is less convenient for selectively managing large music libraries.
Not all USB cables support file transfers. If your phone only charges after being connected, try another data-capable cable. For Mac users, an MTP-compatible file transfer application may be needed to browse Android storage.
Method 2. Move Music from Android to Computer Wirelessly with Cloud Storage
If you don't have a USB cable nearby, cloud storage is another convenient way to move music from Android to a computer. Services such as Google Drive, OneDrive, and Dropbox allow you to upload music from your phone and download it on your computer using the same account.
Here, we'll use Google Drive as an example.
Here's how:
Step 1. Open the Google Drive app on your Android phone and sign in to your Google account.
Step 2. Tap the "+" button and select "Upload".
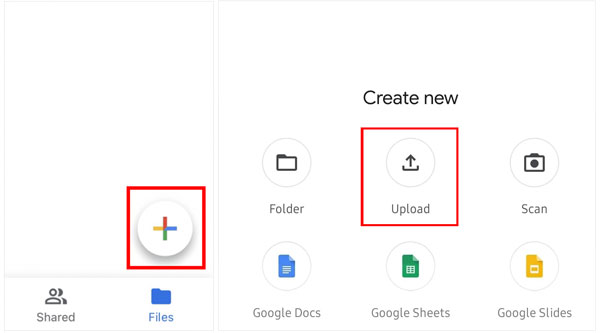
Step 3. Browse your phone's storage and select the music files you want to transfer.
Step 4. Wait for the selected songs to finish uploading.
Step 5. On your computer, open a web browser and visit Google Drive.
Step 6. Sign in with the same Google account used on your Android phone.
Step 7. Find the uploaded music files, select them, and click the "Download" option.
Step 8. Choose where to save the downloaded songs on your computer if prompted. Once the download is complete, you can play or manage the music files on your computer.
- No USB cable or direct phone-to-computer connection is needed.
- Works with both Windows and Mac computers.
- Lets you access uploaded music from different devices.
- Requires a stable internet connection for uploading and downloading.
- Free cloud storage is limited, so large music collections may require additional storage.
- Uploading and downloading many large audio files can take time.
Method 3. Transfer Music from Android to Computer Using Bluetooth
Bluetooth is a convenient wireless option if you only need to transfer a few songs and don't want to use a USB cable or cloud storage. Most Android phones and many Windows computers support Bluetooth, so you can send music files directly between them without an internet connection.
Here's how:
Step 1. On your Windows computer, open "Settings" and go to "Bluetooth & devices".
Step 2. Turn on Bluetooth and pair your computer with your Android phone.
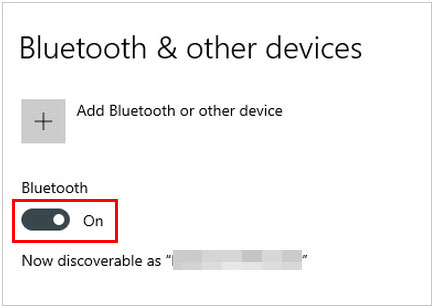
Step 3. On your computer, search for and open "Send or receive files via Bluetooth".
Step 4. Select "Receive files" to make your computer ready to accept incoming music.
Step 5. On your Android phone, open the file manager and locate the songs you want to transfer.
Step 6. Select the music files, tap "Share", and choose "Bluetooth".
Step 7. Select your paired computer from the available devices.
Step 8. Accept the incoming files on your computer if prompted, and wait for the transfer to finish.
Step 9. Choose a destination folder if Windows asks where to save the received files.
- Doesn't require a USB cable or internet connection.
- Allows you to send music files wirelessly.
- Doesn't require cloud storage or an additional file-sharing account.
- Bluetooth is generally slower than USB and Wi-Fi-based transfer methods.
- Not ideal for transferring large music collections.
- Both devices must support Bluetooth file sharing.
Method 4. Sync Music from Android to Computer via Quick Share
Quick Share is Google's wireless file-sharing feature that allows you to exchange files between nearby Android devices and Windows computers. It is a convenient alternative to Bluetooth when you want to send multiple music files without connecting your phone to your computer with a cable.
To use Quick Share, install the Windows application on your computer and make sure both devices have Bluetooth and Wi-Fi enabled.
Here's how:
Step 1. Download and install Quick Share for Windows on your computer. If you're using a Samsung PC, install Samsung's Quick Share application instead.
Step 2. Open Quick Share on your Windows computer and configure your device visibility.
Step 3. On your Android phone, open the file manager and locate the music files you want to share.
Step 4. Select the songs and tap "Share".
Step 5. Choose "Quick Share" from the sharing options.
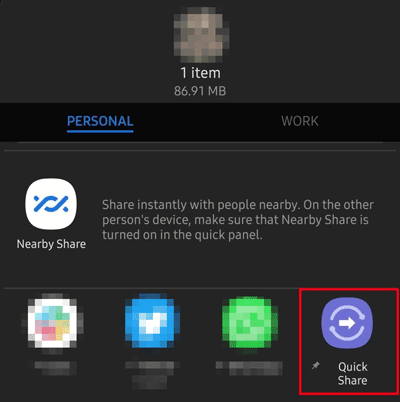
Step 6. Select your Windows computer from the nearby devices list.
Step 7. If prompted, check the pairing PIN and accept the sharing request on your computer.
Step 8. Wait for the transfer to finish. The received music files are usually saved in the Quick Share folder under Downloads.
- Transfers music wirelessly without uploading files to cloud storage.
- Supports sharing multiple files.
- Convenient for transferring files between nearby devices.
- Requires a compatible Windows computer and Android device.
- Both devices need Bluetooth and Wi-Fi or Ethernet enabled.
- Devices need to be nearby, and initial setup may take a little time.
Method 5. Transfer Music from Android to Computer Through SD Card
If your Android phone supports a microSD card, you can use it as an intermediary storage device to transfer music to your computer. This method is especially useful if you have a large music collection and don't want to rely on an internet connection. (How to transfer SD card to computer without trouble?)
Here's how:
Step 1. Insert a microSD card into your Android phone if one isn't already installed.
Step 2. Open the file manager on your phone and locate the music files you want to transfer.
Step 3. Select the songs and choose "Copy" or "Move".
Step 4. Navigate to the SD card's Music folder and paste the selected files there.
Step 5. Once the transfer is complete, safely eject the SD card from your phone.
Step 6. Insert the SD card into your computer's card reader. If your computer doesn't have one, use an external card reader.
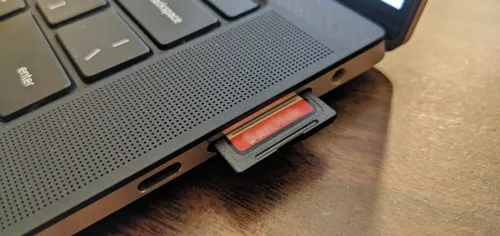
Step 7. Open the SD card in File Explorer on Windows or Finder on Mac.
Step 8. Find the transferred music files, select them, and copy them to a folder on your computer.
- Doesn't require an internet connection or USB connection between the phone and computer.
- Suitable for transferring multiple songs at once.
- Useful for moving large music collections.
- Requires a phone that supports expandable storage.
- A compatible SD card reader may be necessary.
- Removing the card repeatedly can be inconvenient.
Method 6. Transfer Songs from Android to Computer by iReaShare Android Manager
If you want a more organized way to transfer music from Android to computer, iReaShare Android Manager is worth considering. It is a desktop Android data management tool that lets you browse, preview, select, export, and manage music files from your phone on a Windows PC or Mac. Unlike manually browsing folders, the program provides a dedicated Music category, making it easier to locate and select the songs you need.
Main Features of iReaShare Android Manager
- Transfer music between an Android phone and a computer.
- Preview and selectively export music files instead of copying an entire folder.
- Manage audio files, including copying, moving, and deleting songs.
- Transfer other Android data, such as contacts, SMS, photos, videos, and eBooks.
- Connect an Android device to a computer through USB or Wi-Fi.
- Full work with most Android devices, including Samsung, Redmi, Xiaomi, OPPO, and vivo.
How to transfer music from Android to computer with iReaShare Android Manager
-
Download and install iReaShare Android Manager on your Windows PC or Mac. Launch the software and connect your Android phone to the computer using a USB cable.
-
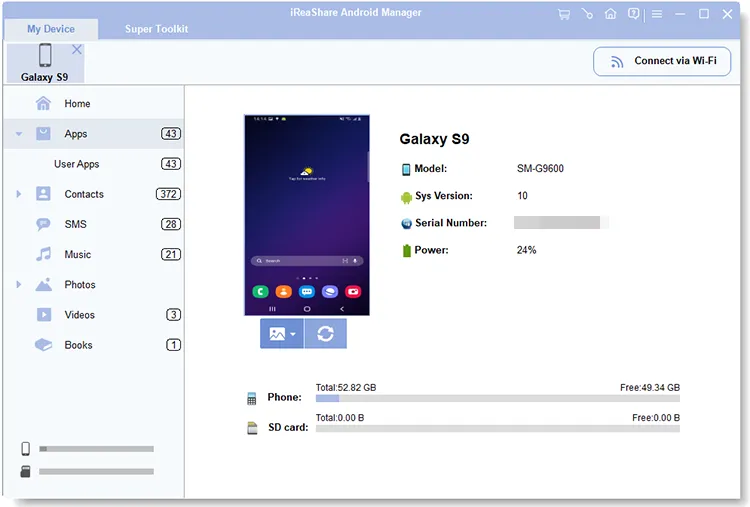
Enable USB debugging on your Android phone by following the on-screen instructions. Once the connection is established, the software will display your phone's information.
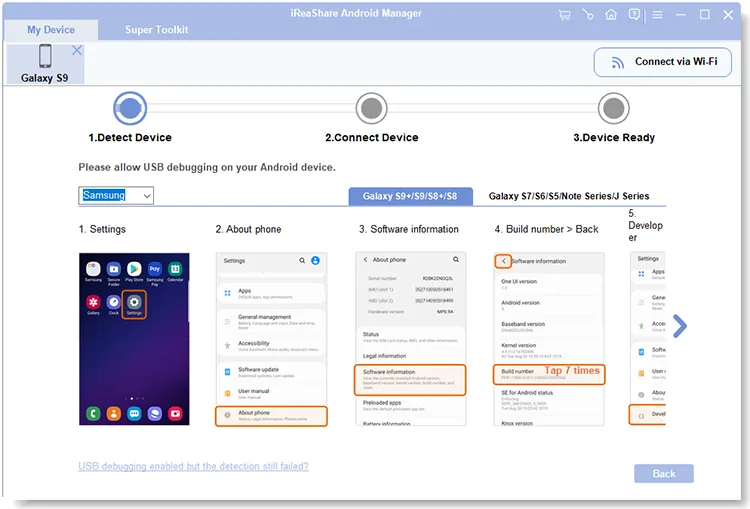
-
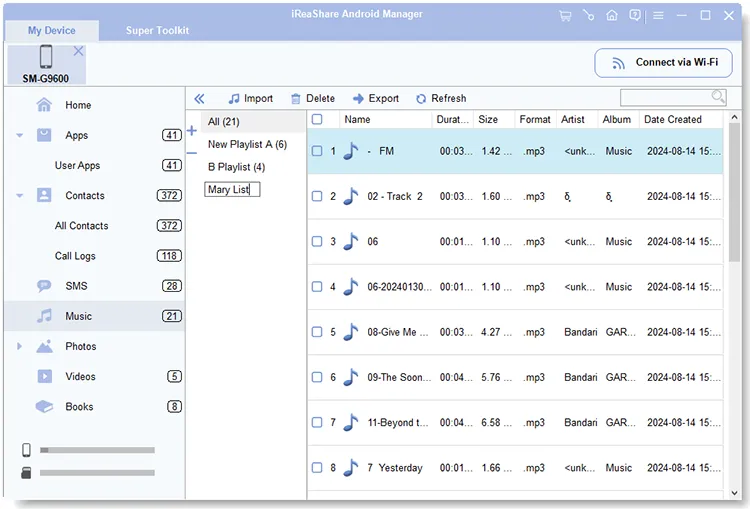
Navigate to the "Music" category in the left panel to view the songs stored on your Android phone.
-
Select the music files you want to transfer and click the "Export" icon. Then choose a destination folder on your computer to save the selected songs.
You can also watch the following video tutorial to learn how to transfer music from your Android phone to your computer using iReaShare Android Manager.
- Supports selective music transfer and batch exporting.
- Provides a dedicated interface for browsing and managing music files.
- Supports USB and Wi-Fi connections.
- Offers additional Android data management features.
- Requires installing third-party software on your computer.
- Some advanced features may require a paid license.
- USB connection may require enabling USB debugging.
Conclusion
That's everything you need to know about how to transfer music from Android to computer. We've introduced six commonly used methods, covering both wired and wireless options, so you can choose the one that works best for your devices and preferences.
If you're looking for a more convenient way to browse, select, and export music files from your Android phone, iReaShare Android Manager is worth trying. It provides a straightforward desktop interface for managing and transferring your music, making it easier to keep your favorite songs organized on your computer.
Related Articles
How to Back Up Music on Android: 5 Ways to Safeguard Your Songs
How to Add Music to Android Phone in 5 Ways (New Guide)
How to Transfer Music from Android to Android Without Hassle
How to Transfer Music from Computer to Android in 5 Practical Ways