


"I got my first MacBook just recently and im having trouble syncing my phone to the Mac without iCloud, especially for photos. I want to download them to the MacBook organized in the folders that are on my iphone. Is this possible at all?"
- From Reddit
So, you want to sync iPhone to Mac, and then you can get the same folders and files on both your devices, right? If yes, go ahead. This guide has displayed 6 effective methods. As long as you follow the steps below, you can easily sync different iPhone data to your MacBook with USB or wirelessly.

- Part 1: Sync iPhone with Mac via Finder
- Part 2: Sync iPhone to Mac via iReaShare iPhone Manager
- Part 3: Sync iPhone Wirelessly with Mac via iCloud
- Part 4: Sync iPhone to Mac via Photos App (Photos and Videos Only)
- Part 5: Sync iPhone to Mac Wirelessly via AirDrop
- Part 6: Sync iPhone with MacBook Wirelessly via Synctrain
- Part 7: Q&A About Syncing iPhone to Mac
Compare the benefits and weaknesses of these methods:
| Method | Pros | Cons |
|---|---|---|
| 1. Finder | 1. No third-party software needed. 2. Supports full local backups and comprehensive media management. |
1. Interface can be unintuitive. 2. The wireless synchronization is slower than wired. |
| 2. iReaShare iPhone Manager | 1. Supports selective data transfer (e.g., just specific texts). 2. Back up most iPhone data to Mac at once. 3. Sync iPhone data to Mac via USB without a network. 4. The transferred data is accessible on Mac. |
1. Requires software app installation. 2. Most advanced features require a paid registration. |
| 3. iCloud | 1. Completely automatic and wireless. 2. Data stays updated across all devices in real-time. |
1. Only 5GB of free storage. 2. Requires a constant internet connection. 3. Recurring monthly costs for more space. |
| 4. Photos App | 1. Optimized for high-res media. 2. Easy to offload and delete photos from phone to save storage. |
1. Restricted to photos and videos only. 2. Usually requires a cable connection for stability. |
| 5. AirDrop | 1. Near-instant wireless transfer. 2. No internet or cables required. 3. Built into the OS. |
1. Only practical for small batches of files. 2. Requires devices to be within Bluetooth/Wi-Fi range. |
| 6. Synctrain | 1. Wireless management without using iCloud. 2. Supports choosing to sync entire folders or specific files. 3. Stream audio and video files directly without downloading the entire file. |
1. Requires third-party software. 2. Wireless sync speeds are slower than wired USB-C transfers. |
Part 1: Sync iPhone with Mac via Finder
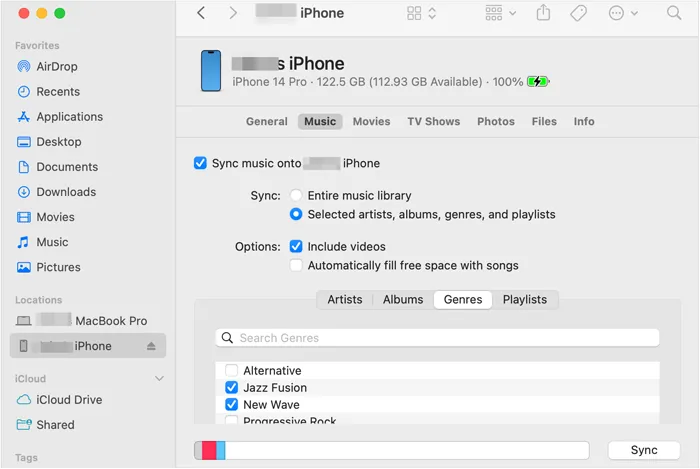
Since the retirement of iTunes on macOS, Finder has become the primary hub for local syncing. This method is best for managing large media libraries (music, movies, and TV shows) and creating full local backups. You can use it to sync your iPhone to your Mac via USB or wirelessly.
To sync iPhone with MacBook via Finder:
-
Connect your iPhone to your Mac using a USB cable. Then open Finder on Mac, and select your iPhone from the sidebar under "Locations".
-
If prompted, click "Trust" on both your Mac and iPhone. On Mac, navigate through the tabs (Music, Movies, Files, etc.) to select specific content to sync.
-
Click "Sync" in the bottom right corner.
Part 2: Sync iPhone to Mac via iReaShare iPhone Manager
For users who find Finder too restrictive, the dedicated tool - iReaShare iPhone Manager - can offer more flexibility. This software allows for selective data transfer, meaning you can move specific messages, contacts, or photos without performing a full sync. It can also back up various data types to Mac at once, and save the data in easily accessible formats.
Main features of iReaShare iPhone Manager:
* Sync iPhone to Mac via a USB cable.
* Selectively transfer iPhone data to a computer.
* Enable you to sync contacts, text messages, notes, photos, videos, music, voice memos, etc.
* Back up and restore iPhone on a MacBook or Windows PC without cloud storage space.
* No data overwriting or ads.
* Highly compatible with iOS 5.0 or later, including iOS 26.
Download iReaShare iPhone Manager.
Download for Win Download for Mac
Guide to syncing iPhone to Mac via iReaShare iPhone Manager:
-
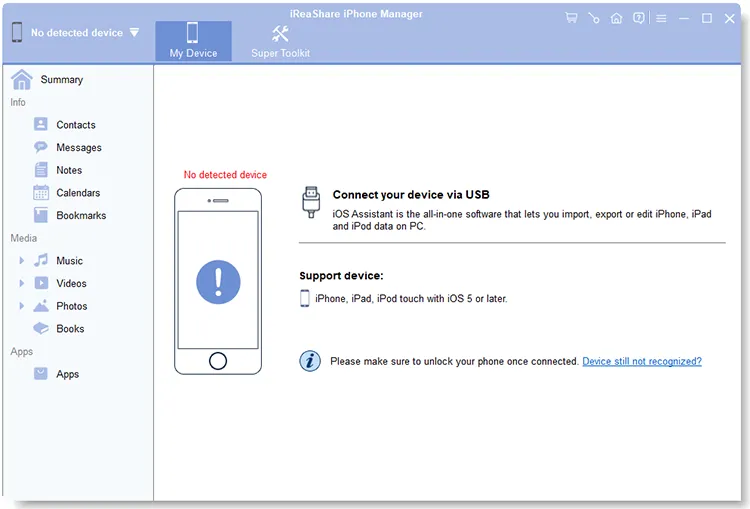
Download and launch the iPhone Manager software on your Mac. Open it, and connect your iPhone to the Mac via a USB cable.
-
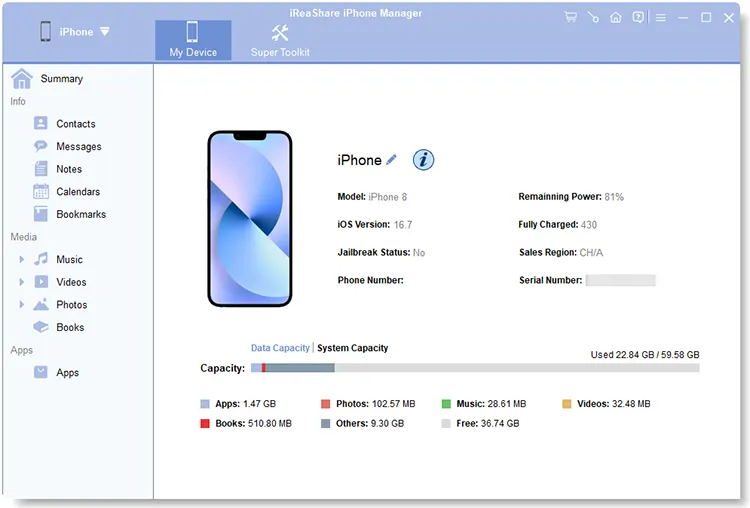
Unlock your iPhone, and click "Trust". Then the software will quickly recognize your mobile device.
-
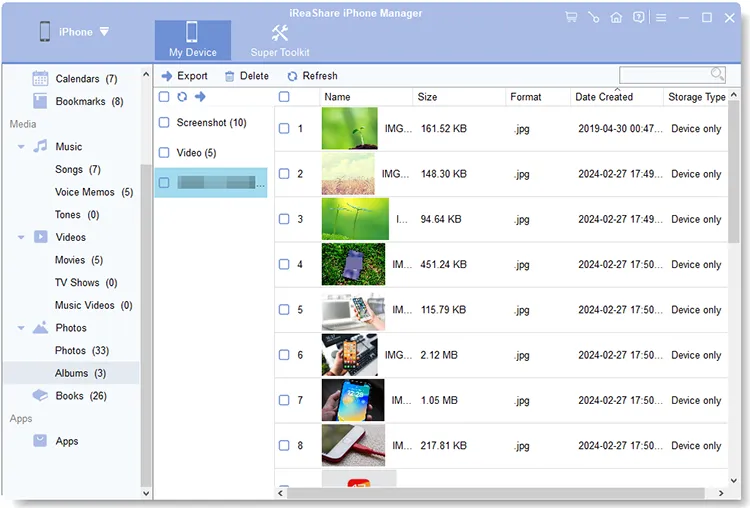
Choose a data type, and select the specific files you want to sync by checking. Then click "Export" to save them to your Mac computer.
Part 3: Sync iPhone Wirelessly with Mac via iCloud
iCloud is the most seamless method as it works in the background. It ensures that your notes, reminders, calendars, and documents are identical on all devices. This way requires you to have adequate cloud storage space on your iCloud account.
Here's how to sync your phone to your Mac wirelessly via iCloud:
-
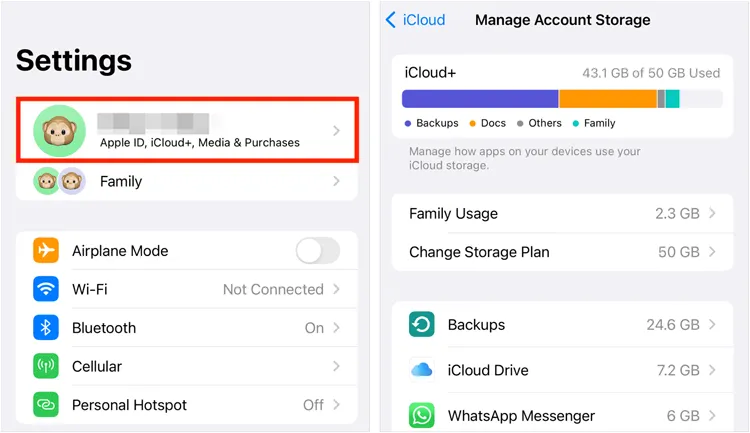
On your iPhone, go to Settings > "[Your Name]" > "iCloud". Then toggle on the apps you want to sync (Photos, Notes, iCloud Drive, etc.).
-
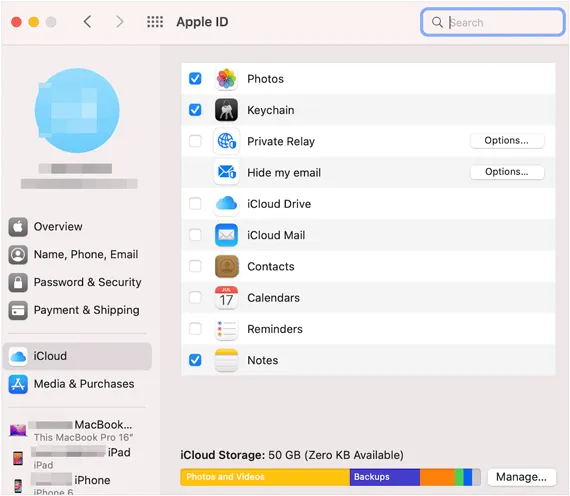
On your Mac, go to "System Settings" > "[Your Name]" > "iCloud" and ensure the same boxes are checked.
-
Data will now update automatically whenever you are connected to Wi-Fi.
Part 4: Sync iPhone to Mac via Photos App (Photos and Videos Only)
If your primary concern is offloading heavy media files to save space on your phone, the Photos App is the most efficient built-in tool for photos and videos.
Here's how:
-
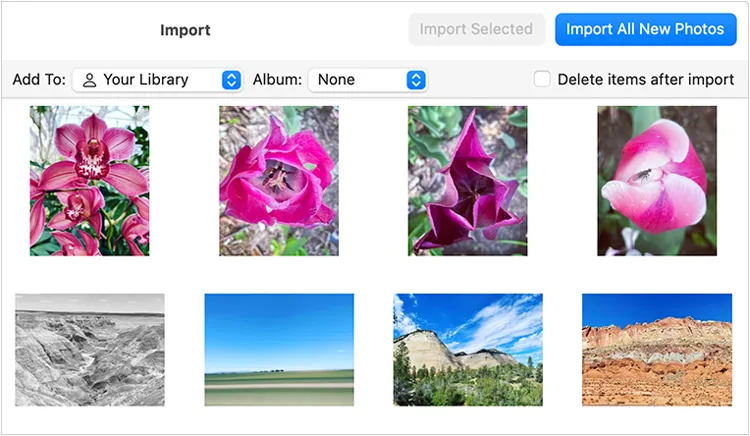
Plug your iPhone into your Mac, and open the Photos app on the computer.
-
Click on your iPhone device name in the sidebar.
-
Select "Import All New Photos" or highlight specific videos and click "Import Selected".
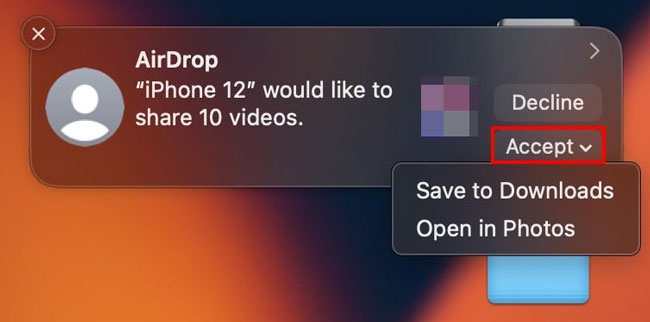
Part 5: Sync iPhone to Mac Wirelessly via AirDrop
AirDrop isn't a "sync" in the traditional sense, but it is the fastest way to move individual files or small batches of data instantly without cables or cloud storage. If you just want to sync some files, AirDrop is good.
To sync iPhone to Mac wirelessly via AirDrop:
-
Enable AirDrop on both devices, and set to "Everyone" or "Contacts Only" to connect the iPhone to the MacBook wirelessly.
-
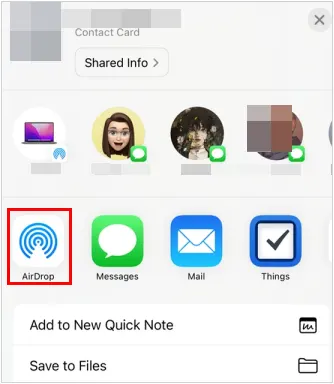
On your iPhone, select a file, tap the "Share" icon, and choose "AirDrop".
-
Select your Mac from the list. The file will appear instantly in your "Downloads" folder on the MacBook.
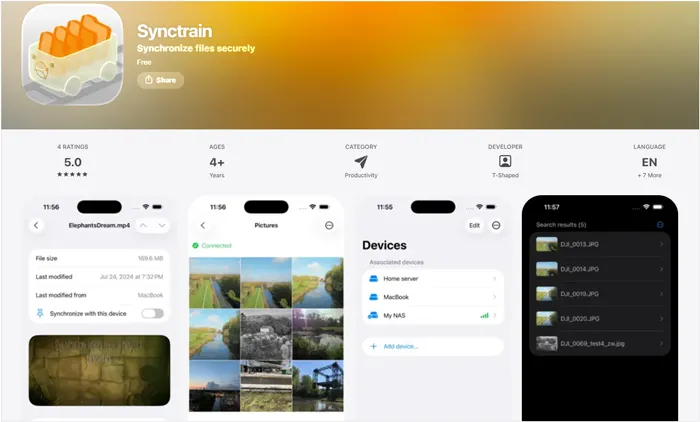
Part 6: Sync iPhone with MacBook Wirelessly via Synctrain
To sync your iPhone with your MacBook wirelessly using Synctrain, you are essentially setting up a peer-to-peer connection based on the Syncthing protocol. Unlike standard iCloud or Finder syncing, Synctrain allows for selective, decentralized file synchronization.
Here are the steps:
-
Download Synctrain from the App Store on your iPhone (requires iOS 17.0+). Then install the Syncthing application on your MacBook. Ensure both devices are connected to the same Wi-Fi network.
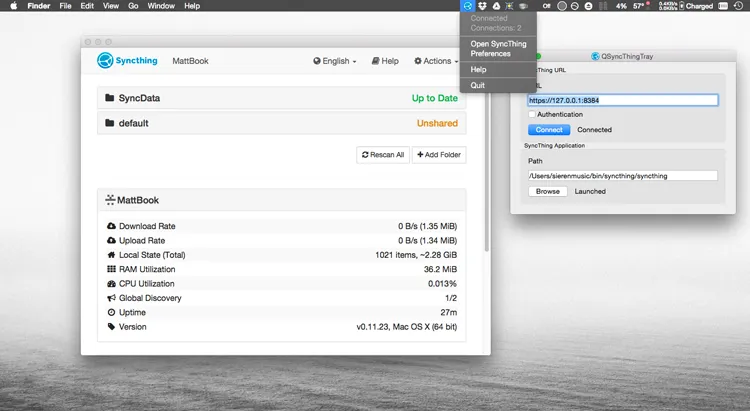
-
Open Syncthing on Mac, open the Syncthing web interface, and complete most configuration on the web UI. Next, locate your device ID in the settings or actions menu.
-
Open the Synctrain app on your iPhone, and locate the device ID for your iPhone within the Synctrain settings. On your MacBook's Syncthing interface, add a new remote device. You will need to input the device ID of your iPhone.
-
On your iPhone's Synctrain app, you should receive a prompt to accept the connection from your MacBook. Accept the request. Once connected, the devices will recognize each other and appear in each other's device lists.
-
On your MacBook's Syncthing interface, create a new folder for the content you wish to sync. Then share this folder with your iPhone by selecting it from your connected devices.
-
On your iPhone's Synctrain app, you will receive a notification about the shared folder. Accept it and choose a local folder in the iOS Files app to store the synchronized files.
Part 7: Q&A About Syncing iPhone to Mac
Q1: Does syncing affect my battery life?
Yes, but minimally. Wireless syncing (via iCloud or Wi-Fi) consumes battery because the device's radio stays active to upload data. For large transfers, it is always recommended to be connected to a power source.
Q2: Why are my iMessages not syncing on my Mac?
This is usually a configuration issue. Ensure that on your iPhone, Settings > "Messages" > "Send & Receive" has your phone number and email checked. On your Mac, open the Messages app > "Settings" > "iMessage" and ensure "Enable Messages in iCloud" is turned on.
Q3: What are the disadvantages of syncing iPhone to Mac?
- Storage Space: A full backup can take up dozens of gigabytes on your Mac's hard drive.
- Privacy: If you share a Mac with others, your synced personal data (like messages or photos) might be accessible if you don't use separate user profiles.
- Data Overwrite: If you sync with a new library, you may accidentally delete existing media on the iPhone.
Conclusion
Syncing your iPhone with your Mac ensures that your data is consistently updated across devices. If you prefer "set it and forget it", you can use iCloud. But if you want to sync your iPhone to Mac offline with USB, iReaShare iPhone Manager and Finder can help. The former allows you to directly preview and select your files on Mac, and the transferred data will not overwrite your existing files on your Mac.
Besides, if you want to try new tools, Synctrain and Syncthing may be suitable. In short, whether wired or wireless, syncing is a simple yet powerful way to make the most of your Apple ecosystem.
Download for Win Download for Mac
Related Articles
How to Transfer Photos from Mac to Android: Full Guide with 6 Solutions
Solve Notes Not Syncing Between iPhone and Mac in 9 Ways
Back Up Android to Mac Without Hurdle: 5 Useful Solutions
iPhone File Explorer on Windows 11/10 PC | Evaluate 9 File Viewers
