


If you want to ensure the safety of your iPhone data, you can back up your iPhone to Mac. When you face a system failure, lose your device, or factory reset your iOS device, you can easily restore your content with the backup. This guide provides 5 effective backup methods, so you can back up iPhone to Mac step by step.
- Part 1: How to Back Up iPhone to Mac Using Finder
- Part 2: How to Back Up iPhone to MacBook via iReaShare iPhone Manager
- Part 3: How to Back Up iPhone on a MacBook with AirDrop
- Part 4: How to Back Up iPhone to a MacBook with Google Drive
- Part 5: How to Back Up iPhone Onto MacBook via Image Capture
- Part 6: Q&A About iPhone Backup on Mac
Compare these 5 backup methods:
| Method | Pros | Cons |
|---|---|---|
| Finder (Mac with macOS Catalina or later) | 1. Full backup of all data. 2. Fast and reliable. 3. Does not require internet. |
1. Requires a USB cable. 2. Takes up storage space on your Mac. 3. Manual backup. |
| iReaShare iPhone Manager | 1. Allows selective backup of data. 2. Can manage and transfer files between Mac and iPhone. 3. User-friendly interface. |
1. Requires software installation. 2. Some features require a paid version. |
| iCloud | 1. Automatic backup with Wi-Fi. 2. Access your data from anywhere. 3. No need for cables. |
1. Limited free storage (5GB). 2. Requires internet connection. 3. Can't back up everything (e.g., apps). |
| Google Drive | 1. Convenient cloud backup for photos, videos, and contacts. 2. Works across platforms. |
1. Doesn't back up apps, settings, or system data. 2. Limited storage without paid plan. |
| Image Capture (Mac) | 1. Quick and easy for photos and videos. 2. No need for iTunes or iCloud. 3. Doesn't require internet. |
1. Only backs up media files (photos, videos). 2. Doesn't back up apps or settings. |
Part 1: How to Back Up iPhone to Mac Using Finder
Since macOS Catalina, Finder has been the primary tool for local backups, replacing the legacy iTunes. Thus, you can use Finder to back up your iPhone to your Mac via USB.
Here are the steps:
-
Connect your iPhone to your MacBook using a USB-C cable. Open Finder and select your iPhone from the sidebar under "Locations".
-
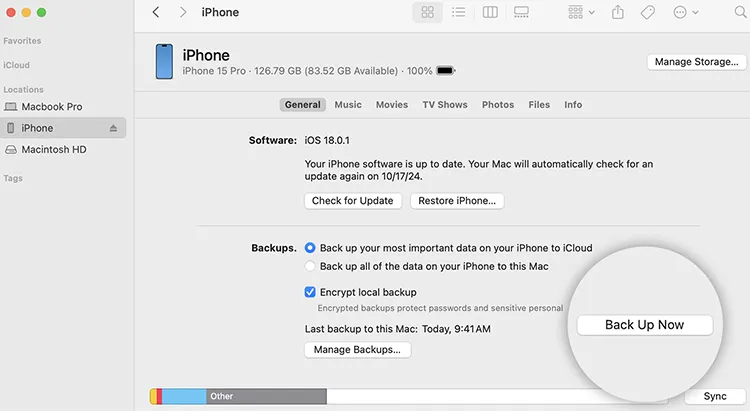
If prompted, tap "Trust" on your iPhone and enter your passcode. In the "General" tab, select "Back up all of the data on your iPhone to this Mac".
-
Select "Encrypt local backup" to include passwords and Health data if needed. Then click "Back Up Now".
Part 2: How to Back Up iPhone to MacBook via iReaShare iPhone Manager
For users who find Finder a bit too restrictive, a flexible tool - iReaShare iPhone Manager - will be more suitable, which supports a "pick-and-choose" approach. You can preview your iPhone data on the interface, so you can selectively back up your contacts, messages, photos, videos, music, books, notes, calendars, etc., from your iOS device to your MacBook.
Main features of iReaShare iPhone Manager:
* Back up iPhone to Mac at once via USB without Finder or iTunes.
* Enable you to view and selectively transfer your iPhone files to your computer.
* Support the transfer of text messages, bookmarks, movies, voice memos, songs, documents, etc.
* Restore your data from your Mac to your iOS device without hassle.
* Allow you to access your backup data on your computer.
* Compatible with iOS 5.0 or later, including iOS 26.
Download this iPhone backup software on your computer.
Download for Mac Download for Win
HHere's how to back up an iPhone to a MacBook with iReaShare iPhone Manager:
-
Download and install the Mac version of this backup software on your Mac. Then open it, and connect your iPhone to the computer with a USB cable.
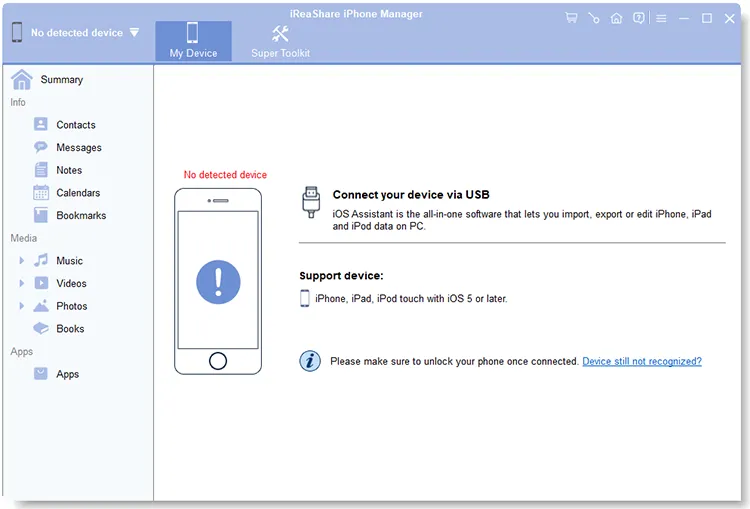
-
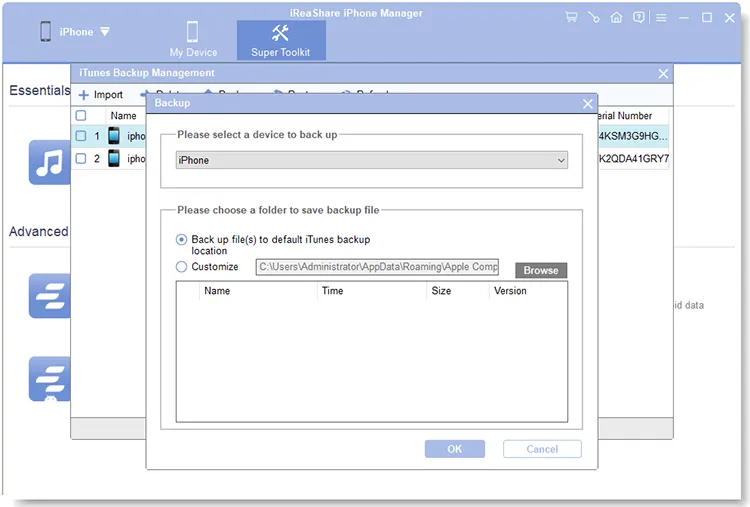
Click "Trust" on your iPhone, and the program will recognize your device. To back up various data types at once, you can click "Super Toolkit" > "iTunes Backup and Restore".
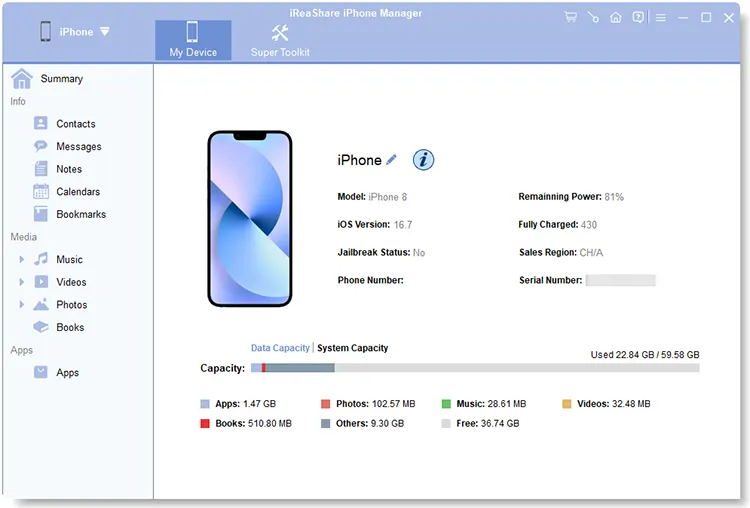
-
Choose the "Backup" feature and opt for your iPhone device. Then you can select a folder to save your backup data. Finally, tap on "OK" to start the backup process.
Part 3: How to Back Up iPhone on a MacBook with AirDrop
If you just want to back up several files to your MacBook, you can utilize AirDrop. It can send your files from your iPhone to Mac without an Internet.
Here's the guide:
-
Please enable "Bluetooth" and "Wi-Fi" on both your iPhone and Mac devices. Then open "Finder" > "AirDrop", and set "Allow me to be discovered by" to "Everyone" or "Contacts Only".
-
On your iPhone, go to Settings, tap "General" > "AirDrop", and select "Everyone for 10 Minutes". Next, navigate to the files you want to back up.

-
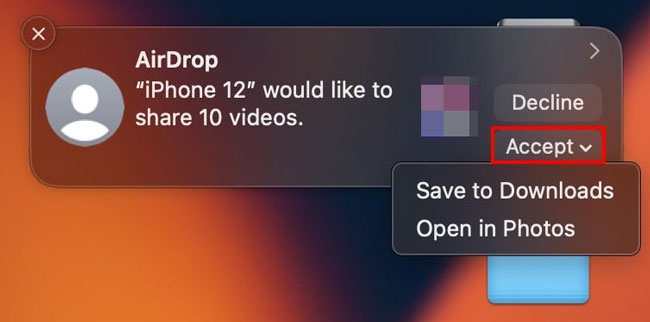
Select the files on your iPhone, and click "Share" > "AirDrop". Then select your Mac's name. Then click "Accept" > "Save to Downloads" on your Mac.
Part 4: How to Back Up iPhone to a MacBook with Google Drive
Google Drive offers an alternative cloud-based backup service for iPhone users who don't want to use iCloud. While it doesn't back up everything like iCloud does, it can store photos, videos, contacts, and documents. Besides, you can download the files to your Mac after uploading.
Here's how to back up iPhone to a MacBook via Google Drive:
-
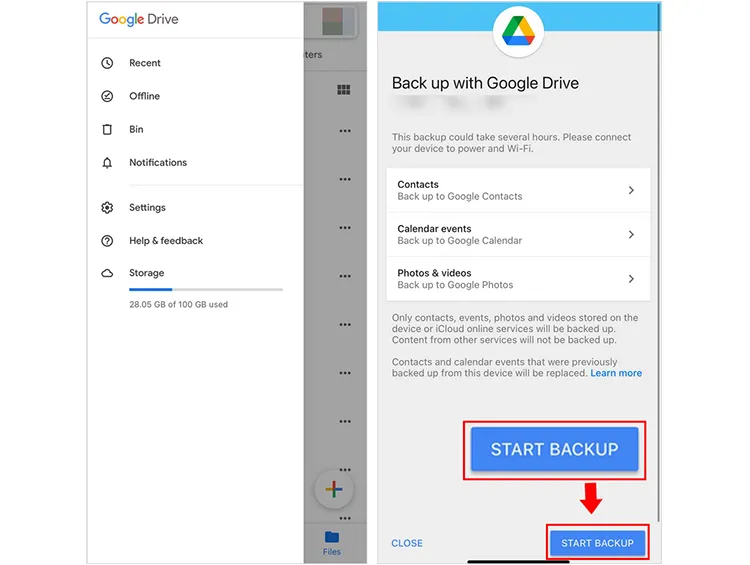
Open the Google Drive app on your iPhone. Log in to or sign up for an account. Then click the "Menu" icon > "Settings" > "Backup".
-
Select the content you want to back up, and click "Start Backup".
-
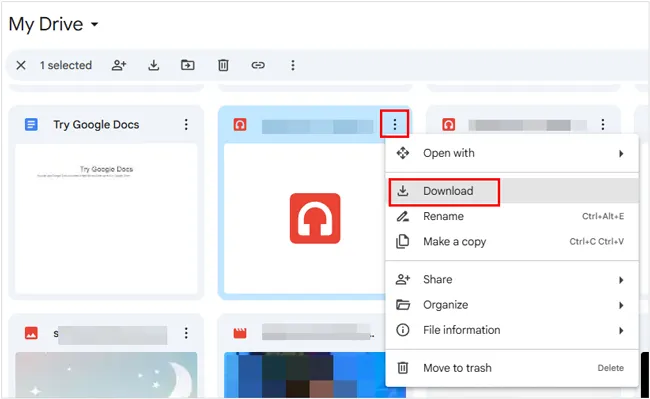
Once finished, you can access these files on your MacBook by visiting the Google Drive website or using the desktop app.
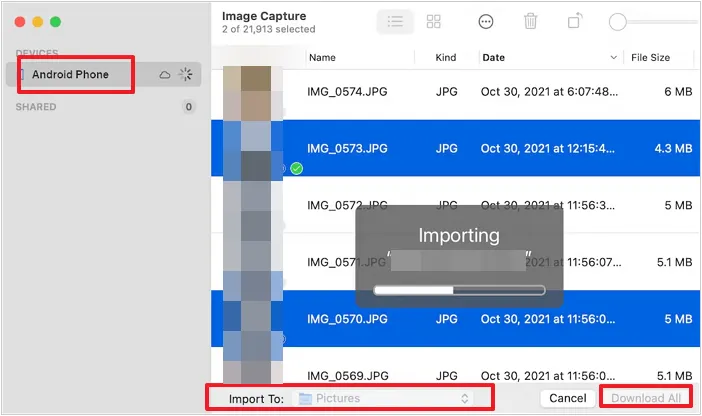
Part 5: How to Back Up iPhone Onto MacBook via Image Capture
If you only want to back up videos and photos from your iPhone, you can use Image Capture, a built-in macOS application.
To back up iPhone onto a MacBook via Image Capture:
-
Connect your iPhone to your Mac using a USB cable.
-
Open Image Capture on your Mac (found in the Applications folder). Then select your iPhone from the list of devices.
-
Choose the folder where you want to save your photos and videos. Then select a destination folder in the "Import To" dropdown at the bottom, and click "Download All".
Part 6: Q&A About iPhone Backup on Mac
Q1: Is it better to back up an iPhone to iCloud or a computer?
It depends on your priority. iCloud is more convenient because it happens automatically over Wi-Fi. However, a computer backup (Finder) is faster for restoring large amounts of data and doesn't require a monthly subscription fee.
Q2: Why won't my iPhone back up to my Mac?
There can be several reasons why your iPhone isn't backing up to your Mac:
- Connectivity issues: Ensure your iPhone is properly connected to the Mac via a cable or wireless network.
- Outdated software: Make sure both your macOS and iOS are up to date.
- Insufficient storage: Your Mac might be out of space for the backup.
- Trust settings: Check that your iPhone is trusting the Mac, and enter the correct passcode.
Q3: Does iPhone backup on Mac include everything?
Almost. A Finder backup includes nearly all your device's data and settings. However, it does not include content already synced to the cloud (like iCloud Photos or Apple Music) or FaceID/TouchID settings for security reasons. By the way, it also depends on which method you choose for iPhone backup.
Conclusion
It's simple to back up an iPhone to a Mac computer, right? With the methods above, you can back up your iPhone data with USB or wirelessly. If you prefer the comprehensive and specific file management, you can try iReaShare iPhone Manager. This tool supports one-click backup and restore, and selective file transfer. You can back up your iPhone to Mac without data loss.
Download for Mac Download for Win
Related Articles
How to Back Up iPhone Without iTunes: 5 Reliable Backup Solutions
5 Ways on Switching from iPhone to Android Step by Step
Sync iPhone to Mac Effectively and Safely: 6 Syncing Approaches
Transfer Files from PC to iPhone Without iTunes (7 Methods)
