TL;DR:
While photo corruption is a frustrating issue caused by hardware wear or file transfer errors, most damaged images can be successfully salvaged using targeted technical solutions. Depending on the root cause, you can recover your files with different specific methods.
- Command-Line & Advanced Code Methods (For Technical Users): This includes running the Windows CHKDSK command to fix underlying storage media file system errors, using ExifTool via command-line to extract intact embedded preview images, and leveraging the HxD Hex Editor to manually inspect and rewrite broken raw binary code.
- Simple & User-Friendly Graphic Tools (For Regular Users): This involves utilizing fully automated software like File Repair to fix broken file structures and headers with a few clicks, or using web-based design platforms like Canva to visually enhance and restore photos with minor artifacts or color distortion.
Digital photography has made capturing memories easier than ever, but it has also introduced a unique vulnerability: file corruption. Opening a cherished photo only to find a blank screen, a "format not supported" error, or a pixelated, gray-blocked mess can be incredibly frustrating.
Fortunately, file corruption isn't always a death sentence for your images. This guide explains why photos get corrupted and corrupt photo repair method. Then you can effectively protect your digital gallery in the future.
Part 1: Why Do Photos Get Corrupted?
To fix a corrupted photo, it helps to understand what went wrong. Photo corruption typically occurs when the data within the file is improperly written, altered, or lost. The most common culprits include:
- Storage Media Degradation: Memory cards (SD cards) and hard drives have limited lifespans. Bad sectors can develop over time, corrupting the data stored on those specific parts of the drive.
- Interrupted File Transfers: Unplugging a camera, phone, or USB drive while photos are transferring to a computer is a leading cause of broken file structures.
- Sudden Power Loss: If your camera battery dies mid-shot, or your computer shuts down while saving an image, the file header may not write correctly.
- Software Crashes: Glitches in photo editing software or operating system crashes during a save cycle can scramble a file's code.
- Malware or Virus Attacks: Malicious software can deliberately alter or encrypt file data, rendering your images unreadable.
Part 2: How to Repair Corrupted Photos?
Depending on the severity of the damage, different methods can be used to salvage your images. Always make a copy of the corrupted file before attempting any repairs so you don't accidentally cause further damage to the original.
Take a quick look at their pros and cons first:
| Method | Pros | Cons |
|---|---|---|
| CHKDSK Command | 1. Built-in free tool with no installation required. 2. Highly effective at fixing underlying file system and storage device errors. |
1. Requires command-line usage, which can be intimidating for casual users. 2. Only repairs storage media issues, not corruption inside the photo file itself. |
| File Repair | 1. Uses advanced AI to automatically enhance quality and correct distorted colors. 2. Offers a simple one-click interface with batch processing and instant preview features. 3. Very easy to use. |
1. Requires purchasing a paid license to unlock full repair and saving functions. 2. Requires downloading and installing a dedicated third-party software application. |
| ExifTool | 1. Free and powerful utility for extracting hidden or embedded preview images. 2. Excellent for safely reading and rebuilding corrupted metadata without altering pixel data. |
1. Completely command-line driven with a steep learning curve for beginners. 2. Cannot fix actual corrupted pixel data if the core image data is missing. |
| HxD Hex Editor | 1. Provides absolute, granular control over the raw binary code and headers of the file. 2. Free to use and capable of fixing files that automated software cannot read. |
1. Requires highly technical knowledge to understand hex values and structures. 2. High risk of permanently ruining the file further if the wrong code is edited. |
| Canva | 1. User-friendly visual editor that works directly in any web browser without installation. 2. Excellent for manual adjustments, cosmetic restoration, and smart AI enhancement. |
1. Cannot repair severely unopenable files or broken binary file structures. 2. Requires a stable internet connection and a free or premium account to use. |
2.1 Using CHKDSK Command
If your photos are corrupted due to a faulty SD card or external hard drive, the issue might lie with the file system rather than the photos themselves. The Windows CHKDSK (Check Disk) tool can repair these storage errors.
Here's how:
-
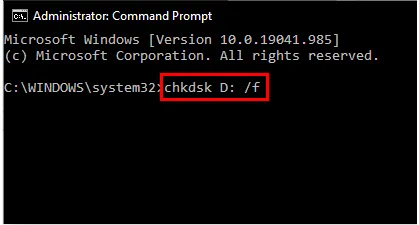
Connect the storage drive to your PC. Then press "Win + X" and select "Command Prompt (Admin)" or "Terminal (Admin)".
-
Type the following command and press "Enter" (replace X: with your actual drive letter): "chkdsk X: /f /r".
-
Wait for the process to complete. CHKDSK will scan the drive, isolate bad sectors, and attempt to recover readable data.
Read more: If you don't need your photos anymore, you can shred the files completely from your computer.
2.2 Using File Repair
When the corruption lies within the photo file structure itself (such as a damaged file header or broken data streams), advanced recovery and repair utilities are required. File Repair provides a dedicated toolset designed specifically to reconstruct corrupted, unopenable, or distorted image files. Its AI capabilities focus on image and video enhancement and repair rather than generative AI; it is an algorithm-driven intelligent repair tool.
Main features of this file repair software:
* Feature a specialized photo repair mode tailored specifically to fix unopenable, damaged, or pixelated image files.
* Can repair a wide range of image formats, including common types like JPEG and PNG, as well as complex RAW files from professional cameras.
* Allow users to import and repair multiple corrupted photos simultaneously, saving significant time and effort.
* Offer a built-in preview function so you can check the visual integrity and quality of the repaired photos before exporting them.
* Utilize smart scanning algorithms to reconstruct corrupted file structures, broken system pointers, and damaged file headers.
Download File Repair on a computer.
To repair corrupted photos with this program:
-
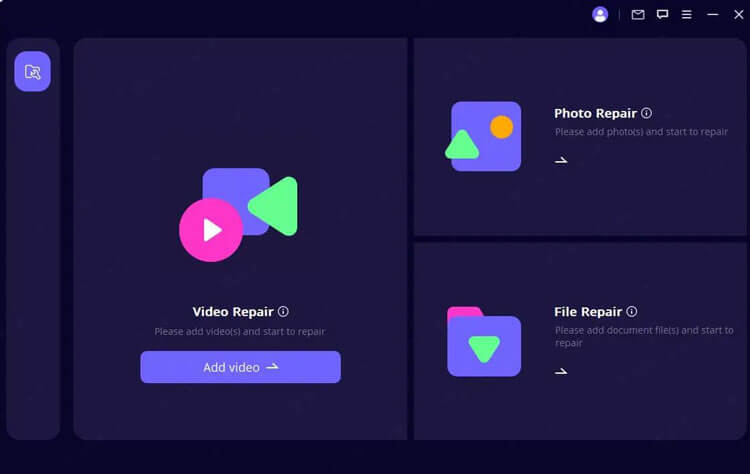
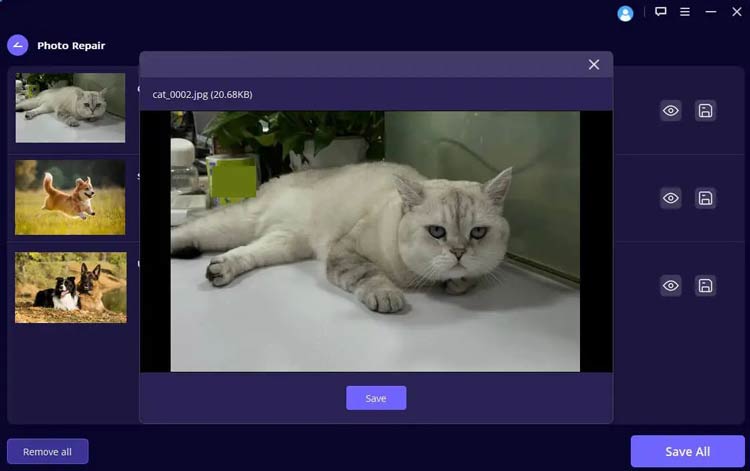
Download and install the data repair software on your computer, then navigate to its dedicated "Photo Repair" module.
-
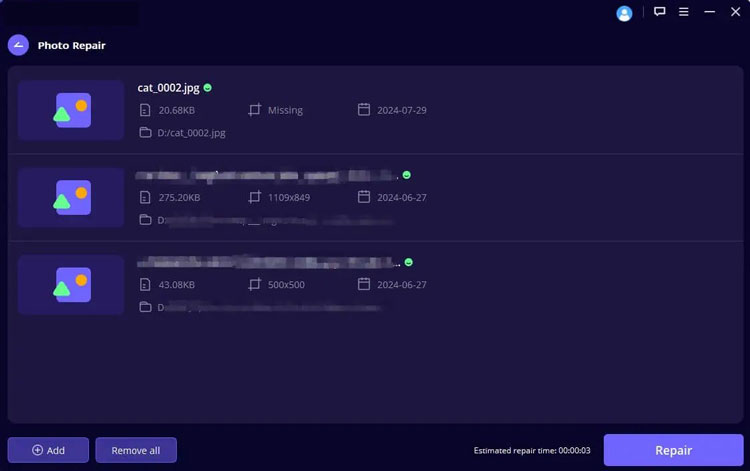
Choose your corrupted photos from your PC, and import them to the software. Or you can click the "Add" icon to add your unopenable pictures.
-
After that, click "Repair All" to initiate the automated scanning and rebuilding process, which fixes corrupted headers and corrupted system pointers. Once repaired, tap the "Download" icon to save the pictures to your computer.
Tips: You can follow this detailed guide to use this file repair program with ease.
2.3 Using ExifTool
Sometimes a photo is fine, but its metadata (EXIF data) or header is corrupted, preventing image viewers from opening it. ExifTool is a powerful, command-line application used to read, write, and edit meta information.
To repair photos with ExifTool:
-
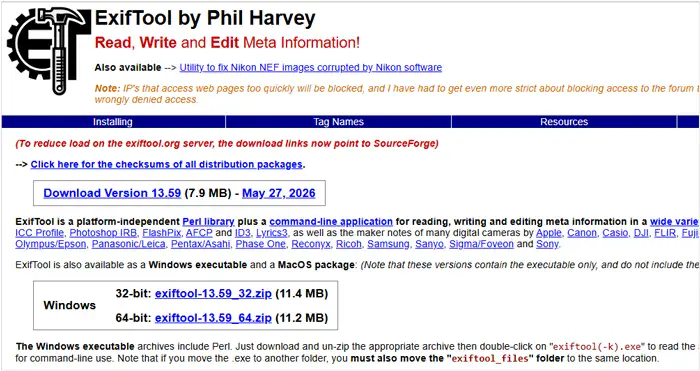
Download ExifTool, extract the zip file, and you will get a single file named "exiftool(-k).exe". Then right-click the file and rename it to exactly "exiftool.exe" (remove the (-k) part).
-
Open your "File Explorer" and go to your D Drive (or E Drive). Create a new folder and name it tools (the full path will be D:\tools). Next, move or copy your newly renamed exiftool.exe into this D:\tools folder.
-
Right-click on "This PC" on your desktop or in "File Explorer", and select "Properties". In the "Settings" window that opens, look at the right side (or scroll down) and click on "Advanced system settings".
-
A small "System Properties" window will pop up. Click the "Environment Variables..." button at the bottom. You will see two sections. In the bottom section called "System variables", scroll down to find the variable named Path (or PATH).
-
Double-click on "Path", or select it and click "Edit". A new window showing a list of paths will appear. Please click the "New" button on the right side, and type your folder path exactly: D:\tools. Click "OK" on all three open windows to save your changes and exit.
-
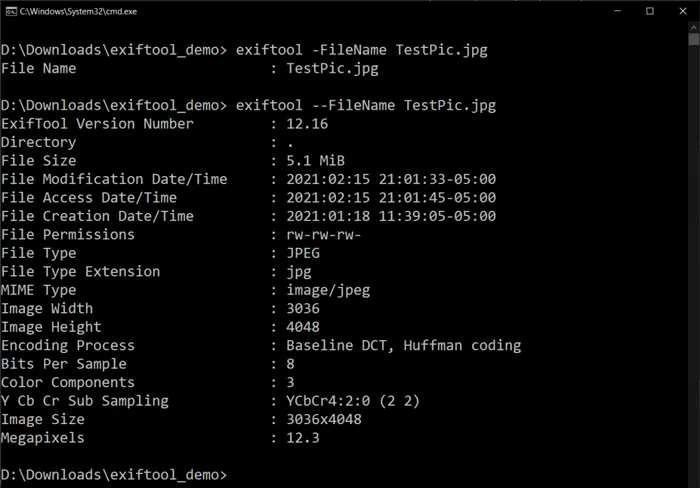
Now, press "Win + R" on your keyboard, type "cmd" in the "Run" box, and hit "Enter". A black Command Prompt window will open. Without changing any folders, simply type:"exiftool", and hit "Enter" again.
-
Now you can elegantly fix your corrupted image from any folder on your computer: In the black Command Prompt window, type the "exiftool -TagsFromFile ", make sure to leave a space at the end.
-
Drag and drop your healthy/good photo (taken with the same camera/phone) directly from your folder into the black window. The path will appear automatically. Then, press the "Spacebar" once. Next, drag and drop your corrupted/bad photo into the black window.
-
Your final command should look something like this (the paths will vary based on where your photos are): exiftool -TagsFromFile "C:\Users\Admin\Desktop\good.jpg" "C:\Users\Admin\Desktop\bad.jpg". Then click "Enter".
-
This repair tool will instantly clone the healthy header structure onto the corrupted file to rebuild it. It will also automatically create a backup of your original broken file ending in "_original" just to be safe.
2.4 Using HxD Hex Editor
For advanced users, a Hex Editor like HxD allows you to manually inspect and edit the raw binary code of a photo file. This is highly effective for fixing corrupted file headers.
Here's the guide:
-
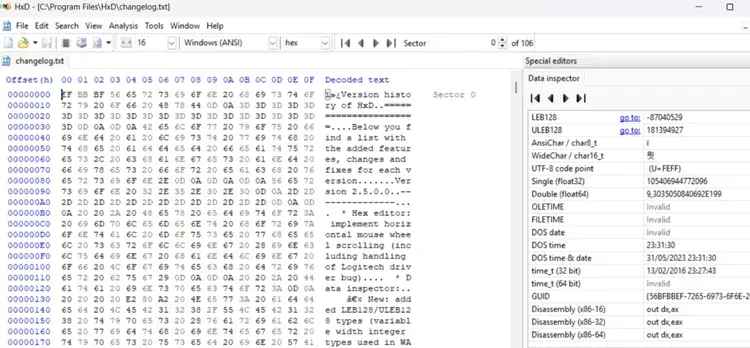
Open a healthy photo (taken with the same camera and settings) and the corrupted photo side-by-side in HxD. Look at the very first code sequence in the top-left corner; a valid JPG file must start with "FF D8 FF".
-
Starting from the line containing "FF D8 FF", click and drag your mouse downwards to select the first 4 or 5 lines of code. You don't need to select too much; selecting down to around line "00000040" is sufficient.
-
Press "Ctrl + C" on your keyboard to copy this valid underlying code. Now, we need to transplant this valid "birth certificate" onto the corrupted photo.
-
Switch to the tab containing the corrupted photo. Examine its beginning. You will usually see a jumble of garbled symbols or large blocks of "00 00 00" —anything but FF D8 FF.
-
Use your mouse to select a section of the corrupted code at the beginning of the file that matches the length (number of lines) of the code you copied earlier.
-
Press "Ctrl + B" on your keyboard (Note: do not use "Ctrl + V"!). After pasting, you will see the overwritten code turn red, indicating that the modification was successful.
-
Click "File" > "Save" in the top-left corner of HxD. Return to your computer folder and double-click the copy of the corrupted photo you just modified. If the underlying pixel data remains intact, the photo should now miraculously display perfectly.
See more: What if your photos disappeared from your iPhone? If so, you can use these solutions.
2.5 Using Canva
If a photo isn't completely corrupted but suffers from visual distortion, compression artifacts, or color damage, web-based design tools like Canva can be used for cosmetic restoration. With this tool, the restoration process will be simpler than the preivous one.
Here are the steps:
-
Upload the corrupted or damaged photo to Canva.
-
Use the "Create" > "Photo Editor" > "Upload" to select your photo. Then click "Adjust" to enhance the brightness, contrast, and saturation manually to balance out distorted color bands.
-
Or you can use the AI-driven features like "Upscale" or "Magic Edit" under "Tools" to make it much clearer. Once done, download the newly adjusted image in a stable format like PNG to lock in the fixes.

Part 3: Q&A About Corrupt Photo Repair
Q1: How can I prevent photo corruption?
Prevention is always easier than recovery. You can safeguard your photos by:
- Always using the "Safely Remove Hardware" or "Eject" option before unplugging storage devices.
- Avoiding shooting photos when your camera battery is critically low.
- Using high-quality, branded SD cards and formatting them inside the camera rather than on a computer.
- Backing up your photos regularly to your computer, cloud storage, or an external drive.
Q2: Can corrupted photos be repaired?
Yes, but it depends heavily on the extent of the damage. If only the header or metadata is broken, the success rate for repair is very high. However, if the actual pixel data of the image has been completely overwritten or zeroed out on a hard drive, complete recovery may be impossible.
Q3: Are there risks when repairing photos?
Yes. Modifying file code manually (via Hex editors) or running aggressive repair scripts can sometimes degrade the file further or corrupt it entirely. Furthermore, downloading untrusted "free photo repair" software from sketchy websites poses a malware risk to your computer. Always work on a copy of your file, never the original.
Conclusion
Photo corruption can strike unexpectedly, but it is not always the end of your precious memories. By understanding the causes and using the appropriate repair methods, from CHKDSK and file repair software to metadata correction and hex editing, you can often recover damaged images. If you want to fix your photos with simple clicks, use File Repair. Then you don't need to enter any line commands or copy any image code.
By understanding why corruption happens and practicing safe data habits, you can keep your digital photography safe for years to come.
Related Articles
How to Shred Photoshop Files Permanently (Step-by-Step Guide)
Back Up Photos from iPhone: 5 Ways to Save Your iPhone Pictures
How to Transfer Photos from Android to Mac: 6 Reliable Methods
iPhone Won't Send Pictures to Android: Solve It with Ease