


"I am thinking of getting an iPad for drawing. I know there is a history of poor communication between iOS and Windows, so I am worried I won't be able to get my art off the iPad and onto my PC. Is it possible to transfer photos/files between an iPad and Windows 11 or not?"
- From Reddit Discussion
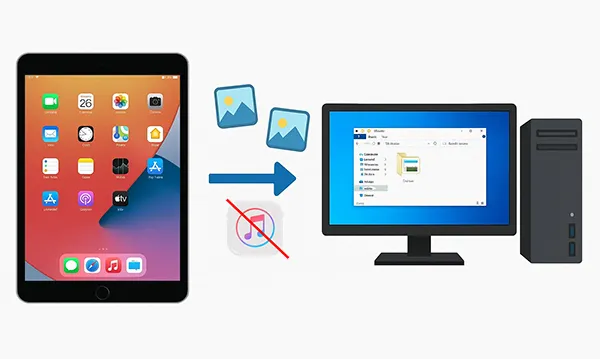
When you want to transfer photos from an iPad to a PC without iTunes, how can you do that? Fortunately, there are 6 methods you can use to get your pictures onto your computer, from using cloud services to simple drag-and-drop techniques. Let's check it out.
- Part 1: How to Transfer Photos from iPad to PC Without iTunes via iPhone Manager
- Part 2: How to Transfer Pictures from iPad to Computer via iCloud Photos
- Part 3: How to Download Pictures from iPad to Computer via Google Drive
- Part 4: How to Copy Photos from iPad to PC via Windows Photos App
- Part 5: How to Move Pictures from iPad to Computer via Email
- Part 6: How to Get Photos from iPad to Computer via Snapdrop
- Part 7: FAQs About Transferring Pictures from iPad to Computer
Compare the pros and cons of these methods:
| Method | Pros | Cons |
|---|---|---|
| iReaShare iPhone Manager |
1. Provides full control and management of iOS data transfer. |
1. Requires software installation on your PC. 2. A paid application. |
| iCloud Photos | 1. Automatic syncing across all devices. 2. Photos are accessible from anywhere with an internet connection. 3. Seamless integration with the Apple ecosystem. |
1. Requires a stable internet connection. 2. The free storage limit (5GB) is often insufficient for a large number of photos. 3. Requires a Windows app for easy access on a PC. |
| Google Drive | 1. Cross-platform compatibility (works on both Apple and Windows devices). 2. Offers a generous free storage tier (15GB). 3. Photos can be accessed from any device with a browser. |
1. Requires a stable internet connection for uploading and downloading. 2. Free storage is shared with other Google services like Gmail. 3. Upload and download speed can be affected by your internet connection. |
| Windows Photos App | 1. Simple, drag-and-drop interface. 2. No extra software or cloud account is needed (it's built into Windows). 3. Fast transfer speed via USB cable. |
1. Only works on Windows PCs. 2. You have to be physically connected to the computer via a cable. |
| 1. Very easy and familiar method. 2. No special apps or cables required. 3. Good for sending a small number of photos. |
1. Not suitable for large files or many photos due to attachment size limits. 2. Images may be compressed, reducing quality. 3. Tedious and inefficient for bulk transfers. |
|
| Snapdrop | 1. Web-based, so no installation is needed. 2. Very fast, peer-to-peer transfer on a local network. 3. Cross-platform and device agnostic. |
1. Both devices must be on the same Wi-Fi network. 2. The website can sometimes be inconsistent or time out. 3. Lacks advanced features like a transfer history. |
Part 1: How to Transfer Photos from iPad to PC Without iTunes via iPhone Manager
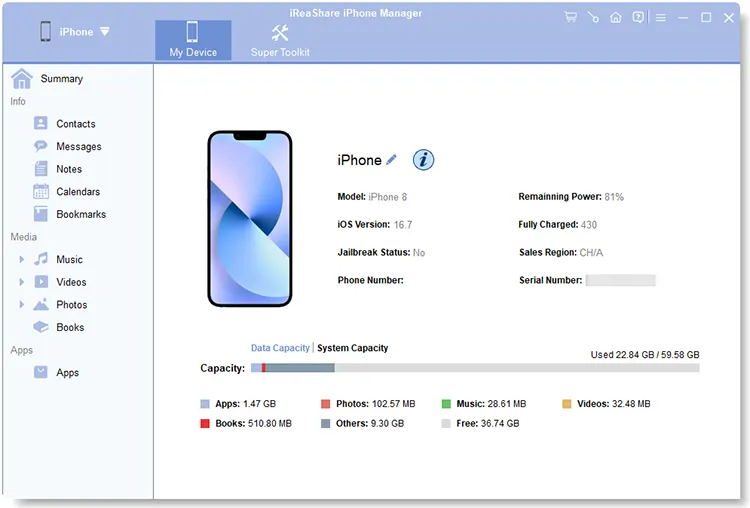
If you're looking for a dedicated photo transfer tool for iOS and Windows devices, a program like iReaShare iPhone Manager can make the process straightforward. This software is designed to manage your iOS device's files, including photos, music, videos, and more, and allows you to transfer them to your computer with ease.
Main features of iReaShare iPhone Manager:
* Transfer pictures from an iPad to a PC via USB.
* The connection between your iPad and your PC is easy to establish.
* Back up data from your iOS device to your PC in one go.
* Selectively transfer your files like photos, contacts, music, notes, calendar, books, bookmarks, and videos from an iOS device to a computer.
* Support iOS 5.0 and iPadOS 5.0 and higher, including the latest iOS 26.
* Work for iPad, iPad Pro, iPad Air, iPad mini, iPhone 16/15/14/13/12/11/X/8/7, etc.
Download iReaShare iPhone Manager.
Download for Win Download for Mac
To copy photos from iPad to PC via this iPad photo transfer tool:
-
Download and install the iReaShare iPhone Manager software on your PC, and connect your iPad to your computer using a USB cable.
-
Open the program. It should automatically detect your iPad, and requires you to make your iPad trust your computer by clicking "Trust" on your iPad.
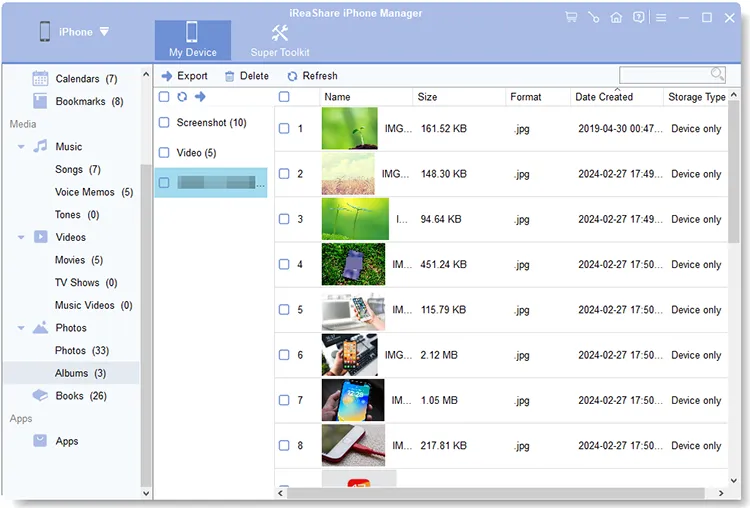
-
Once connected, navigate to the "Photos" section within the software. You'll see all your photo albums displayed. Select the photos you wish to transfer, and tap "Export" to save them to a designated folder on your PC.
Watch the video guide to transfer your pictures:
Part 2: How to Transfer Pictures from iPad to Computer via iCloud Photos
iCloud Photos is a built-in wireless option for syncing your pictures across all your devices, and it's a great way to access them from your PC.
To import photos from iPad to PC via iCloud Photos:
-
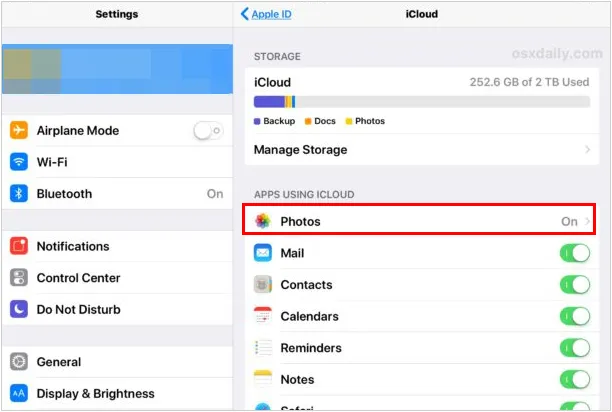
On your iPad, go to Settings > "[Your Name]" > "iCloud" > "Photos" and make sure "Sync this iPad" is enabled. This will upload all your photos to the cloud.
-
On your PC, you have two options:
- Use the iCloud for Windows app: Download and install the app from Apple's website. Sign in with your Apple ID, and your photos will automatically sync to a folder on your computer.
- Use the iCloud website: Open your web browser and go to icloud.com. Sign in with your Apple ID, click on the Photos icon, and then select the pictures you want to download. You can download them individually or in bulk.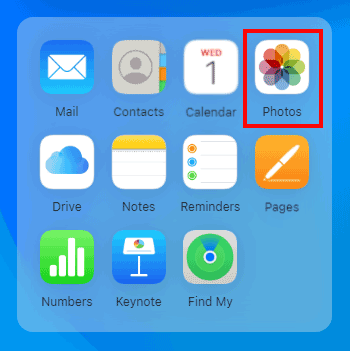
Part 3: How to Download Pictures from iPad to Computer via Google Drive
If you already use Google Drive for cloud storage, it's a simple way to move your photos. This method involves uploading them from your iPad and then downloading them on your PC.
To use this method:
-
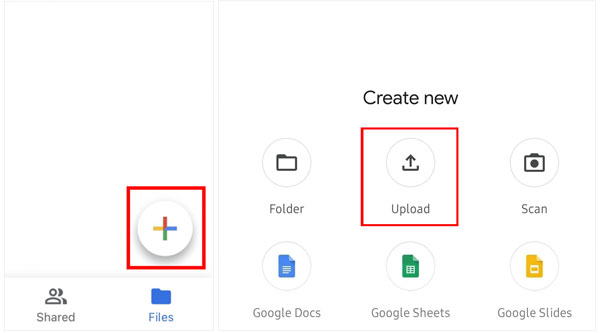
Make sure you have the Google Drive app installed on your iPad.
-
Open the Google Drive app, log in to your Google Account. Next, tap the "+" icon, and select "Upload". Choose the photos you want to upload from your iPad's camera roll.
-
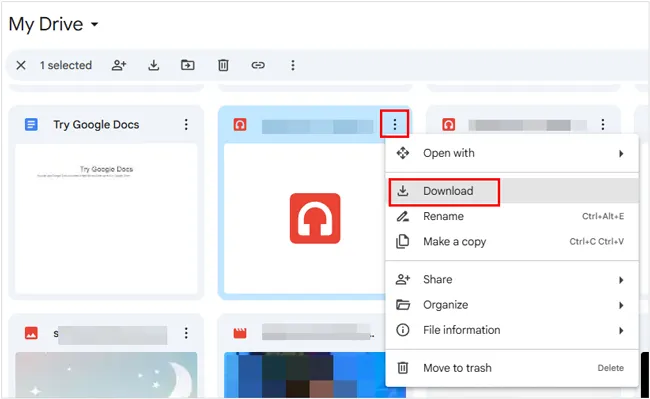
On your PC, go to drive.google.com in your web browser. Find the photos you uploaded, select them, and then click the "Download" button to save them to your computer.
Tips: How can you share contacts from an iPhone to an iPad? Don't worry. Here are 4 effective solutions.
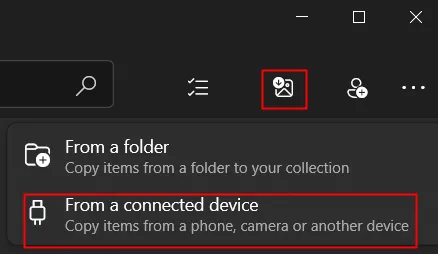
Part 4: How to Copy Photos from iPad to PC via Windows Photos App
For Windows users, the built-in Photos app is one of the most straightforward methods. It allows you to import photos directly from your iPad once it's connected to your computer.
To import your photos from iPad to PC with the Photos app:
-
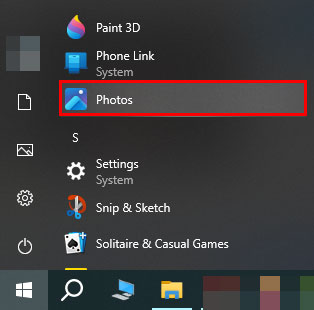
Connect your iPad to your PC with a USB cable. If the Photos app doesn't open automatically, click the "Start" menu and search for "Photos".
-
In the Photos app, click the "Import" button in the top-right corner.
-
Select "From a connected device" and choose your iPad from the list. The app will scan your device for new photos. Select the ones you want to transfer and click "Import" to copy them to a folder on your PC.
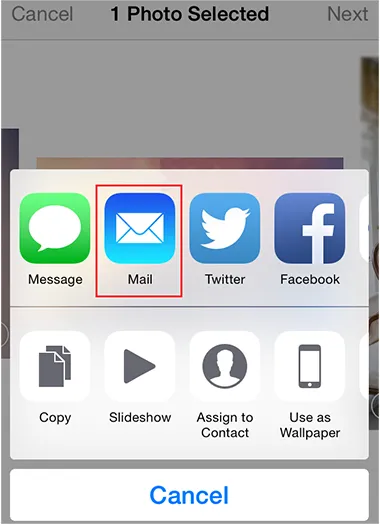
Part 5: How to Move Pictures from iPad to Computer via Email
For transferring just a few photos, sending them to yourself via email is a quick and easy solution. You can use your iPad's Mail app to share photos to yourself, and then save them to your computer. However, you can send several pictures only at once because of the file size limitation.
To send images from an iPad to a computer with email:
-
On your iPad, open the Photos app. Select the photos you want to transfer.
-
Tap the "Share" button (the square with an arrow pointing up). Next, choose the Mail app and compose a new email.
-
Address the email to yourself and send it. On your PC, log in to the same email account, open your email, and download the attached photos.
Part 6: How to Get Photos from iPad to Computer via Snapdrop
Snapdrop is a fantastic web-based tool that works like a local AirDrop for any device. It's fast, simple, and requires no installation. You can use it to share your photos between your iPad and computer. By the way, we do not recommend that you share your important or private pictures with this tool, especially when you use a public network.
To get photos from an iPad to a computer via Snapdrop:
-
On both your iPad and your PC, open a web browser and go to snapdrop.net. Your iPad and PC will automatically see each other on the local network.
-
On your iPad, tap the icon that represents your PC. Choose "Photo Library" and select the pictures you want to send.
-
A download prompt will appear on your PC. Accept the download, and the photos will be saved to your computer.

Part 7: FAQs About Transferring Pictures from iPad to Computer
Q1: Will transferring photos delete them from my iPad?
No. Transferring is typically a copy, not a move—unless you specifically delete them after.
Q2: What to do if only some photos appear on the computer?
- Some photos may be in HEIC format, which older Windows versions may not support.
- Photos stored only in iCloud may not download without an internet connection.
- Ensure photos are fully downloaded to the iPad before transferring.
Q3: How can I free up space after transferring photos?
- Verify photos were successfully copied, and then delete photos from iPad.
- Consider using Optimize iPad Storage in iCloud settings.
Conclusion
You don't need iTunes to transfer photos from your iPad to your PC. Whether you prefer a dedicated tool like iReaShare iPhone Manager to transfer, back up, restore, and manage your iOS data on your computer or cloud-based solutions like iCloud and Google Drive, there's a method to suit every user.
Download for Win Download for Mac
Related Articles
How to Clear iPad to Sell Step by Step (4 Methods for Data Erasure)
Accurate Guide: How to Remove Apple ID from iPad Without Password
How to Transfer Photos from Android to Mac: 6 Reliable Methods
Efficiently Transfer Photos from Android to Computer
