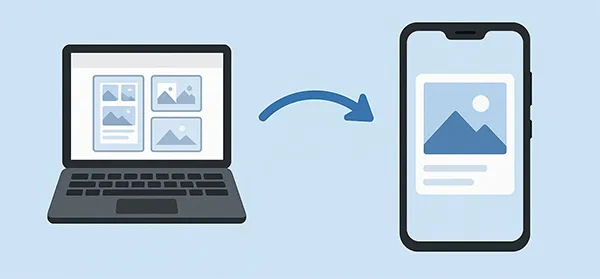
Some Android users are searching for effective and reliable methods to transfer photos from a computer to an Android device. If you also want to import your funny or memorable photos to your Android phone or tablet, you can get help from this article, which offers 6 trustworthy methods, enabling you to move your images conveniently.
Part 1: How to Transfer Photos from Computer to Android via Android Manager (USB & Wi-Fi)
If you want to simplify the picture transfer between your computer and Android device, you can use iReaShare Android Manager, a seamless data transfer and management desktop app for Android phones and tablets. This tool supports USB and Wi-Fi transfer, so whether you want to transfer photos via USB or without USB, it can meet your needs.
Main features of iReaShare Android Manager:
* Get photos from a computer to an Android phone or tablet with ease.
* Transfer photos with original quality and formats.
* Support various image formats, including JPG, JPEG, PNG, WEBP, and more.
* Help you export photos from Android to a computer as well.
* Transfer videos, contacts, music, documents, SMS, etc., between your computer and Android device.
* Compatible with Android 6.0 and later.
Download the iReaShare Android Manager software.
Download for Win Download for Mac
Transfer pictures from your computer to Android via USB:
Step 1: If you want to transfer your photos with USB, please connect both your devices with a USB cable.
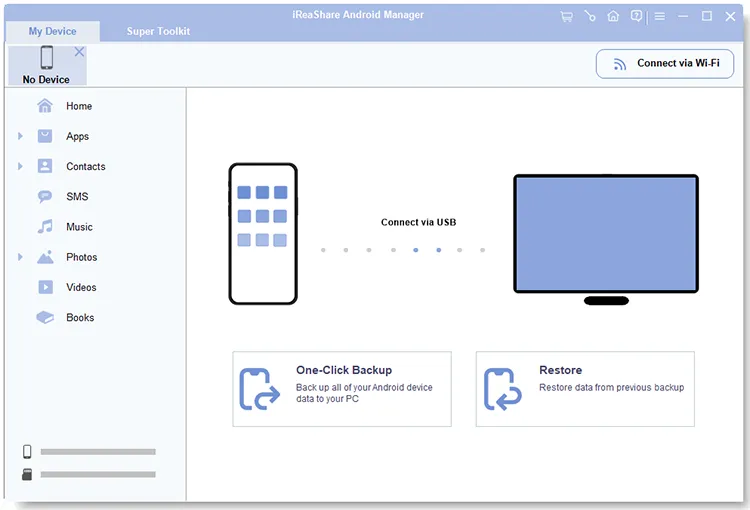
Step 2: Enable the Android USB debugging mode by following the on-screen instructions. Then the program will recognize your mobile phone.
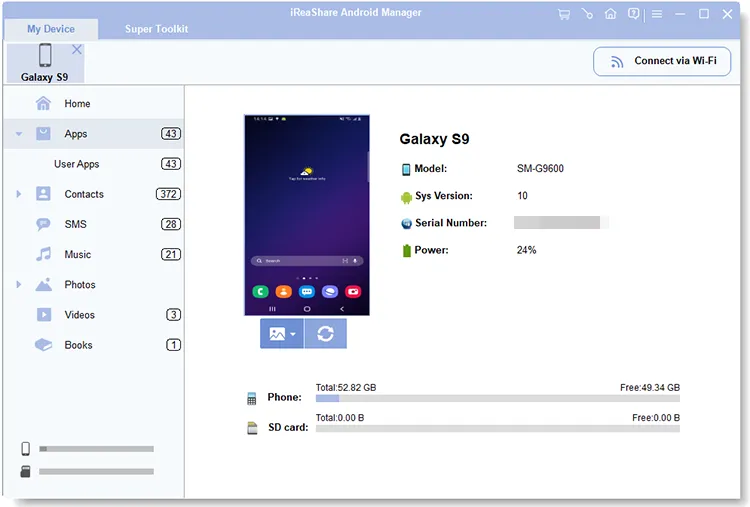
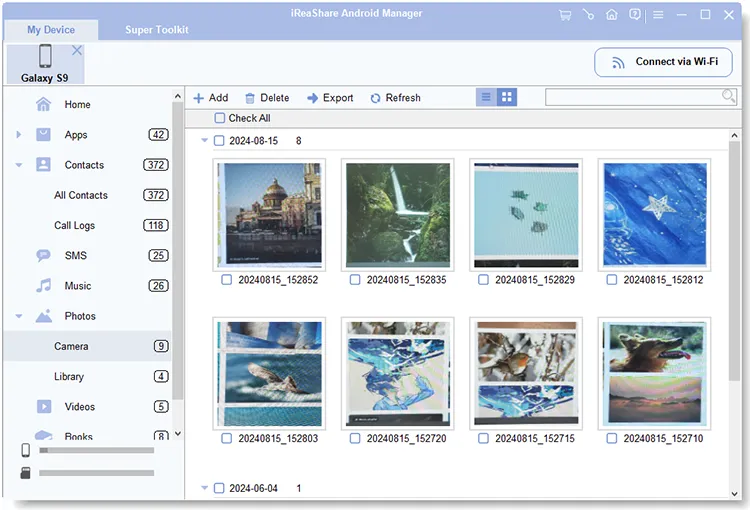
Step 3: Once connected, click "Photos" > "Add" to select your photos from your PC. Then import them to your Android phone.
Transfer photos from a PC to Android wirelessly with this software:
Step 1: Launch iReaShare Android Manager on your PC after installing it, and connect your Android phone and PC to the same Wi-Fi network.
Step 2: Choose the "Connect via Wi-Fi" icon on the left corner of the interface. Then choose "Allow access" if prompted on your computer. The software will install an app on your phone if you allow it.
Step 3: Then open the app and click "Scan" to scan the QR code on the PC to establish the connection. After that, you can import your images from your PC to your Android device.

Here's the video guide about how to transfer photos from a PC to an Android phone:
Part 2: How to Transfer Photos from PC to Android Without USB
If you prefer a cable-free experience, several wireless methods allow you to transfer photos from your PC to your Android phone.
2.1 Using Google Photos
Google Photos is a popular cloud-based service that offers an easy way to sync photos across your devices. As long as your network is stable and there is sufficient cloud storage space on your Google Account, you can seamlessly sync your photos between your computer and Android device.
Here are the steps:
Step 1: On your computer, go to photos.google.com and sign in with your Google Account. Click the "Upload" button and select the photos you want to transfer from your PC.
Step 2: Open the Google Photos app on your Android device, ensuring you're signed in with the same Google Account.
Step 3: The uploaded photos will automatically sync and appear in your library. You can save the photos to your local storage space.
Tips: If you want to transfer your iPhone photos to your Android phone, you can read this guide.
2.2 Using Dropbox
Dropbox is another excellent cloud storage service that facilitates file transfers between devices. However, it provides only 2 GB of free cloud storage for every user.
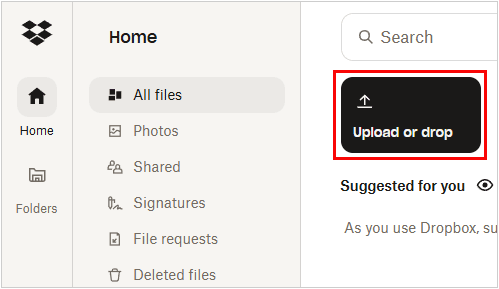
Here's how to transfer photos from a computer to Android for free via Dropbox:
Step 1: Install the Dropbox desktop app or visit dropbox.com on your computer. Upload the photos you want to transfer to your Dropbox account.
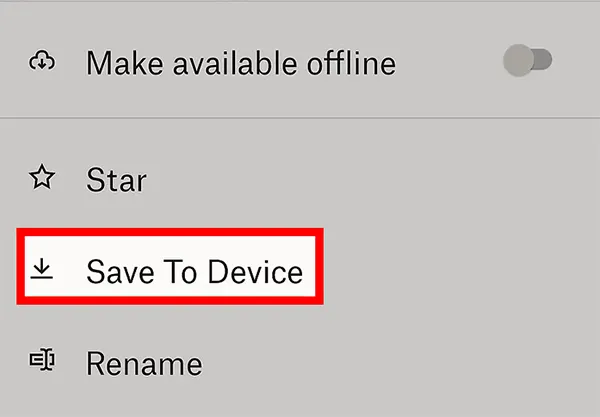
Step 2: Install the Dropbox app on your Android phone and sign in. Navigate to the folder where you uploaded the photos, and you can then view or download them to your device.
2.3 Using Quick Share
Quick Share (formerly Near Share) is a feature on Windows and Android that allows for quick and easy local sharing of files between devices. If you want to send several photos wirelessly, it will be an ideal option.
Here's how:
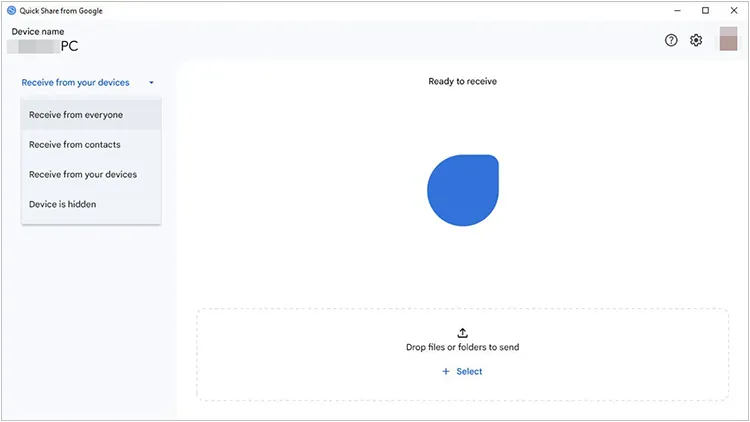
Step 1: On your Windows PC, please download the Quick Share app, and then log in with your Google Account used on your Android phone.
Step 2: On your Android phone, enable "Quick Share" from your Quick Settings panel.
Step 3: Right-click the photos you want to transfer on your PC, select "Share", and then choose "Quick Share". Your Android device should appear as an option.
Step 4: On your Android phone, you'll receive a notification to accept the incoming files. Then you will get your photos.
2.4 Using Bluetooth
For smaller batches of photos, Bluetooth can be a convenient wireless transfer method. Please place your PC and Android phone within 10 meters.
Here's how:
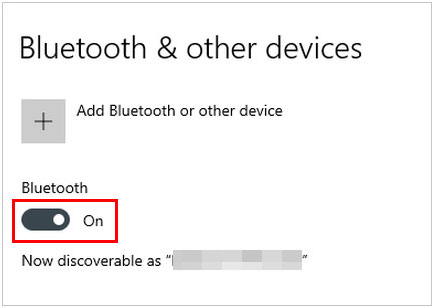
Step 1: Ensure Bluetooth is enabled on both your computer and Android phone. Go to your computer's Bluetooth settings and pair with your Android device.
Step 2: On your computer, right-click the photos you want to send, select "Send to" > "Bluetooth device", and choose your Android phone.
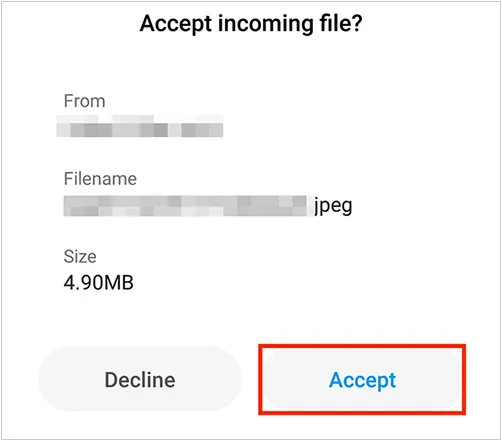
Step 3: On your Android phone, you'll receive a prompt to accept the incoming Bluetooth transfer.
Part 3: How to Transfer Photos from Computer to Android via USB Manually
The most straightforward and often fastest way to transfer photos is by manually dragging and dropping them using a USB cable.
Here's how to use a USB cable to move photos from a computer to Android:
Step 1: Connect your Android phone to your computer using a USB cable. Then choose "File transfer/Android Auto" on your Android device.
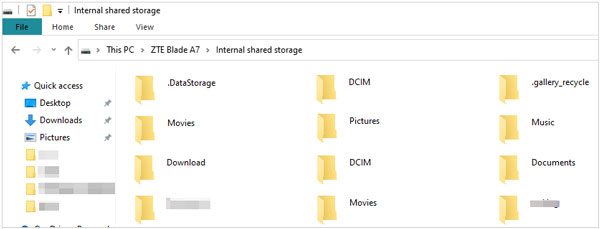
Step 2: On your computer, open "This PC" and double-click your Android device to access it.
Step 3: You'll typically find folders like "DCIM" (for camera photos), "Pictures", or "Download".
Step 4: On your computer, navigate to the folder containing the photos you want to transfer. Select the photos, then drag and drop them into the desired folder on your Android phone's storage. You can create a new folder if you wish.
Step 5: Once the transfer is complete, safely eject your Android device from your computer before disconnecting the USB cable.
Part 4: FAQs About Transferring Photos from Computer to Android
Q1: Can I use a Mac to transfer photos to Android?
Yes, iReaShare Android Manager provides a Mac version, so you can download it on your Mac to transfer your photos to your Android device. Or you can install Android File Transfer on Mac to drag and drop your photos to your Android phone. By the way, you can get 6 ways to transfer pictures from Android to Mac if needed.
Q2: Are there size limits for photo transfers?
It depends on what tool you use. If you use iReaShare Android Manager and USB manual transfer, there is no size limit for the photo transfer. But if you use email, it often has the limit of 25MB, and the cloud services are limited based on your storage plan.
Conclusion
With these various methods, you have ample choices to efficiently transfer your cherished photos from your computer to your Android device, ensuring they're always accessible on the go. If you want the USB and wireless transfer methods to be available at the same time, or to back up all your photos in 1 click, try iReaShare Android Manager.
Download for Win Download for Mac
Related Articles
How to Factory Reset Windows XP Computer Step by Step (Full Tutorial)
Transfer Videos from Phone to Computer (Android and iPhone)
How to Transfer Text Messages from Android to Computer
Solved: How to Add Music to Android Phone in 5 Ways (New Guide)